

I remember the exact moment I realized I had been defeating my own painting efforts. After hours of meticulous prep and careful brushing, I eagerly peeled back that stubborn painter’s tape only to reveal ragged edges and shredded paint beneath. It felt like a punch in the gut. How could something so simple turn into a frustrating mess?
If you’ve ever experienced this pain—peeling off tape only to see jagged lines or damaged finish—you know exactly what I mean. And honestly, it can ruin the look of an otherwise flawless paint job, making all that effort seem wasted. But here’s the thing: there’s a secret, a trusted technique I’ve picked up that can save your finish from destruction.
Today, we’re diving into the art of removing painter’s tape without tearing the finish. Yes, with a few simple tips, you can achieve crisp, clean lines every single time. No more pulling away tape and cringing at the damage.
Why So Many Paint Jobs End Up Looking Cheesy
The truth is, most DIY painters make a critical mistake early on—rushing the tape removal process. They peel too quickly or wait until the paint is completely dry, only to find the edges lifting or paint cracking. I once fell into this trap myself, pulling tape hours after painting, thinking I was doing the right thing. But in reality, I was causing more harm than good.
According to professional painters, patience and a few strategic steps are key. Giving the paint enough time to cure slightly before tape removal is essential; otherwise, you risk damaging your flawless work. For more on how to perfect your painting process from start to finish, check out [this comprehensive guide](https://elitepainterpro.com/master-the-art-of-house-painting-with-these-pro-tips).
So, how do we get it right? Well, it starts with understanding the best technique and timing—something I’ve mastered through trial and error, and I’m eager to share it with you. Are you tired of ending your painting projects with jagged lines and tears? If so, stay tuned because we’re about to turn your next project into a professional-grade finish.
Timing is Everything
Wait until the paint is just touch-dry, typically about 1 to 2 hours after application for interior walls. I once rushed to peel off tape after a quick hour, only to find the edges lifted and paint torn. To avoid this, gently press your fingernail or a small tool against the edge; if it resists, the paint isn’t ready yet. This patience ensures the paint has sufficiently cured to hold its shape during tape removal.
Prepare Your Tools for a Smooth Peel
Use a craft knife or utility razor to score along the tape’s edge before peeling. Carefully run the blade under the tape where it meets the paint, creating a tiny incision. During my last project, I scored the tape and peeled it back slowly, which produced a razor-sharp line—not a jagged mess. This step prevents the tape from pulling out dried paint and gives you more control over the removal process.
Peel at a Gentle Angle and Speed
Pull the tape back on itself at a 45-degree angle slowly and steadily. Think of peeling tape like unwrapping a delicate gift—gentle and deliberate. I recall tugging too quickly and tearing the paint—an avoidable mistake. Consistent, slow peeling minimizes stress on the paint edge, resulting in a crisp line.
Use Warm Water or Solvent to Loosen Residues
If any bits of adhesive remain, dampen a cloth with warm water or a mild solvent like rubbing alcohol and gently wipe along the edge. This softens adhesive residue and reduces the risk of pulling up fresh paint. When I worked on a detailed trim project, this step kept my lines clean, saving me hours of touch-up work.
Keep Patience in Mind
Rushing leads to tears and jagged lines. Trust the cure time and follow the proper removal technique. For more expert insights on house painting strategies, visit this resource. Remember, the devil’s in the details—precise tape removal can make or break the overall look of your finish.
While many believe that choosing the right paint color alone guarantees a professional finish, the real nuance lies in understanding the preparation and application techniques that influence long-term results. A widespread myth is that thicker coats hide flaws and speed up projects, but in reality, multiple thin coats provide better adhesion and durability, preventing cracking and peeling over time. According to painting expert Bob Vila, proper layering and drying times are critical to a flawless finish, yet many DIYers rush this process, leading to costly mistakes.
One trap I often warn about is the misconception that all paints are suitable for every surface. Using the wrong type—such as latex on oil-based substrates—can cause adhesion issues that surface treatments or proper primers could have prevented. The fine print is especially important in high-moisture areas like bathrooms where mold-resistant paints make a difference. To get it right, understanding the specific requirements of each space is essential, and consulting detailed guides can save you headaches, like this one on local painting strategies.
Have you ever fallen into this trap? Let me know in the comments.
Why does surface preparation matter more than the paint itself?
Proper surface prep—cleaning, sanding, priming—is often underestimated but can make or break your project. Skimping here leads to uneven application, premature wear, and even bubbling paint. Painting professionals spend as much time prepping as they do painting, understanding that a smooth, clean surface ensures even color distribution and longevity. Recent studies in surface science show that adhesion issues are primarily caused by dirt and oils on the substrate, not the paint quality itself, emphasizing that preparation is where true expertise starts. For comprehensive tips on prepping your surfaces, visit professional house painting tips.
In essence, deep attention to detail and understanding the nuances of materials and techniques distinguish DIY successes from failures. Don’t fall into common traps by rushing or ignoring these critical steps. For tailored advice on your next project, consider reaching out through our contact page.Maintaining your house’s paint job is crucial for long-term beauty and defense against the elements. Using the right tools and establishing a solid maintenance routine can dramatically extend the lifespan of your paint. One of my go-to methods is employing a high-quality power washer with adjustable pressure settings to gently clean exterior surfaces without stripping paint. I personally prefer the Greenworks 1500 PSI pressure washer, as its adjustable nozzles allow for gentle yet effective cleaning, reducing premature peeling or chipping.
Hovering around for small touch-ups and detailed areas, I rely on a microfiber brush or a small foam roller. These tools are essential because they help remove dirt and grime without damaging the painted surface, especially in tight corners or around trim. For example, I use the Wooster Shorty Roller for quick touch-ups on exterior walls—its ergonomic design reduces fatigue and results in smoother finishes.
Proper maintenance isn’t just about cleaning; it’s about proactive inspection. Regularly walk around your property to check for signs of blistering, cracking, or peeling. Addressing these issues early with targeted spot repairs and touch-ups can prevent major overhauls later. Keep a stash of exterior-grade primer and matching paint for quick fixes—delaying repairs often leads to more extensive damage and longer, more costly projects.
Looking toward the future, advances in coating technology aim to produce self-cleaning and more durable paints, which reduce the frequency of maintenance. For now, however, a systematic approach with the right tools remains your best bet. I recommend setting a bi-annual schedule for cleaning and inspections to stay ahead of problems. If you’re curious about the latest in paint technology, this insightful article on professional painting innovations offers valuable tips.
Ever wondered how to keep your painted surfaces pristine without constant repainting? How do I maintain my house paint over time? The answer lies in a combination of tailored tools and routine checks. For instance, incorporating a soft-bristle brush for delicate areas combined with power washing can make a significant difference—just like I do with the Greenworks pressure washer. Remember, staying proactive now pays off by reducing long-term costs and preserving curb appeal.
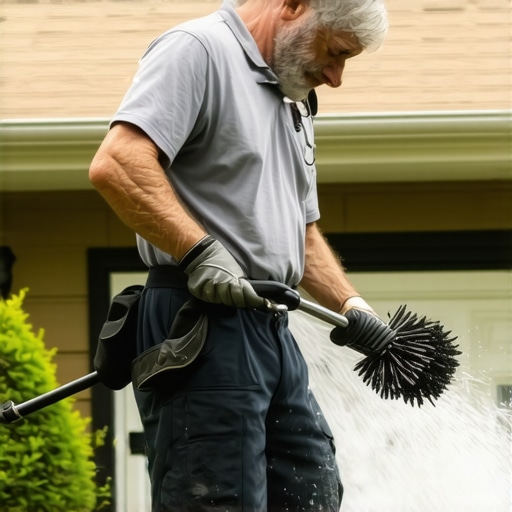
To truly maximize your investment, embrace a seasonal maintenance habit. Start by scheduling a thorough exterior inspection every spring and fall, taking note of any areas that may need attention. Carrying a detailed checklist and using an exterior ladder or extension pole ensures you don’t miss hidden spots. These practices contribute not only to aesthetics but also to protecting your home’s structure. As the trend of eco-friendly and durable paints grows, early detection and prompt repairs will become even more crucial in preserving those finishes. So, why not try incorporating a routine inspection and gentle cleaning with your existing tools today? It’s a smart move toward lasting results.
Lessons That Changed My House Painting Game
One revelation I had was the significance of patience during tape removal; rushing only leads to jagged lines and frustration. Another lightbulb moment was discovering how scoring the tape beforehand prevents paint from tearing, saving time and rework. Lastly, I realized that using warm water or mild solvents to wipe away adhesive residues maintains crisp edges and prolongs your paint’s beauty.
My Go-To Tools and Resources for Top-Tier Painting
For achieving perfect lines, I swear by a quality craft knife for scoring edges, which you can find at your local hardware store—trust me, it makes a difference. The book Master the Art of House Painting has been an eye-opener, packed with pro techniques that I wish I knew sooner. Online, I rely on local painting strategies for tailored advice on surface prep and finishing touches. These resources have truly elevated my projects, making each one look professional.
Transform Your Approach and Celebrate Your Success
Taking the leap into mastering essential house painting techniques can seem daunting, but the payoff is worth it. Imagine transforming your space with clean, sharp lines that impress everyone—without the costly mistakes. Your home deserves that level of care and expertise. So, gear up, apply these insider lessons, and watch your painting projects soar to new heights. Ready to redefine what you thought was possible for your home? Let’s make it happen together!