

I’ll never forget the day I painted my living room trim over a lush, deep-pile carpet. I had assumed it would be a straightforward task, but as I reached for the painter’s tape, I realized I was in for a frustrating challenge. The tape kept pulling up fibers, and the paint inevitably bled onto the carpet, turning my DIY project into an unintended abstract art piece. That lightbulb moment—when I understood the significance of proper technique—completely transformed how I approach painting around carpets.
Why Painting Trim Over Thick Carpet Can Be Tricky—and Why It Matters
Painting trim over thick, plush carpet isn’t just about aesthetics; it’s about preserving the integrity of your space. If done poorly, it can lead to awkward paint lines, damage to your soft flooring, or even needing to redo the entire job. I’ve learned from personal experience that without the right strategy, what should be a simple refresh turns into a messy, time-consuming ordeal.
Is the Hype About Special Tape Actually Worth It?
Early on, I made the mistake of dismissing premium painter’s tape, thinking any masking tape would do the trick. That was a costly oversight. Low-quality tape often struggles with thick carpets, resulting in paint seepage or fibers tearing loose, leaving unattractive edges. According to experts, using the right tape is crucial for achieving crisp lines without damaging your flooring. Want to skip the trial-and-error? I’d recommend checking out professional painting tips for sharper, cleaner results.
So, if you’ve ever faced the frustration of pulling up carpet fibers or dealing with paint seeping where it shouldn’t, you’re not alone. This article will guide you through easy-to-implement tricks to get perfect edges without ruining your carpet or your nerves. Ready to make your painting projects smoother and more satisfying? Let’s dive into the solutions that changed my approach—and they can do the same for you.
Patients often overlook the importance of preparation and the right tools, which can make or break your painting experience. Keep reading, and I’ll share my proven strategies to master this tricky task once and for all.
Prepare Your Tools and Workspace
First, gather high-quality painter’s tape designed for plush carpets, a sharp utility knife, a small brush for touch-ups, and a drop cloth or plastic sheeting to protect surrounding areas. Set up your workspace by removing or covering furniture and floor accessories. This initial step is like laying the foundation before building a house—essential for smooth progress and professional results. When I painted my guest bedroom trim, I realized that having everything within reach prevented unnecessary interruptions, saving me time and frustration.
Protect the Carpet and Surroundings
Lay down a drop cloth or plastic sheeting over the carpet to catch any drips or spills. For added security, tuck the plastic under the edges of the carpet if possible. This is similar to placing a shield when tackling a messy project—think of it as armor that keeps your carpet pristine. I once lazily skipped this step and ended up spending hours cleaning paint stains from my carpet fibers later. Don’t make that mistake—prevention is key.
Apply the Special Tape Strategically
Choose the Right Tape
Select a painter’s tape specifically rated for thick or textured carpets. These tapes have adhesive formulations that cling firmly without pulling fibers. Cheaper tapes often fail here, resulting in paint seepage or fiber tears. Read reviews or consult your local paint store staff—professional-grade tapes make a noticeable difference.
Attaching the Tape
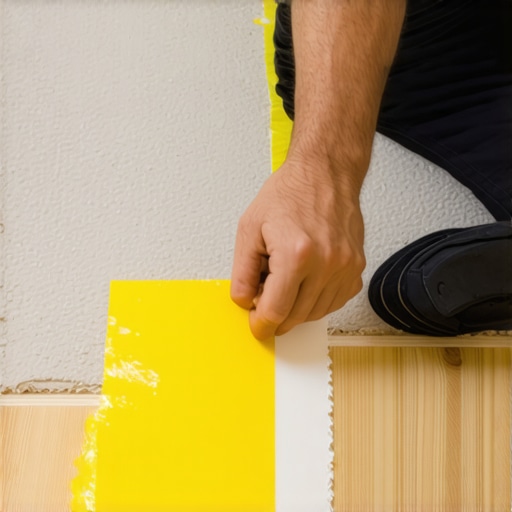
Carefully press the tape into the edge of the carpet, ensuring it conforms to the fibers without excessive tension. Use your fingers or a small smoothing tool to press down, creating an airtight seal. In my last project, I pressed the tape too hard, which caused fibers to rip loose. Testing your tape on a small, inconspicuous area before full application can prevent spoilage.
Cut in Along the Edge with Precision
Using a small, angled brush, cut in along the tape line with smooth, confident strokes. This technique is like carving with a chisel—precision matters. I once applied too much paint on my first attempt, causing bleeding under the tape. To avoid this, load your brush with just enough paint to cover the edge, removing excess by dabbing it on a paper towel. This step ensures crisp, clean lines every time.
Paint the Trim Carefully
Once the edge is cut-in, use a roller or brush to paint the rest of the trim. Maintain a steady hand and work in small sections to prevent drips. Think of it like coloring within the lines—patience pays off. After experience, I started to paint in thin layers, allowing each to dry before the next. This keeps the finish smooth and minimizes the need for touch-ups.
Remove the Tape Without Tearing the Carpet
As soon as the paint has set to a firm touch—usually after a few hours—peel back the tape gently at a 45-degree angle. For added safety, try the hairdryer trick: warm the tape with low heat to soften the adhesive, then peel slowly. This technique prevents fibers from catching and tearing—a trick I discovered that saved me from redoing an entire edge. Practice patience; rushing can cause smudges or pulled fibers.
Touch Up with a Fine Brush
After tape removal, inspect your edges. Use a tiny brush dipped in fresh paint to correct any imperfections or small gaps. This final step polishes your work, giving it a professional look. I find that this attention to detail makes all the difference, especially when inspecting the edges under good lighting.
By following these concrete steps, painting around thick carpets becomes a manageable, even satisfying task. For more advanced techniques and insider tips, explore professional painting strategies that will elevate your DIY projects to the next level.
 Many homeowners and even seasoned DIYers tend to fall into common misconceptions when tackling house painting projects. While everyone emphasizes choosing the right color or preparing surfaces, few realize the intricate details that can make or break the final result. For example, there’s a widespread belief that using cheap paint saves money, but in reality, it often leads to uneven finishes, quicker peeling, and increased long-term costs. According to a study by the Painting Contractors Association, the quality of the paint directly influences durability and appearance, emphasizing that investing in premium products yields superior results.
Another nuance often missed is the importance of surface curing times. New drywall or plaster needs adequate drying before painting—skipping this step can cause paint to bubble, crack, or peel prematurely. Many overlook this and rush to complete projects, inadvertently compromising their work. Patience here not only preserves the finish but also maintains the integrity of the wall.
A common myth that I frequently encounter is the idea that primer isn’t necessary if you’re painting over a light color. In fact, using a primer ensures smooth color coverage, reduces the number of paint coats needed, and helps prevent bleed-through of stains or darker shades. Skilled painters always recommend priming when transitioning between significantly different hues or when covering stains. Skipping this step can result in uneven color and increased cost over time.
For advanced painters, understanding the significance of brush and roller selection can be transformative. Using a high-quality, appropriate tool for the specific paint type and surface improves texture and reduces application flaws. For instance, trying to finish tight corners with a large roller can cause uneven application. Instead, using a smaller brush or specialty tool tailored to edges saves time and enhances precision.
Beyond tools, the timing of your project plays a crucial role. Painting in high humidity or extreme temperatures can drastically affect drying times and finish quality. Experts suggest painting during moderate weather conditions to ensure optimal adhesion and curing. Ignoring these environmental factors often results in a glossy, sticky, or overly dusty surface, which diminishes durability.
Lastly, never underestimate the power of proper cleanup and surface preparation post-painting. Failing to remove painter’s tape at the right time or neglecting touch-ups can lead to uneven edges and visible flaws that ruin an otherwise professional appearance. A small detail like allowing paint to cure fully before removing tape can prevent tearing fibers or causing smudges.
Have you ever fallen into this trap? Let me know in the comments. Mastering these subtle yet critical aspects elevates your painting projects from amateur to professional results. For more in-depth tips on achieving flawless finishes, explore [the ultimate guide to house painting](https://elitepainterpro.com/the-ultimate-guide-to-house-painting-boost-curb-appeal) or [unlock the power of expert techniques](https://elitepainterpro.com/unlock-the-power-of-professional-painting-for-a-stunning-home). Remember, attention to detail is what separates a good paint job from a truly exceptional one.
Keep It Working: Essential Tools and Maintenance for Long-Lasting Paints
Achieving a stunning, durable paint job requires more than just quality materials; it demands the right tools and ongoing maintenance. Personally, I swear by a high-grade, angled sash brush for detailed edging—such as cutting in around trim or corners—because it provides precision and reduces paint wastage. For larger surfaces, a high-quality roller with a medium nap (around 3/8 inch) ensures even coverage without leaving streaks, saving me time and effort. However, it’s not just about application; cleaning and caring for your tools prolongs their effectiveness and, ultimately, your investment.
How do I maintain my painting tools over time?
The secret lies in immediate cleanup after each use. I opt for a dedicated brush cleaner and a rinse with warm water or mineral spirits depending on the paint type. For oil-based paints, I prefer mineral spirits—they dissolve residual paint effectively without damaging the bristles. After cleaning, I hang brushes to dry in a well-ventilated space, ensuring the bristles maintain their shape. Regularly replacing worn-out brushes and rollers prevents imperfections and uneven finishes, which is especially crucial for exterior and high-traffic interior surfaces.
In addition to tools, monitoring your paint’s condition during projects is vital. I recommend inspecting for signs of drying out or thickening—if the paint becomes gloopy, add a compatible thinner or consider replacing it. Also, always keep your paint stored in a cool, dry area, ideally in airtight containers, to prevent spoilage or skin formation.
Clever Strategies for Maintaining Painted Surfaces
Beyond tools, routine upkeep can extend the life of your paintwork significantly. Simple measures like cleaning walls with a mild soap solution periodically remove dust and grime that degrade paint over time. For exterior surfaces, inspecting for chips or peeling early allows for targeted touch-ups rather than full repainting, saving time and money. I suggest using a small, angled brush for these area-specific repairs—it’s quick and ensures a seamless blend with existing paint.
As trends in painting evolve, innovative maintenance techniques are emerging. For instance, eco-friendly, low-VOC sealants can provide an extra layer of protection against moisture and UV rays, boosting longevity. I predict that as sustainability becomes a priority, more homeowners will adopt these solutions—making maintenance less invasive and more effective over the long term. Explore future-proof your paint jobs with expert tips to stay ahead of the curve.
Boost Your Results Before Next Painting Session
One advanced tip worth trying is the use of the hairdryer trick for tape removal. Warm the tape gently before peeling, reducing the risk of fiber tearing and ensuring clean, professional edges. Implementing this simple step can drastically improve your finishing quality and save you from redoing work due to mishandled tape removal. Give it a try on your upcoming project to see immediate results!
Remember, maintaining your tools and surface condition isn’t just a chore—it’s an investment in your home’s aesthetics and durability. The more attentive you are to these details, the longer your beautiful paintwork will stand strong against the test of time.
As I reflect on my painting journey, one profound insight stands out—the importance of patience and attention to detail in achieving professional results. The moments I learned to trust high-quality tools and embrace meticulous techniques have transformed my approach, saving me time, frustration, and costly mistakes. Discovering that even small adjustments, like warming painter’s tape for gentle removal or choosing the right brush size, can make a significant difference was a game-changer. These lessons remind me that mastery in house painting isn’t just about skills but also about embracing a mindset of continuous learning and care.
Hidden Gems from My Painting Chronicles
- The Power of Proper Preparation: Investing time upfront in protecting your carpet with the right tape and drop cloths pays dividends. It’s a small step that prevents enormous headaches later, reinforcing that prevention is better than cure.
- Tools Matter More Than You Think: An inexpensive angled brush or high-quality painter’s tape can elevate your results. I realized that quality tools aren’t a luxury—they’re an investment in your craft, providing cleaner lines and less frustration.
- Patience Is Your Best Ally: Rushing peel-off steps or applying thick layers often costs more in touch-ups. Learning to wait for the paint to set and using tricks like warming tape ensures a smoother finish and saves time in the long run.
- The Little Things Make a Big Difference: Small details, such as the angle of your peel or the pressure exerted when pressing tape, profoundly impact the final look. Paying attention to these nuances turned my projects from mediocre to professional-grade.
- Embrace Continuous Learning: Sharing these experiences and reading expert tips—like those at professional painting strategies—reminds me that mastery is an ongoing journey, one rooted in curiosity and dedication.
Tools and Resources That Made a Difference
- High-Quality Painter’s Tape: I trust brands rated for textured carpets, ensuring clean lines without fiber tears or seepage.
- Specialized Brushes and Rollers: Investing in the right tools for trim and large surfaces improves finish quality, making your work look professional.
- Online Expert Guides: Resources like these painting tips provide insights that elevate your DIY projects beyond basic skills.
- Project Planning Apps: Apps that help schedule and prepare your workspace keep chaos at bay, turning painting into an enjoyable process.
Your Next Colorful Step Awaits
Remember, every successful painting project begins with a single, confident stroke—armed with the right techniques and patience. Whether you’re touching up a trim or tackling a full room, embracing these lessons ensures your efforts will stand the test of time. Don’t let small mistakes dim your enthusiasm; instead, view them as opportunities to learn and refine your craft. Ready to elevate your house painting skills? Dive into expert strategies for future projects and turn your home into a masterpiece. What’s the next area you’re excited to transform with a fresh coat of paint? Drop your plans in the comments below!