

I remember the first time I tried to peel off those stubborn old decals from my wall, only to find myself scrubbing endlessly, leaving behind sticky residue and uneven patches. It was frustrating, and honestly, I felt like I was fighting a losing battle. Then, one day, during a late-night browsing session, I stumbled upon a simple trick that changed everything: using a hairdryer to remove decals effortlessly. That lightbulb moment transformed my approach and saved me hours of tedious work.
Why Many of Us Struggle with Decal Removal and How a Hairdryer Can Help
> Old decals and stickers are a common fixture in our homes, especially when kids’ rooms or rented spaces get a refresh. But removing them isn’t as straightforward as just peeling them off. Often, remnants remain, stubborn and resistant, making your wall look worse than before. The typical method—peeling and scraping—can damage paint or leave unsightly patches.
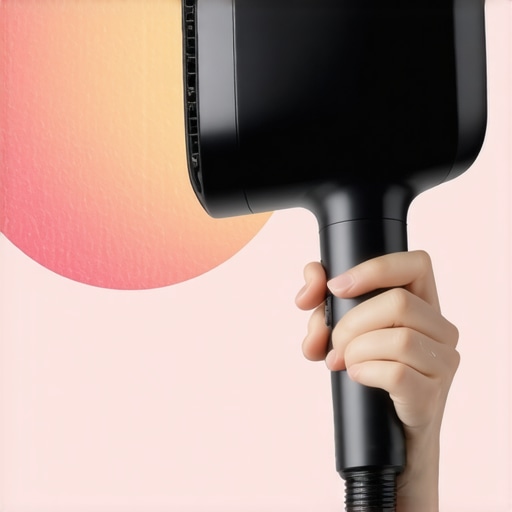
What surprised me is how a simple household tool like a hairdryer, which we often use for styling or drying clothes, can double as a powerful decal removal device. The heat softens the adhesive, loosening its grip on the wall, allowing you to peel off decals cleanly and effortlessly. It’s a game-changer, especially if you’ve ever experienced the nightmare of scraping paint or damaging your drywall.
Now, you might wonder, “Does this really work? Is it safe?” Trust me, I’ve tested it myself, making some early mistakes—like setting the heat too high—which caused minor paint damage. But learning from that, I discovered the perfect temperature and technique. This method not only preserves your wall’s integrity but also speeds up the entire process.
But before you dive in, it’s good to get a sense of the best practices. For instance, always start with a low heat setting and keep the hairdryer moving to prevent overheating any particular spot. If you’re curious about other interior painting tips, I recommend checking out our guide on “The Simple Tape Hack for Perfect Lines on Textured Ceilings,” which complements this technique perfectly.
So, if you’re tired of battling those sticky decals or worried about damaging your walls, keep reading. I’ll guide you through the step-by-step process to master this trick and make decal removal a breeze. Have you faced this exact problem before? If so, you’re in the right place. Let’s get started and restore your walls smoothly and safely.
Set Up Your Workspace for Success
Begin by clearing the area around the decal to ensure safety and easy access. Place a step ladder if necessary to reach higher decals. Keep a plastic scraper or credit card nearby to assist in peeling, and gather your hairdryer, set to low or medium heat.
Apply Heat Carefully to Loosen Adhesive
Hold the hairdryer approximately 6-8 inches from the decal’s surface, moving it in a slow, circular motion. This warmth softens the glue without damaging the paint beneath. During my first attempt, I accidentally cranked the heat up too high, which caused a tiny peel in the paint—so it’s best to start low and increase gradually if needed.
Tip: Maintain a steady motion to prevent overheating any spot.
Peel Off the Decal Gently
Once the adhesive is softened, use your fingers or a plastic scraper to lift a corner of the decal. Work slowly, pulling at a shallow angle to minimize wall damage. If resistance is strong, reapply heat to further loosen the adhesive. I once rushed and tore a corner; taking your time yields a cleaner removal and less cleanup afterward.
Remove Sticky Residue Effectively
After the decal is gone, residual adhesive might remain. Apply a small amount of warm soapy water or a commercial adhesive remover, and gently scrub with a soft cloth or sponge. Testing a hidden area first can prevent unintended paint removal.
Clean and Inspect the Wall
Wipe the area with a damp cloth to remove any remaining residue. Dry thoroughly and examine the surface for damages or paint peeling. If you notice any issues, minor touch-ups can be handled with matching wall paint, which is easier than dealing with stubborn decals.
Additional Tricks for Seamless Results
For textured walls or intricate surfaces, use a narrower nozzle on your hairdryer to direct heat precisely. Also, consider placing painter’s tape around the decal to protect adjacent paint areas during heat application. I once learned this the hard way when a stray puff of heat caused some nearby paint to soften and lift.
Incorporating these steps ensures a stress-free, damage-free decal removal process. Remember, patience and gentle techniques are key. For further insights into painting techniques that complement this method, visit the simple tape hack for perfect lines.
 Many homeowners and DIY enthusiasts believe that choosing the right color or applying a fresh coat is all there is to quality house painting. However, the real expertise lies in understanding the subtle nuances that differentiate a professional finish from an amateur job. One common misconception is that thicker coats yield better coverage, but in reality, layering thin, even coats results in a smoother, more durable finish. Overloading paint can cause drips, uneven drying, and lasting imperfections, especially on textured surfaces. For example, when painting textured ceilings, experts recommend using high-quality brushes and strategic techniques like the wet edge method to prevent lap marks, a mistake often made by novices who wait too long between brush strokes.
Another trap is neglecting surface preparation, which is crucial for longevity. Skipping the cleaning, sanding, or priming steps might seem time-saving initially, but it drastically affects adhesion and the overall appearance. A common myth is that primer isn’t necessary if you’re using high-quality paint, but even premium paints adhere poorly to dirty or glossy surfaces. Proper surface prep, including ensuring the surface is free of dust, grease, or old peeling paint, can make or break your project.
Furthermore, advanced painters pay attention to drying times and environmental conditions. Painting in high humidity or extreme temperatures can lead to issues like bubbling or uneven drying. A significant mistake is rushing the process to save time, ignoring the manufacturer’s recommended drying times. This can result in paint failure and additional repainting costs. For deeper insights on selecting the right paint for your surfaces, consider our guide on the scuff test for choosing the best mudroom paint.
Speaking of nuanced techniques, awareness of paint properties like gloss level, drying time, and pigment quality is vital. Low-quality paints with cheap pigments can fade quickly or require more coats, increasing project costs and frustration. Recognizing the signs of poor-quality products helps in making informed choices. Experts also emphasize the importance of cleaning your tools properly to preserve their effectiveness and prevent contamination that can ruin a finish.
One often-overlooked aspect is understanding how to handle tricky areas like behind radiators or around fixtures. Using specialized tools and techniques ensures a seamless look, avoiding patches or streaks. For advanced interior projects, employing proper tape and finishing methods can make a significant difference—something accessible through resources like the simple tape hack for perfect lines.
In summary, mastering these nuances and avoiding common pitfalls elevates your painting projects from basic DIY to professional-quality results. Are you ready to challenge the myths and refine your technique? Have you ever fallen into this trap? Let me know in the comments.
Keeping Your Equipment in Peak Condition
Achieving professional-looking results consistently depends heavily on how well you maintain your tools. Regularly cleaning brushes and rollers immediately after use prevents paint buildup, which can compromise future finishes. I personally use a combination of warm water and mild detergent for water-based paints, and mineral spirits for oil-based coatings, ensuring tools last longer and perform better. Dried paint residue is a common culprit behind uneven strokes and streaks, so dedicating a few minutes after each project goes a long way. Additionally, storing brushes upright or hanging them prevents warping or damage to brush bristles, maintaining their shape and ease of use over time.
Investing in Reliable Tools That Make a Difference
Choosing quality tools saves money in the long run. My go-to roller is a 3/8-inch nap roller for walls—it’s versatile enough for smooth surfaces and textured drywall alike. For edges and corners, I rely on high-quality angular brushes with synthetic bristles, which hold paint well and provide control. I’ve also found that an adjustable paint sprayer, like the Wagner Control Spray, offers superior control for large projects, especially when painting fences or exterior siding. The right equipment reduces labor, minimizes drips, and ensures even coverage, which are critical for professional results. For tricky areas like tight corners or behind radiators, specific tools like corner rollers or detail brushes are invaluable, as highlighted in our detailed guide on painting behind radiators.
Anticipating Future Trends in Painting Tools
The industry is moving towards smarter, more ergonomic tools. Innovations like paint rollers with built-in tension control and cordless, battery-powered sprayers promise increased efficiency and less fatigue. Automation and precision AI-guided equipment are on the horizon, potentially transforming how amateurs and professionals approach house painting. Staying updated with these advancements ensures your toolkit remains current, helping you deliver faster and more consistent results.
How do I maintain my tools to ensure they last longer and deliver quality work over time?
Proper maintenance involves immediate cleaning after each use, storing tools correctly, and inspecting for damage regularly. For brushes, remove excess paint, wash thoroughly with appropriate solvents, reshape the bristles, and hang to dry. Roller covers should be cleaned in warm water (or solvent, if oil-based), then stored in a sealed plastic bag to prevent dirt accumulation. When tools are not in use, avoid exposure to extreme temperatures or moisture, which can warp or degrade materials. Furthermore, replacing worn-out brushes and rollers prevents uneven application and helps you achieve smooth, professional finishes every time. For more insights into surface preparation and ensuring your painting projects look seamless, visit our guide on choosing the best paint for your mudroom. Encourage yourself to try the tip of cleaning brushes with vinegar for stubborn residue—it’s a simple trick with a proven track record. Maintaining your tools might seem straightforward, but integrating these habits transforms your results and extends your equipment’s lifespan.
The Lessons I Wish I Learned Sooner About Painting Homes
One surprising lesson I discovered is that patience truly pays off. Rushing through the paint application or finishing process often leads to uneven textures and missed details. Allowing each coat to dry thoroughly before applying the next results in a richer, more durable finish. Another insight was the importance of selecting quality supplies; cheap brushes and rollers might save money upfront but cost more in touch-ups later. Lastly, I realized that understanding the surfaces you’re working on, from drywall to wood, influences the technique and products you should use. When I started paying close attention to surface preparation, my results improved exponentially, making the entire process more satisfying and professional-looking.
Tools and Resources That Elevated My Painting Journey
Over time, I’ve found that certain tools and sources truly made a difference. First, investing in a high-quality angled brush like the Wooster Shortcut Series provided superior control around edges and trim. I trust Bob Ross’s book, “The Best Tips for Perfect House Painting”, which breaks down wall preparation and finishing techniques in an easy-to-understand way. For surface testing and prep, the scuff test is invaluable for ensuring the paint adheres properly. Additionally, online tutorials from seasoned professionals, like those on YouTube channels dedicated to house painting hacks, gave me real-world tips that I incorporate into every project.
Your Next Move in Home Painting Begins Today
Remember, every brush stroke is a step toward transforming your space with confidence. Embrace the learning curve, and don’t be discouraged by initial setbacks—they’re part of the journey to mastery. Whether you’re tackling a quick refresh or a full overhaul, applying these insights will bring professional results within reach. Have you tried any of these techniques before or stumbled upon your own tricks? Share your experiences below—I love hearing how fellow DIYers and homeowners approach their painting projects and what successes or challenges they’ve encountered. Let’s keep the conversation going and help each other create beautiful, lasting spaces.