

Imagine the frustration of spending hours meticulously painting your trim only to find tiny, unsightly dust nibs ruining the smooth finish. One day, after a particularly long weekend of painting, I stood back and noticed faint specks that seemed impossible to ignore. It was then that I realized I hadn’t been paying close enough attention to those tiny dust particles hiding in plain sight. That lightbulb moment led me to discover a simple, yet powerful technique: the flashlight trick for spotting dust nibble.
Why Dust Nibbles in Your Trim Can Ruin Your Hard Work
Dust nibble marks are small imperfections caused by tiny particles settling on wet paint or fresh coatings. These minuscule specks can make your otherwise pristine finish look rough and unprofessional. If left unchecked, they can even cause the paint to peel or develop blemishes down the line. The challenge is that dust nibble marks are often invisible to the naked eye until it’s too late, especially when working in poorly lit areas or with matte finishes that hide imperfections well.
Fortunately, I found a way to identify these pesky flaws early, saving me time, money, and the headache of repainting. And today, I want to share that trick with you—so you don’t have to learn it the hard way like I did.
Have You Faced Dust Nibbles That Seemed Invisible?
If you’ve ever finished a painting project only to discover tiny bumps and specks afterward, you’re not alone. Many homeowners and even professional painters overlook the importance of proper inspection techniques, leading to costly touch-ups. In my early days, I made the mistake of skipping a thorough inspection before the paint dried completely. That mistake taught me the value of a little extra effort with the right tools.
According to a study by the Paint & Coatings Industry, dust and debris are among the leading causes of poor finish quality, emphasizing the need for better inspection practices. Fortunately, with just a small flashlight and a keen eye, you can reveal even the tiniest nibble marks that would otherwise go unnoticed, ensuring your professional-grade finish stays flawless.
Now that you understand why catching dust nibble marks early is crucial, let’s move on to the proven technique—the flashlight trick—that will make your inspection process a breeze and guarantee a smooth, dust-free finish every time.
Get Up Close and Personal
Start by turning off all the lights in the room and grabbing a high-quality flashlight. Position yourself close to the trim—about a foot away—and hold the light at a sharp angle so the beam grazes the surface. This proximity allows the light to catch any tiny imperfections like dust nibble marks that are invisible in normal lighting.
Scan Methodically and Calmly
Slowly slide the flashlight along the entire length of your freshly painted trim, focusing on one section at a time. Use deliberate, steady sweeps to ensure nothing gets overlooked. Think of yourself as a detective meticulously examining evidence—patience is your ally here. I recall a time when I discovered faint dust specks on my bathroom crown molding that I had rushed through earlier. The intense light revealed those tiny nuisances, which I then sanded and repainted for a flawless finish.
Identify and Fix Dust Nibble Marks
If the flashlight reveals any tiny bumps or specks—a clear sign of dust nibble marks—address them immediately. Lightly sand the imperfections with fine-grit sandpaper, being cautious not to remove too much paint. After sanding, clean the area with a tack cloth to remove dust particles before applying a touch-up coat. This quick step prevents small imperfections from becoming persistent eyesores.
Use A Second Inspection for Assurance
Once you’ve corrected the flaws, repeat the flashlight scan. This second inspection is your quality control to ensure all dust nibble marks are gone. It’s a practice I adopted after a messy repaint in my living room; the second pass caught residual specks, saving me from future touch-ups and keeping my finish spotless.
Keep Your Lights and Surface Clean
Before you start inspecting, ensure your work area is free of dust and debris. Wipe down surfaces with a damp cloth to remove any lingering dust. This prep minimizes the chances of dust settling on your wet paint, and the flashlight technique then becomes even more effective in spotting the remaining flaws.
Maintain Consistency for Future Projects
Incorporate this flashlight inspection into your regular painting routine. Over time, it becomes a quick, instinctive step that guarantees a professional-looking finish. Whether you’re touch-up painting or a full-room overhaul, this method builds your confidence and sharpens your eye for detail. For more tips on perfecting your house painting projects, check out this pro-painting guide. By consistently applying this technique, dust nibble marks become a thing of the past, and your home’s finish radiates quality.When it comes to painting your home, many believe they have the process all figured out, but in reality, there’s a lot of overlooked nuances that can impact the final result. One prevalent myth is that all paints are created equal; however, the truth is that choosing the right type of paint and understanding its properties is crucial for durability and aesthetics. For instance, some homeowners assume that high-gloss finishes are easier to clean and maintain, but in practice, they tend to highlight imperfections and surface flaws, making matte or eggshell finishes preferable in certain spaces.
Another common misconception is that preparation work can be rushed or skipped. This oversight often leads to peeling, bubbling, and uneven color application down the line. Proper surface prep—including cleaning, sanding, and priming—is an investment that ensures longevity and a professional-looking finish. Many forget that the quality of tools matters greatly; cheap brushes and rollers may save money upfront but can cause streaks, uneven coats, and dips that compromise the overall look. It’s worth investing in high-quality equipment to achieve a smooth, even finish that lasts.
What Advanced Painters Know About Primer and Paint Compatibility?
One critical nuance often missed, even by experienced DIYers, is the importance of primer-paint compatibility. Using mismatched products can result in poor adhesion, color bleeding, or extended drying times. For example, oil-based primers and latex paints don’t mix well and can cause peeling. An expert approach involves understanding the chemistry behind these materials—consulting product datasheets and manufacturer recommendations—to select the correct primer and paint combinations. This knowledge can prevent costly reworks and ensure your project stands the test of time. According to industry research by the Paint & Coatings Industry, proper material compatibility significantly enhances durability and finish quality in residential projects. 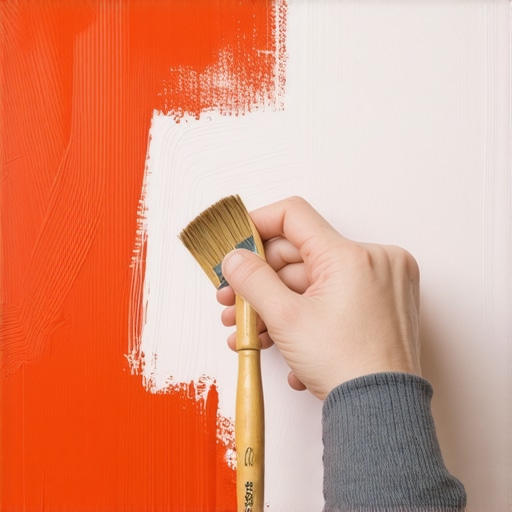
Finally, be aware of common mistakes like underestimating drying times, especially in humid or cold climates, which can lead to smudging or sticking. Follow the manufacturer’s instructions carefully, and when in doubt, consult a professional for insights tailored to your specific environment. For more insider tips on elevating your painting game and avoiding these pitfalls, check out this comprehensive guide. Don’t let misconceptions or overlooked details rob your hard work of its intended beauty—mastering these nuances will set your results apart.
Keep Your Equipment in Prime Condition for Lasting Results
Investing in high-quality tools is essential, but maintaining them properly ensures their longevity and performance. I personally swear by using a 4-inch angled sash brush with synthetic filaments for trim work—this allows precision and smooth application, reducing touch-ups later. Regularly clean brushes with mineral spirits after each use and store them properly to prevent bending bristles. Additionally, using a premium, rust-resistant paint sprayer like the Graco Magnum X5 can drastically speed up exterior projects; just remember to flush it with cleaning solution after each use to prevent clogs and corrosion. Proper tool maintenance isn’t just about preservation—it’s about ensuring the quality of every stroke on your walls.
Smart Storage Means Consistent Finish Quality
Always transfer leftover paint into airtight, labeled containers with proper seals. This prevents skinning over or contamination, allowing you to perform touch-ups months later without color mismatches or texture issues. I recommend keeping a small, labeled toolkit with essential items—brush cleaner, liner brushes, touch-up pens—so you’re ready for any correction without hunting through your garage. Moreover, storing brushes vertically with the bristles facing up helps maintain their shape and prevents damage, ensuring cleaner lines with each project. Consistency over time depends heavily on how well you preserve your tools and materials.
Plan for Long-Term Maintenance
Beyond the painting itself, consider the ongoing upkeep of painted surfaces to keep your home looking fresh. Crafted a maintenance schedule that includes regular inspections for peeling or chipping, especially after extreme weather shifts. Touch up areas with a small brush to address minor issues before they escalate—this proactive approach can save you from costly extensive repairs later. Keep an eye on surface cleanliness; dirt and grime can accelerate deterioration, so a gentle wash with mild soap and water every couple of years works wonders. Embracing a maintenance mindset ensures your investment endures for years to come.
Scaling Up: Techniques for Larger Projects
As your projects grow in scope, efficiency becomes critical. Using a 12-inch roller frame with a high-quality, lamination-coated cover reduces streaks and is easier to clean, allowing coverage of larger areas with fewer passes. For exterior facades, I rely on airless sprayers equipped with proper pressure regulators—this not only speeds up the process but also produces an even coat that lasts longer. Remember, with larger projects, preparation is key: masking, taping, and surface cleaning accelerate workflow and improve results. Investing in these tools and methods means you can take on bigger jobs confidently, delivering professional results every time.
Where Do I Go From Here?
Looking ahead, the trend in painting tools is leaning toward intelligent, eco-friendly options that reduce waste and improve precision. Lightweight, cordless sprayers with adjustable flow controls and environmentally-safe primers are becoming standard. If you’re eager to elevate your skills, I recommend exploring advanced techniques like airless spray application detailed in our professional painting guide. Experimenting with these tools and methods will keep your work efficient, durable, and visually stunning. Remember, regular upkeep—like cleaning brushes thoroughly with mineral spirits—will ensure your tools serve you well for countless projects. Don’t hesitate to try one of these maintenance tips today, and you’ll see immediate improvements in your craftsmanship.
Lessons That Changed My House Painting Game
- One of the toughest lessons I learned was never to underestimate the power of proper lighting during inspections—good lighting can reveal flaws invisible in regular light, saving me time and money in the long run.
- Discovering that high-quality tools and diligent maintenance elevate the final finish taught me that investing in the right equipment pays off with smoother coats and fewer touch-ups, making the entire project more gratifying.
- Understanding the importance of surface prep—cleaning, sanding, and priming—before even picking up a brush shifted my approach from hurried to meticulous, resulting in professional-looking results that truly stand the test of time.
- I realized that small, consistent inspections using a flashlight can dramatically reduce hidden dust nibble marks, leading to a flawless, dust-free painting finish that impresses every time.
Tools and Tips That Elevated My House Painting
- The pro-painting guide provided insights on selecting the perfect primer and paint compatibility, preventing common issues like peeling and uneven color—trust me, it’s a game-changer.
- High-quality brushes, especially angled sash brushes, and efficient rollers from trusted brands helped me achieve cleaner edges and smoother coats—these investments make all the difference in professional results.
- I found that using an airless sprayer for larger projects sped up work and ensured even coverage; paired with proper cleaning routines, it becomes an invaluable tool for any serious DIY painter.
- Keeping tools properly stored, like brushes facing upward and airtight containers for leftover paint, maintains quality and readiness for touch-ups, saving me time and mess later on.
Your Next Step Toward Flawless Painting
Don’t let overlooked details or misconceptions steal the beauty from your home. Embracing these insights and techniques will transform your painting projects from average to extraordinary. Whether you’re tackling a small touch-up or a full-room makeover, remember that patience, preparation, and proper inspection make all the difference. Curious about how to refine your process further? Visit our local painting secrets page to discover more expert tips and elevate your house painting skills today!