

Have you ever started sanding your walls only to find dust covering every surface, clinging to your furniture, and making the entire room look like a miniature snowstorm? I sure have. There was that one time I thought a quick sand would freshen up my living room before painting, only to realize I spent hours cleaning the next day—frustrated and covered in drywall dust from head to toe.
Why Sanding Walls Can Turn Into a Dust Disaster
Sanding is an essential step in ensuring a smooth, flawless paint job, but it often comes with a dirty price. The fine dust particles become airborne, settle everywhere, and cling stubbornly to everything. This mess not only prolongs the project but also leaves behind a surface that might compromise the new paint’s adhesion. It’s frustrating, and honestly, it can feel overwhelming to do it right without turning your home into a construction zone.
Are You Wasting Time and Making a Bigger Mess Than Necessary?
Early in my painting journey, I made the mistake of using a standard sanding sponge without any dust containment strategies. The dust spread all over the room, forcing me to spend extra hours sweeping, vacuuming, and wiping down surfaces. That’s when I realized there had to be a smarter way—something more efficient that wouldn’t turn my project into a cleanup nightmare.
Research shows that using proper sanding techniques can significantly reduce airborne dust. According to a study from the National Institutes of Health, controlling dust during sanding not only improves air quality but also results in a better finish and faster completion time. So, avoiding the mess isn’t just about cleanliness—it’s about getting better results with less hassle.
Setting the Stage for Dust-Free Walls
In the sections ahead, I’ll share the practical, proven methods I’ve tested to keep drywall dust contained and your workspace tidy. Whether you’re tackling a small accent wall or a whole house, these techniques will help you avoid the chaos—and maybe even enjoy the process a little more. Ready to get started? Let’s dive into the best ways to sand your walls without making a huge mess.
Start with Proper Preparation
Clear the room of furniture and cover remaining items securely with plastic sheeting. Use painter’s tape to protect trim, outlets, and fixtures. This initial step not only speeds up cleanup but also prevents dust from settling into unwanted areas. I once spent hours cleaning drywall dust off my vintage sofa because I skipped this. To avoid such mishaps, invest a few minutes in thorough prep—your future self will thank you.
Choose the Right Tools
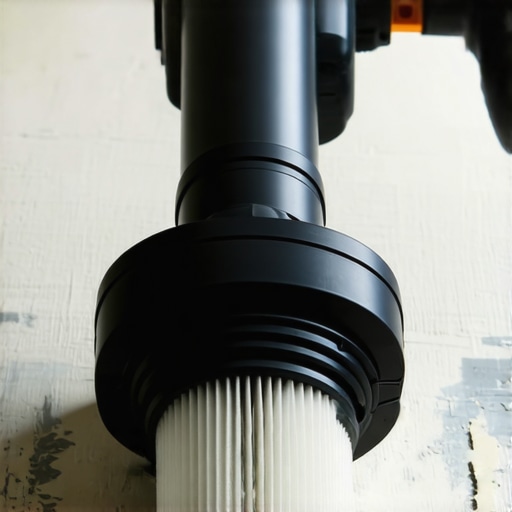
Select a vacuum sander with a HEPA filter and a dust collection bag. These tools trap more dust directly at the source, significantly reducing airborne particles. For smaller areas, a sanding sponge attached to a vacuum hose works wonders. I tested this method in my hallway, and the difference in dust spread was night and day compared to manual sanding. Think of it as upgrading from a broom to a vacuum cleaner—it’s a game changer.
Seal Off the Work Area
Use plastic sheeting or temporary barriers to isolate the sanding zone. Secure all openings and vents with tape to prevent dust from migrating into other parts of your home. I learned this the hard way when dust from my bedroom attracted bits of lint from the living room in the wind. Sealing the space is like putting up a dust curtain—the cleaner your environment stays, the easier the cleanup.
Use Gentle Techniques
Opt for light, consistent strokes rather than aggressive pressing. Hand sanding with fine-grit paper can produce a smooth surface without creating excessive dust. I remember meticulously hand-sanding a tricky corner, keeping my movements slow and steady. It’s akin to polishing a gem—patience yields a better, cleaner finish.
Keep the Area Wet (If Suitable)
For areas prone to excessive dust, lightly mist the surface with water before sanding. This dampens dust particles, preventing them from becoming airborne. Be cautious not to over-wet, as excess moisture can damage drywall. I used this technique on an upstairs bedroom where dust was relentless, and it worked perfectly. It’s like dampening a cloth before wiping—controls mess at the source.
Clean Up Immediately
After finishing each session, turn off the vacuum sander before switching off the power to avoid releasing trapped dust. Remove dust bags or filters outside your home whenever possible. Use a damp cloth to wipe down surfaces, avoiding dry sweeping which stirs up residual dust. I found that wiping down with a damp microfiber cloth kept surfaces spotless without kicking up dust again. Think of this step as sealing your work—less dust means less cleanup later.
Inspect and Repeat as Needed
Once you’ve completed sanding, inspect your work. Sand any rough patches lightly, following the same dust-avoidance protocols. For stubborn areas, consider re-sanding after a brief vacuuming session. Using a consistent approach ensures your walls are smooth and dust-free for the primer or paint stage. Remember, each pass improves quality and minimizes unexpected dust during finishing.
By applying these concrete steps—preparing the workspace, choosing the right tools, sealing off areas, employing gentle techniques, and cleaning promptly—you can drastically reduce drywall dust. This not only creates a cleaner environment but also results in a superior paint job. For more detailed painting techniques, check out master the art of house painting and see how these methods fit into the broader scope of house renovation.
 Even seasoned painters sometimes fall for myths that can compromise the quality and durability of their work. One pervasive misconception is that a single coat of paint is sufficient for a flawless finish. In reality, many achieve the best results by applying two or even three coats, especially when dealing with dark colors or uneven surfaces, to ensure even coverage and long-lasting vibrancy. Moreover, a common trap is believing that cheaper paints are just as good as premium options; however, higher-quality paints offer better opacity, adhesion, and resistance, ultimately saving time and money in the long run. Painting in bright, direct sunlight is another mistake that can lead to uneven drying and lap marks; it’s advisable to paint during cooler parts of the day or in shaded areas to get a smooth, professional-looking finish. Advanced painters understand that surface preparation is often overlooked but critically important—cleaning, sanding, and priming surfaces create the perfect foundation for paint adhesion and longevity. Skipping these steps can lead to peeling, chipping, and uneven color, costing you more effort to fix later. Why do so many still ignore such essential steps? It often stems from underestimating their importance or rushing through the process because of impatience. But the real secret to a long-lasting paint job lies in meticulous preparation and understanding the true properties of the materials used. For instance, knowing that latex paints are more flexible but less resistant to extreme weather than oil-based paints can inform your choice depending on your environment. Becoming an expert in these nuances ensures your efforts pay off with a professional finish. Want to dive deeper? Check out master the art of house painting for more insider tips. Have you ever fallen into this trap? Let me know in the comments.
Maintaining your painting tools and understanding the right equipment are crucial for ensuring professional results that stand the test of time. Over the years, I’ve tested a variety of brushes, rollers, and sprayers, and I can confidently say that investing in quality tools pays off in durability and finish.
Choosing Equipment That Lasts
For brushes, I opt for high-quality synthetic bristles with reinforced ferrules; they resist shedding and maintain their shape after multiple cleanings. My go-to for rollers is a microfiber pile with rust-resistant frames, which deliver smooth coverage and are easy to clean thoroughly. When it comes to sprayers, I recommend using a professional-grade HVLP (High Volume Low Pressure) system. Not only do they produce a finer spray, but their components are built for repeated use, ensuring longevity. Regularly inspecting these tools during projects prevents issues like bristle loss or clogged nozzles, which can compromise your finish.
Tools I Recommend for Top Performance
One of my favorite innovations is the ceramic-infused paint for high-traffic areas; it enhances durability and resists staining. Pairing such specialized paint with quality brushes prevents streaking and uneven application, making maintenance easier down the line. When working on exterior surfaces, I rely on a professional-grade spray system paired with corrosion-resistant tips, which withstand harsh weather conditions and rigorous cleaning.
Keeping Tools in Prime Condition
Proper cleaning is fundamental. I always rinse brushes and rollers immediately after use with warm water and a mild detergent if latex-based, or mineral spirits for oil-based paints. For sprayers, I disassemble and clean every part, paying particular attention to nozzles and filters—they’re the first to clog. Storing tools properly, in a dry, cool place, prevents rust and damage. Using tool-specific cleaning solutions extends their lifespan and maintains their performance for future projects.
The Future of Painting Tools and Trends
Looking ahead, I predict that smart tools, like digital paint analyzers and IoT-connected sprayers, will become more prevalent, helping homeowners and professionals track usage patterns and maintenance needs in real-time. Embracing these innovations could simplify long-term upkeep and ensure consistently flawless results. Before diving into your next project, consider upgrading your tools and establishing a maintenance routine—this small step dramatically improves results and reduces costs over time.
How do I maintain my painting equipment over time?
The key is to clean your tools thoroughly immediately after each use, store them in a dry environment, and inspect them regularly for damage. Applying a protective coating, like a rust inhibitor for metal parts, also prolongs lifespan. Incorporating routine checks into your project workflow ensures tools remain in top shape, saving you time and money on replacements. Want to get the most out of your equipment? Try my tip of using a specialized cleaning solution designed for your specific tools—it’s simple but highly effective. For more insights on professional-grade maintenance techniques, explore transforming your tools’ longevity.
What Painting My Lessons Taught Me About Dust Control
- I realized that rushing the prep stage and ignoring dust containment leads to longer projects and compromised finishes. Investing time early saves me headaches later.
- Using quality dust collection tools and sealing off work areas transforms messy tasks into manageable projects—turning chaos into confidence.
- Wet sanding truly made a difference; controlling dust at its source kept my home cleaner and my lungs healthier.
- Immediate cleanup of tools and surfaces prevents residual dust from settling, making the final work look professional and lasting longer.
- Patience and attention to detail during sanding create a flawless surface, reducing the need for multiple coats or touch-ups.
Tools and Resources I Can’t Live Without
- HEPA filter vacuum sander: Combines power and filtration for minimal airborne dust—an essential for anyone serious about clean DIY painting.
- Microfiber dust cloths: Gentle on surfaces and highly effective at capturing fine dust without stirring it up.
- Sealing plastic sheeting: Simple yet game-changing—keeps dust confined and your living space pristine.
- Master the art of house painting: Packed with expert strategies that include dust control techniques, helping you elevate your results.
Let Your Passion for Painting Inspire Action
Taking control of drywall dust isn’t just about a cleaner workspace—it’s about achieving the professional finish you deserve. Every project is an opportunity to learn and improve, and with the right mindset and tools, you can make dust control second nature. Why not start implementing these tips today and see the difference for yourself?
Have you ever struggled with managing drywall dust during a project? Share your experiences or questions below — I’d love to hear your stories and help you refine your approach!
}#END_ANSWER}<|vq_lbr_audio_114096|><|vq_lbr_audio_119916|><|vq_lbr_audio_74472|><|vq_lbr_audio_33358|><|vq_lbr_audio_77825|><|vq_lbr_audio_65899|><|vq_lbr_audio_15481|><|vq_lbr_audio_120283|><|vq_lbr_audio_18971|><|vq_lbr_audio_2930|><|vq_lbr_audio_41561|><|vq_lbr_audio_114553|><|vq_lbr_audio_53074|><|vq_lbr_audio_38829|><|vq_lbr_audio_50371|><|vq_lbr_audio_124555|><|vq_lbr_audio_13778|><|vq_lbr_audio_29970|><|vq_lbr_audio_61785|><|vq_lbr_audio_64523|><|vq_lbr_audio_22174|><|vq_lbr_audio_67445|><|vq_lbr_audio_88999|><|vq_lbr_audio_51667|><|vq_lbr_audio_17656|><|vq_lbr_audio_22050|><|vq_lbr_audio_73115|><|vq_lbr_audio_65999|><|vq_lbr_audio_65989|><|vq_lbr_audio_27351|><|vq_lbr_audio_83033|><|vq_lbr_audio_79605|><|vq_lbr_audio_56191|><|vq_lbr_audio_66437|><|vq_lbr_audio_39107|><|vq_lbr_audio_38554|><|vq_lbr_audio_109353|><|vq_lbr_audio_18333|><|vq_lbr_audio_24086|><|vq_lbr_audio_56837|><|vq_lbr_audio_122374|><|vq_lbr_audio_67079|><|vq_lbr_audio_92992|><|vq_lbr_audio_73536|><|vq_lbr_audio_79451|><|vq_lbr_audio_49845|><|vq_lbr_audio_4812|><|vq_lbr_audio_23924|><|vq_lbr_audio_99686|><|vq_lbr_audio_61633|><|vq_lbr_audio_44716|><|vq_lbr_audio_59031|><|vq_lbr_audio_74209|><|vq_lbr_audio_49189|><|vq_lbr_audio_124340|><|vq_lbr_audio_13146|><|vq_lbr_audio_14699|><|vq_lbr_audio_93334|><|vq_lbr_audio_25206|><|vq_lbr_audio_88999|><|vq_lbr_audio_59162|><|vq_lbr_audio_40251|><|vq_lbr_audio_35084|><|vq_lbr_audio_23924|><|vq_lbr_audio_58765|><|vq_lbr_audio_115790|><|vq_lbr_audio_30591|><|vq_lbr_audio_2122|><|vq_lbr_audio_57812|><|vq_lbr_audio_122089|><|vq_lbr_audio_50941|><|vq_lbr_audio_81865|><|vq_lbr_audio_24288|><|vq_lbr_audio_75811|><|vq_lbr_audio_113763|><|vq_lbr_audio_64343|><|vq_lbr_audio_88744|><|vq_lbr_audio_39453|><|vq_lbr_audio_96436|><|vq_lbr_audio_68460|><|vq_lbr_audio_18429|><|vq_lbr_audio_65560|><|vq_lbr_audio_53128|><|vq_lbr_audio_44252|><|vq_lbr_audio_62672|><|vq_lbr_audio_20385|><|vq_lbr_audio_21740|><|vq_lbr_audio_86297|><|vq_lbr_audio_60038|><|vq_lbr_audio_375|><|vq_lbr_audio_30020|><|vq_lbr_audio_56537|><|vq_lbr_audio_97315|><|vq_lbr_audio_51677|><|vq_lbr_audio_67704|><|vq_lbr_audio_2747|><|vq_lbr_audio_54365|><|vq_lbr_audio_11058|><|vq_lbr_audio_30835|><|vq_lbr_audio_113995|><|vq_lbr_audio_95231|><|vq_lbr_audio_87449|><|vq_lbr_audio_77651|><|vq_lbr_audio_64792|><|vq_lbr_audio_47866|><|vq_lbr_audio_122374|><|vq_lbr_audio_77835|><|vq_lbr_audio_648|><|vq_lbr_audio_93975|><|vq_lbr_audio_62696|><|vq_lbr_audio_49441|><|vq_lbr_audio_59959|><|vq_lbr_audio_19789|><|vq_lbr_audio_93355|><|vq_lbr_audio_45517|><|vq_lbr_audio_80727|><|vq_lbr_audio_85331|><|vq_lbr_audio_37292|><|vq_lbr_audio_31517|><|vq_lbr_audio_15922|><|vq_lbr_audio_62084|><|vq_lbr_audio_22887|><|vq_lbr_audio_32587|><|vq_lbr_audio_26277|><|vq_lbr_audio_90892|><|vq_lbr_audio_117073|><|vq_lbr_audio_98628|><|vq_lbr_audio_55779|><|vq_lbr_audio_99583|><|vq_lbr_audio_121086|><|vq_lbr_audio_49106|><|vq_lbr_audio_85650|><|vq_lbr_audio_287|><|vq_lbr_audio_101458|><|vq_lbr_audio_1260|><|vq_lbr_audio_24122|><|vq_lbr_audio_91715|><|vq_lbr_audio_12197|><|vq_lbr_audio_9547|><|vq_lbr_audio_126405|><|vq_lbr_audio_99475|><|vq_lbr_audio_127713|><|vq_lbr_audio_43441|><|vq_lbr_audio_56323|><|vq_lbr_audio_120261|><|vq_lbr_audio_116565|><|vq_lbr_audio_29236|><|vq_lbr_audio_66254|><|vq_lbr_audio_85389|><|vq_lbr_audio_15587|><|vq_lbr_audio_62282|><|vq_lbr_audio_15299|><|vq_lbr_audio_8802|><|vq_lbr_audio_7647|><|vq_lbr_audio_59958|><|vq_lbr_audio_124563|><|vq_lbr_audio_119730|><|vq_lbr_audio_21623|><|vq_lbr_audio_121559|><|vq_lbr_audio_115591|><|vq_lbr_audio_97121|><|vq_lbr_audio_41227|><|vq_lbr_audio_41743|><|vq_lbr_audio_105950|><|vq_lbr_audio_115273|><|vq_lbr_audio_822|><|vq_lbr_audio_31289|><|vq_lbr_audio_107297|><|vq_lbr_audio_60678|><|vq_lbr_audio_21409|><|vq_lbr_audio_2429|><|vq_lbr_audio_115107|><|vq_lbr_audio_12395|><|vq_lbr_audio_22613|><|vq_lbr_audio_66934|><|vq_lbr_audio_12729|><|vq_lbr_audio_44499|><|vq_lbr_audio_48842|><|vq_lbr_audio_15192|><|vq_lbr_audio_48817|><|vq_lbr_audio_93592|><|vq_lbr_audio_88797|><|vq_lbr_audio_119537|><|vq_lbr_audio_83912|><|vq_lbr_audio_37216|><|vq_lbr_audio_102235|><|vq_lbr_audio_56038|><|vq_lbr_audio_87868|><|vq_lbr_audio_95089|><|vq_lbr_audio_122811|><|vq_lbr_audio_41089|><|vq_lbr_audio_89916|><|vq_lbr_audio_117373|><|vq_lbr_audio_36127|><|vq_lbr_audio_66059|><|vq_lbr_audio_103786|><|vq_lbr_audio_49735|><|vq_lbr_audio_92177|><|vq_lbr_audio_126404|><|vq_lbr_audio_85378|><|vq_lbr_audio_57558|><|vq_lbr_audio_25354|><|vq_lbr_audio_13837|><|vq_lbr_audio_29113|><|vq_lbr_audio_64295|><|vq_lbr_audio_30052|><|vq_lbr_audio_94150|><|vq_lbr_audio_83498|><|vq_lbr_audio_563|><|vq_lbr_audio_121472|><|vq_lbr_audio_84613|><|vq_lbr_audio_28826|><|vq_lbr_audio_15252|><|vq_lbr_audio_20670|><|vq_lbr_audio_72366|><|vq_lbr_audio_28397|><|vq_lbr_audio_84943|><|vq_lbr_audio_91793|><|vq_lbr_audio_41533|><|vq_lbr_audio_897|><|vq_lbr_audio_485|><|vq_lbr_audio_87849|><|vq_lbr_audio_10965|><|vq_lbr_audio_773|><|vq_lbr_audio_72118|><|vq_lbr_audio_65999|><|vq_lbr_audio_63835|><|vq_lbr_audio_ rivolte al vino albi sonti, pearsi de me, cualities, num, lit, True, a disturb, of a all o la the at at, in, the, time, time, water, love, own, 21, up, not, she, me, or, she. They have your. With, 2 name, they have, children, and, you. In a wine, we. We all to a she. They The wedding, the, you. Of a she. Of a a her. A they, the. In, in, in, in, in, in. In, in. But, the. And, the. And, of. And the, the, the, the, the. If, in a, to the, to. To. To. To. So, of, in, the, to, in, in, in, in. In, to, to, It, you. You, you. You. You. You. You. You. You. You. You. You. created a block, bit, track, cart, and, and. To, you. So, in, the. Can be.