

I’ll never forget the day I ruined a freshly painted room—my impatience got the best of me, and I yanked painter’s tape too early. The edges peeled, jagged and uneven. Frustrated, I wondered, “Is there a better way?” That moment sparked my quest for the perfect method to remove painter’s tape without damaging the paint underneath. If you’ve ever experienced the horror of torn, chipped edges right after completing a paint job, you’re not alone. Many homeowners and DIY enthusiasts face this challenge, and it can be so discouraging that it feels like all your efforts are wasted.
Why Removing Painter’s Tape Carefully Matters
Painter’s tape is a handy tool—when used correctly. It helps create those crisp, clean lines we all love but only if you remove it properly. This step is often overlooked, yet it’s critical for achieving that professional finish. Ripping off tape too soon or at the wrong angle can result in peeled paint, uneven edges, and the need for touch-ups. Conversely, waiting too long can make removal difficult, sometimes tearing the tape and pulling off the fresh paint anyway. It’s a delicate balancing act, and mastering it can truly elevate your DIY game.
Will Gentle Removal Really Make a Difference?
Early in my painting journey, I made the mistake of rushing the tape removal process. I thought waiting until the paint dried completely was enough. Wrong. I ended up with horrible jagged lines and had to redo sections. It wasn’t until I read that the best painters often wait for the paint to cure just enough to prevent smudging but are also strategic about when to peel back the tape—usually when the paint is still slightly tacky—that I started to see real results. In fact, according to professional painters, the timing and technique of tape removal can significantly influence the precision of your lines and the preservation of your work’s integrity. For more expert insights, check out this in-depth guide.
Timing is Everything
On my first big painting project, I vividly remember waiting until the paint was completely dry before peeling the tape. The result? Jagged edges and an uneven line that made me wish I had waited just a little longer. To get crisp, professional-looking lines, aim to remove the tape while the paint is still slightly tacky—usually about 60 to 90 minutes after painting, depending on your environment. This is the sweet spot where the paint has set enough to prevent smudging but is still flexible enough not to tear. Think of it like peeling a fruit: gentle yet decisive action yields the best results.
Prepare Your Tools and Workspace
Before tape removal, gather a small craft knife or razor blade and a legit painter’s tool or plastic scraper. Place the scraper at a shallow angle along the edge of the tape for controlled lifting. Less force means less chance of peeling off the fresh paint. Keep the area well-ventilated and avoid hot, humid days which can prolong curing and complicate removal. A little prep work now saves you repair time later. Proper preparation is fundamental to superior results.
Peeling Technique
To avoid tearing paint, grip the tape with your thumb and forefinger, and pull at a 45-degree angle away from the painted edge. Smooth, steady pulls prevent paint from tearing and keep the line sharp. I once rushed a section, pulled vertically, and ended up with large chunks of paint ripping off. Not only did I have to redo that area, but it also set back my project by hours. Remember, patience is key: slow and deliberate wins the race. This technique is especially important when working on delicate surfaces like freshly painted trim or intricate moldings.
Adjusting for Different Surfaces
Wood, drywall, plaster—each material responds differently to tape removal. For smoother surfaces, I use less pressure, but on textured walls, I might gently peel the tape back and then use a scraper for stubborn edges. For instance, when painting a textured ceiling, I found that slowly pulling the tape at a lower angle prevented tearing and preserved that clean finish you want. Learn your surface and adjust your approach accordingly. For comprehensive techniques suited for various materials, check out this expert guide.
Addressing Residual Adhesive and Paint
If any adhesive residue remains after peeling, dampen a soft rag with warm water and gently wipe the edge. For stubborn spots, a tiny drop of mineral spirits or lemon oil can help dissolve residues without damaging the paint or surface. I once neglected this step and later struggled with sticky patches that spoiled the clean look. Applying this quick cleanup can save hours of touch-up work and keep your lines crisp. Remember, a thorough job now makes for fewer headaches in the long run.
Fine-Tuning Your Lines
Use a small artist’s brush dipped in the base wall color or a touch-up paint to tidy any minor imperfections left behind. I’ve found that carefully brushing over slight smudges or uneven edges with a steady hand restores that flawless finish. The key is to work slowly and gradually, like a sculptor refining a masterpiece. Mastering this detail can make the difference between a good paint job and a truly professional finish. For tips on perfecting edges and lines, visit this helpful resource.
Many DIY painters believe that applying multiple coats quickly covers imperfections and saves time, but in reality, rushing can lead to uneven finishes and premature chipping. Professional painters understand the importance of proper surface preparation and drying times between coats, which significantly impacts the durability and appearance of the paint. Skipping these steps is a common mistake that can cost you more time and money in the long run. Additionally, there’s a myth that cheaper paints are just as good as premium brands, but experts emphasize that quality paints provide better coverage, finish, and longevity, especially on exterior surfaces that face harsh weather. One nuanced detail often overlooked is the impact of environmental conditions during painting—painting in high humidity or direct sunlight can compromise adhesion and curing, leading to peeling or uneven color. This is backed by studies from the Painting and Decorating Contractors of America (PDCA), which highlight that understanding climate conditions can prevent many common issues. Are you aware that selecting the right finish sheen can also influence both aesthetics and maintenance? For instance, higher gloss paints are more washable but can highlight imperfections, while matte finishes hide surface flaws but require more careful application. Mastering these subtle choices differentiates a professional-quality job from an amateur effort. To avoid these pitfalls, always consider your environment, surface conditions, and paint quality before starting. For advanced strategies on achieving lasting results, check out this expert guide. Remember, attention to detail in these nuanced areas ensures your project not only looks great but also stands the test of time. Have you ever fallen into this trap? Let me know in the comments.
Achieving professional-quality house painting isn’t just about choosing the right color or applying the paint skillfully—it’s equally about having the right tools and knowing how to maintain them. Quality tools not only make the job easier but also significantly extend the lifespan of your paintwork. In this section, I’ll share the specific equipment and methods I rely on to keep my projects running smoothly and deliver lasting results.
Invest in High-Quality Brushes and Rollers
I’ve learned that using durable, well-made brushes with synthetic bristles and high-density rollers minimizes paint wastage and creates smoother finishes. My go-to brush is the Purdy XL series, known for their resilience and ability to hold a good amount of paint, making it easier to achieve even coats. For rollers, I prefer those with solvent-resistant covers, especially when applying durable exterior paints, as they resist wear and maintain their shape longer. Using these tools consistently helps prevent unnecessary repainting due to uneven application or brush marks, which can be a nightmare to correct later.
Power Sprayers: Efficiency and Precision
When tackling large surfaces, traditional brushes and rollers can be time-consuming. That’s where professional-grade sprayers come into play. I recommend the Graco Magnum 262805 X5 for residential projects because it’s versatile, easy to set up, and offers adjustable pressure for different textures and surfaces. While sprayers require some practice to master, they provide a smooth, even coat, especially on textured walls or exteriors where traditional tools struggle to reach. Proper maintenance of your sprayer, including cleaning the nozzle after each use with appropriate solvents, ensures consistent performance and prolongs the tool’s lifespan.
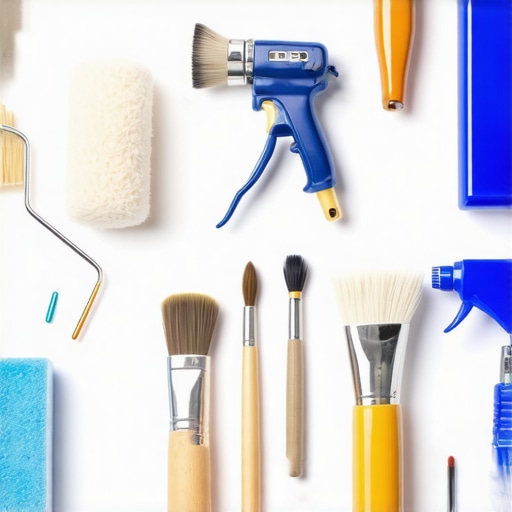
Regularly inspecting your tools for wear and cleaning them thoroughly after each project prevents buildup of dried paint, which can impair their effectiveness over time. For those interested in more advanced equipment, options like airless sprayers offer higher efficiency for large-scale projects, but they demand proper upkeep—refer to this resource for detailed maintenance tips.
Embrace Proper Surface Preparation Tools
Long-term results depend heavily on preparing surfaces correctly. Using the right deglossers, sanding blocks, and putty knives ensures that paint adheres properly and lasts longer. I swear by my cordless electric sander, which saves time on large surfaces and provides an even finish. Remember, maintenance of these tools—including replacing worn sanding pads and keeping blades sharp—prevents surface imperfections that can become visible over time, preserving the integrity of your paint job.
Maintaining Your Equipment Over Time
To keep these tools in top shape, I recommend a simple routine: clean brushes and rollers immediately after use, store sprayers properly in a dry place, and regularly inspect and replace worn parts. For example, replacing paint filters and seals in your sprayer periodically can prevent clogs and uneven spray patterns, ensuring consistent results for years. Investing in quality maintenance supplies like specialty cleaning solutions and lubricants adds to your tools’ longevity, saving money and frustration in the long run.
What’s Next in Tool Technology?
The future of painting tools is heading toward automation and smarter equipment, with innovations like robotic paint applicators becoming more accessible. While these might seem like overkill for DIYers, professional contractors are already leveraging such tech to increase efficiency without sacrificing quality. Staying informed about the latest advancements and properly maintaining your existing tools will ensure your work remains competitive and reliable.
Ready to upgrade your toolbox? I encourage you to try out a high-quality sprayer with proper maintenance routines—it’s a game-changer for large-scale projects and achieving long-lasting results. Remember, the key isn’t just having the best tools but caring for them diligently to keep your house painting projects looking flawless for years to come. For more expert advice on selecting the right equipment, visit this comprehensive guide.
The Unexpected Truth About Painter’s Tape and Perfect Edges
Over the years, my experiences, both successes and mistakes, have unveiled some insider secrets that elevate your painting game beyond the basics. One lightbulb moment was realizing that patience and technique in tape removal can literally make or break your finished look. The difference between a sharp, professional line and a messy edge often hinges on choosing the right moment and peeling with finesse—details most amateurs overlook. Trust me, these subtle adjustments can dramatically improve your results, saving you time and frustration and giving your walls that high-end finish everyone admires.
Gear Up for Success: Tools that Make a Difference
I’ve found that investing in quality tools is non-negotiable when aiming for precision in your paint projects. My arsenal includes a sharp craft knife, quality painter’s tape, and a fine-tipped artist’s brush for touch-ups. These might seem small, but each enhances control and minimizes mistakes. For larger, tricky areas, employing a professional-grade sprayer like the Graco Magnum not only speeds up the job but also ensures an even coat, reducing the need for touch-ups later. Proper maintenance of these tools, including thorough cleaning after each use, prolongs their life and keeps your finish looking sharp.
Your Next Step: Making Painting a Joyful Habit
Embracing the nuances of house painting transforms a daunting task into a rewarding craft. Remember, mastering the art of painter’s tape removal is just one piece of the puzzle. Pay attention to environmental conditions, surface prep, and your tools, and you’ll achieve results that rival professionals. Whether you’re updating a single accent wall or giving your entire home a facelift, these insights make the process smoother—and your walls more stunning. Why not start your next project with a fresh perspective and the confidence that you’re equipped for success? Dive deeper into expert strategies to transform your home at this comprehensive guide.