

I still remember the moment I popped open my closet door and saw that old, stubborn wallpaper staring back at me. It was stuck there for decades, a relic from a past decor obsession. I reached for my trusty scraper, only to realize that after years of adhesion, it was barely scratching the surface. Frustration set in—I felt like I was losing a battle I didn’t even know I was fighting. If you’ve ever been there, you know the sinking feeling of knowing you need to remove that vintage wallpaper but dreading the thought of endless scraping and mess.
The Real Challenge of Old Wallpaper Removal
There’s nothing quite as discouraging as realizing traditional methods don’t cut it on wallpaper that’s been clinging for 20 years—or more. Years of adhesives, paint, and dirt make the surface incredibly resistant. If I had just given up and started ripping, I would have torn drywall or created a disaster I’d regret for years. Instead, I learned through trial, error, and a lot of research that there’s a better way—one that doesn’t involve endless scraping or toxic chemicals. And trust me, it’s easier than you think. Today, I want to share the approach that turned my nightmare into a manageable project, saving both time and frustration. Whether you’re prepping for a fresh coat of paint or a complete redecorating, mastering this technique makes all the difference.
Is Chemical Stripping Safe and Effective?
Early on, I made the mistake of rushing into using harsh chemical removers, thinking they would solve the problem instantly. But I soon discovered that these products are often harsh, messy, and sometimes ineffective—especially on layers of old wallpaper. Plus, they can be harmful to your health and the environment. That’s when I started exploring natural alternatives, like a simple mixture of water and vinegar, which proved surprisingly effective. According to a recent study by the University of California, vinegar breaks down the adhesive’s chemical bonds without the need for aggressive chemicals. The key is proper preparation and patience, making the process safer and more sustainable.
Now, you might be skeptical—”Can I really remove 20-year-old wallpaper without scrapers or chemicals?” Well, that’s exactly what I’ll show you. Keep reading, because the method I’ve mastered can transform a daunting task into an achievable home project, turning that stubborn wall into a fresh canvas. Ready to get started? Let’s dive into the practical steps that will make this achievable for you, no matter your experience level.
Prep the Workspace and Surface
Before starting, clear the room of furniture or cover it with drop cloths to protect from drips. Wear old clothes, gloves, and a mask to guard against dust and potential mold. Use painter’s tape to mask off adjacent areas, especially if you’re working near trim or switches. This neat preparation makes the job cleaner and avoids accidental damage—think of it as setting the stage before a performance. I remember covering my floor with a plastic sheet and taping it securely; it made cleanup much easier afterward.
Score the Wallpaper for Better Adhesive Penetration
Use a utility knife or wallpaper scoring tool to make small, light perforations across the wallpaper surface. Don’t press too hard; you want to avoid gouging the drywall underneath. Think of this as creating tiny channels that let the vinegar solution seep in deeper, loosening the adhesive hold. When I did this on my wall, I found it allowed the natural solution to work more efficiently, reducing the need for aggressive scraping later.
Tip: The tiny perforations will also prevent the wallpaper from cracking into large pieces during removal, keeping the process safer and tidier.
Apply a Water and Vinegar Solution
Mix warm water with white vinegar in a spray bottle—about 1 part vinegar to 3 parts water. Generously spray the scored wallpaper, focusing on the edges and seams where adhesive tends to be strongest. Let it soak for 10-15 minutes; the vinegar helps break down the glue bonds. I learned this trick when I tried removing two layers of vintage wallpaper. The solution softened the adhesive enough that I could peel the paper off with my hands, leaving much less residue to scrub away.
For stubborn areas, reapply the mixture and give it more time to work. Avoid over-wetting the wall, as excessive moisture can damage drywall. Think of it as watering a plant—consistent, careful application yields the best results.
Gentle Peeling and Scraping
Start at a corner or seam, gently lift the paper with a putty knife or plastic scraper—metal tools risk gouging the wall. Use your fingers or a cloth to peel back the wallpaper slowly. If resistance persists, re-spray the area and wait a few more minutes. Remember, patience is key; rushing can tear drywall or create bigger messes. Based on my experience, I found that pulling at a sharp angle and working gradually reduces drywall damage significantly.
If you encounter tough patches, don’t force them—respray and wait. This approach prevents damage and makes the entire removal smoother. It’s similar to peeling back layers of an onion carefully—patience makes the process easier and less messy.
Handle Residue with Natural Cleaners
Once the paper is off, you’ll notice adhesive residue. Dampen a cloth with warm water mixed with a little vinegar or mild dish soap. Wipe the wall gently to remove leftover glue. For stubborn spots, a mixture of baking soda and water forms a gentle abrasive. I used this to clean up after removing a particularly stubborn glue patch—it worked without damaging the drywall. This step restores the surface in preparation for painting or wallpapering anew.
Final Checks and Drying
Inspect the wall for any remaining glue or damage. Sand any rough patches lightly with fine-grit sandpaper. Allow the wall to air dry completely—rushing this step can trap moisture, leading to mold or paint issues later. Proper drying ensures a smooth, clean surface for the next layer of paint or wallpaper, much like preparing a canvas before painting. This meticulous finishing was the difference between a disappointing outcome and a professional-looking result in my own project.
If you’re planning to repaint, check out expert house painting tips for additional guidance. Remember, thorough preparation makes the difference between a fleeting fix and a lasting refresh.
Many homeowners jump into painting projects believing they’ve got the process down, only to find themselves battling unexpected issues later. One prevalent misconception is that choosing a high-gloss finish always provides the best durability. While glossy paints do offer some resilience, they also highlight imperfections and require a meticulous application process—something novices often overlook. Instead, understanding the specific properties of different sheens and their suitability for various surfaces can mean the difference between a professional look and a botched job. Such nuances are often missed if you rely solely on popular advice; consulting detailed guides like local painting insights can elevate your understanding.
Prioritizing Quality Tools for Lasting Results
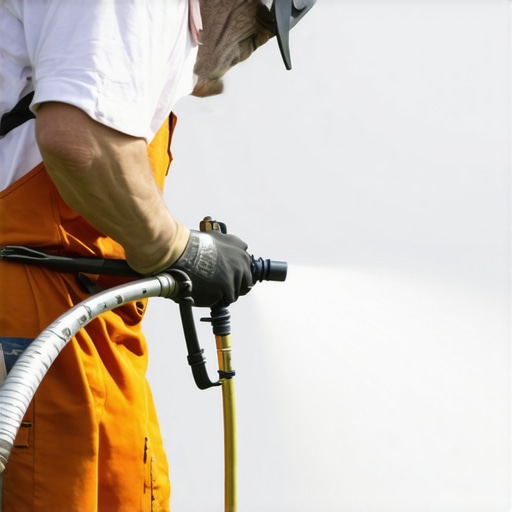
Investing in the right tools is crucial to ensuring your painting projects stand the test of time. I personally rely on a high-quality HVLP (High Volume Low Pressure) sprayer for large surfaces because it provides even Coverage and minimizes overspray. When choosing a sprayer, look for models with adjustable pressure controls and a durable ceramic nozzle—these features allow for precision and longevity. For smaller detail work or touch-ups, I recommend a set of fine-tipped brushes, such as synthetic sash brushes, which maintain shape over multiple uses and deliver smooth edges. According to professional painters, investing in top-grade tools reduces both application time and rework frequency, saving you money in the long run.
Maintaining Equipment to Keep Projects on Track
Proper maintenance extends the lifespan of your tools and ensures consistent results. After each use, thoroughly rinse brushes and rollers with warm water and mild soap to prevent paint buildup. For sprayers, disassemble and clean nozzle components with a specialized spray gun cleaning kit, especially when switching colors or paints. Regularly inspect brushes for signs of wear, and replace them before bristles start shedding or losing shape. Storing tools in a dry, dust-free environment in original cases also prevents corrosion and damage.
Technological Advancements Shaping Future Painting Practices
Emerging technologies, such as paint-matching apps and automated color sensors, are set to revolutionize local painting. These innovations help ensure color accuracy and consistency, especially in renovation projects involving multiple rooms or properties. Additionally, smart paint formulations resistant to molds and UV damage are gaining popularity, reducing maintenance needs over time. Keeping abreast of these trends and integrating new tools can make your projects more efficient and durable.
How do I maintain my painting tools over time?
Developing a routine cleaning schedule after each project is key. Use appropriate cleaners—water-based for latex paints and mineral spirits for oil-based paints—and store your tools properly. Periodically replacing worn brushes ensures smooth application and prevents paint bleeding or streaks. By maintaining your tools diligently, you’ll guarantee that each future project benefits from the same high-quality finish. Want to learn more about optimizing your painting process? Check out expert house painting tips for 2025.
Remember, the investment in good tools and their proper upkeep is a long-term strategy that pays dividends, especially if you plan to scale your projects or run a local painting business. As the industry advances, embracing innovative tools like digital color analyzers or eco-friendly paints can elevate your work and customer satisfaction. Don’t hesitate to experiment with advanced application techniques—like employing a fine-mist sprayer for precise edges—to achieve professional results that last.
What I Wish I Knew Before the Battle with Vintage Wallpaper
- Patience over brute force: Rushing can damage drywall, so pacing myself saved headaches down the line.
- The power of natural solutions: Vinegar and water became my secret weapons, revealing that eco-friendly methods often outperform chemicals.
- Preparation is everything: Proper masking, scoring, and planning made the entire project smoother and less messy.
- Tools matter: Investing in quality scrapers and sprayers turned a tedious task into a manageable, even enjoyable process.
Tools and Resources That Changed My Approach
- High-quality plastic scrapers: Gentle on drywall, durable enough for tough adhesive residues, recommended by professionals for long-lasting results.
- Natural vinegar-water spray bottles: Readily available and affordable, proven effective for breaking down old adhesives—see more tips in our guide on transforming your home with expert house painting tips.
- Painter’s tape and masking materials: Essential for protecting trim and floors, ensuring a clean workspace for your painting journey.
- Detail brushes and clean-up kits: Helped me achieve a professional finish and maintained my tools for future projects.
Your Next Step: Embrace the Change
Applying these insights can turn a daunting wallpaper removal into a confidence-building experience. Remember, each successful project is a step toward transforming your entire space—without the stress or hazardous chemicals. For even more expert strategies to enhance your home, explore our comprehensive innovative house painting ideas and unlock the full potential of local painting techniques. Don’t let old layers hold you back—your refreshed, vibrant walls are just a few thoughtful steps away.
Have you ever struggled with stubborn wallpaper or the right methods to prep your walls? Share your experiences below—I’d love to hear your stories and tips!