

Sitting on the edge of my bathtub, paintbrush in hand, I looked around my tiny bathroom and felt a wave of frustration. The cramped feel, the dull colors—it was like the space was closing in on me every morning. I had tried painting walls before, but nothing seemed to make a real difference. That was my lightbulb moment: I realized that small spaces require more than just a fresh coat of paint—they need a strategic approach to truly feel bigger and brighter. If you’ve ever faced that same feeling of being overwhelmed by a compact bathroom, you’re not alone. Today, I’m going to share the tried-and-true methods that transformed my tiny bathroom into a spacious sanctuary—and how you can do the same.
Why the Right Paint Choices Matter More Than You Think
When space is tight, every visual trick counts. The colors, finishes, and techniques you pick can either make your bathroom seem more confined or open it up instantly. I’ve learned from personal experience that light, neutral shades—think whites, soft beiges, or sunny pastels—reflect more light, creating an illusion of depth and space. But it’s not just about color; the way you apply it matters too. Using matte finishes can hide imperfections, but a glossy or semi-gloss sheen will bounce light around, making the room feel larger. It’s a delicate balance, and choosing wisely can dramatically change your space. For more expert tips, check out this guide on local painting strategies that boost room size perception.
The Biggest Fear: Will These Tricks Work for My Bathroom?
Honestly, I was skeptical at first. I thought, “Can just changing the paint color really make a difference?” I made a mistake early on—overly dark colors and too much clutter—which only accentuated the smallness of my bathroom. Once I understood how color, finish, and placement could work together, everything changed. Now, I want to help you avoid those rookie mistakes and give your bathroom a fresh, spacious feel. Ready to turn your tiny bathroom into a light-filled retreat? Let’s dive into the practical steps that make this possible, step by step.
Prep Your Surface Like a Pro
Before diving into painting, ensure your bathroom walls are clean and smooth. I remember a time I overlooked cleaning a stubborn patch of grease next to the sink, which caused uneven paint adhesion. Use a strong but gentle cleaner, like a mixture of warm water and mild soap, to remove grime. After cleaning, sand down any rough spots with fine-grit sandpaper to create an ideal surface for paint to stick. This preparation step is crucial; think of it like prepping a canvas before painting artwork.
Choose Colors That Expand the Space
Select light, neutral hues—like soft whites or pale beige—that reflect natural light effectively. During my own makeover, I picked a semi-gloss white because it bounced light around, making the room seem more open. Apply painter’s tape along edges, fixtures, and moldings to keep lines crisp and avoid accidental splashes. Use a high-quality primer to seal the surface, which enhances paint adhesion and color vibrancy. For best results, consider applying two coats of your chosen color, as this deepens the brightness and smoothness of the finish. Refer to top local painting strategies to get professional tips on color selection and application.
Master the Painting Technique
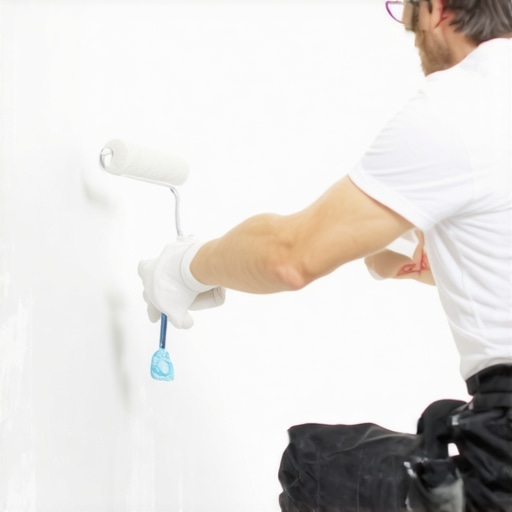
Invest in a good-quality roller with the right nap—about ⅜ inch for smooth surfaces. When I painted my bathroom, I started with a new roller cover; old rollers tend to shed hairs or unevenly distribute paint. Load the roller evenly and use a ‘W’ or ‘M’ pattern to distribute paint across the wall before rolling in smooth, overlapping strokes. This minimizes streaks and lap marks. Don’t press too hard; let the roller’s nap do the work. For edges and corners, switch to a sharp brush to cut in neatly along edges and around fixtures. I once experimented with different brushes and found angled brushes offered more control for tight spots. For more detailed techniques, check out house painting pro tips.
Layer and Finish for Lasting Brightness
Allow at least 24 hours between coats, and ensure the room is well-ventilated to speed up drying. After the first coat, inspect your work for drips or uneven spots and lightly sand those areas once dry to create a seamless look. Apply a second coat to reinforce color and brightness. Finish with a semi-gloss or gloss paint for the walls; these finishes reflect more light and make the space feel larger. For a glossy shine on trim or moldings, use a smaller brush for precision. Remember, patience in this stage translates into a more professional and luminous result. To prevent common issues like peeling or streaks, consider reading tips on proper finishing techniques.
Extra Tips to Amplify the Effect
Maximize natural light whenever possible—keep window treatments light and airy. Mirrors can also double the perceived space, so position one strategically opposite or near a window. Use wall-mounted shelves or vertical storage to draw the eye upward, creating an illusion of height. By combining these painting techniques with clever decor, you’ll turn your tiny bathroom into a bright, spacious retreat—no major renovation needed. For deeper insights, explore local painting solutions for every budget.
 While most DIY enthusiasts and even some professionals focus on surface-level techniques, true mastery in house painting lies in understanding the nuanced details that often go unnoticed. One common myth is that selecting a color and applying two coats guarantees a perfect finish. In reality, factors like paint type, surface preparation, and environmental conditions play critical roles in the final outcome. For instance, using zero-VOC paints might seem healthier, but they sometimes require specific application techniques to avoid issues like streaking or poor adhesion. Many overlook the importance of proper curing time, which varies depending on humidity and temperature, and rushing this step can lead to peeling or surface cracks later on. This is where advanced knowledge becomes essential—knowing when and how to apply certain finishes or primers based on wall material can make all the difference.
Are You Falling for the Cheap Paint Trap? The Hidden Costs of Saving a Few Bucks
One of the most pervasive misconceptions is that cheaper paint always saves money. However, low-quality paints often have poor longevity, chipping, or fading, leading to more frequent repainting. According to a study by the Painting and Decorating Contractors of America, investing in premium paints can reduce maintenance costs by up to 50% over ten years. Moreover, many homeowners fail to recognize that the application technique varies significantly between brands; applying a cheap, low-viscosity paint with a high-nap roller can result in uneven coverage and an amateurish finish. It’s crucial to understand the nuances of different paint formulations and how they interact with surfaces. For expert insights on how to select the right products and avoid costly mistakes, visit this article on local painting essentials.
Beware of the Over-Sanded and Over-Primed
Another advanced mistake is over-preparing surfaces—excessive sanding or multiple layers of primer can sometimes do more harm than good. Over-sanding can damage delicate drywall joints or remove textured finishes that actually help hide imperfections. Similarly, applying multiple coats of primer might trap moisture or lead to an uneven base, especially on slick surfaces like glossy kitchens or bathroom tiles. Proper surface preparation is about balance; knowing when to stop is what separates a professional finish from a novice slip-up. For detailed advice on prepping surfaces correctly, check out local painting strategies. Remember, a flawless finish isn’t just about the paint but about understanding these critical underlying steps. Have you ever fallen into this trap? Let me know in the comments.
Keep Your Painting Projects Smooth with the Right Tools
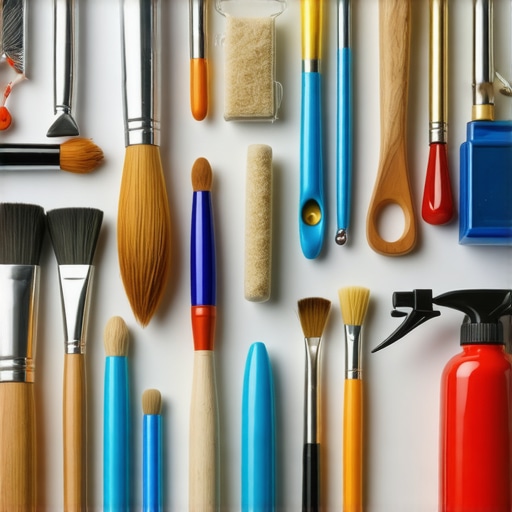
Investing in quality tools is the cornerstone of achieving professional-looking results that stand the test of time. My personal go-to is a high-grade Radial Corner Painter, which allows for crisp edges without tape and saves a ton of time when cutting in around trim and ceilings. The precision of a good angled brush, like a Purdy Elite, makes corner work a breeze, especially in tight spots or intricate moldings. For large wall areas, I prefer a 9-inch roller with a medium nap, such as a Mohair blend, which ensures even coverage and reduces streaks. Using a paint grid instead of a tray minimizes mess and helps maintain a consistent paint load on the roller, which directly influences surface smoothness. Remember, employing tools tailored to specific tasks not only makes the work easier but also significantly extends the lifespan of your paint job.
Maintain Your Equipment for Long-Term Results
Proper maintenance of your painting tools prevents premature wear and ensures consistent performance. After each project, rinse brushes thoroughly with warm water or appropriate solvent (oil or latex-based paint), depending on the brush type. For foam rollers, I recommend removing excess paint, cleaning with mild soap, and storing them in airtight bags to maintain their shape and prevent drying out. Storage is equally crucial—keep brushes with the bristles upright and in a dry place, and wrap rollers in plastic to avoid dust accumulation. Using paint additives like flow conditioners can improve ease of application and help brushes glide more smoothly, reducing mechanical stress. Regular tool maintenance not only preserves their effectiveness but also contributes to achieving durable and flawless finishes over time.
Where Do You See Painting Tools Going Next?
Advancements such as cordless paint sprayers with improved battery life and adjustable spray patterns are revolutionizing the industry, making large-scale projects faster and more precise. Expect to see continued innovations combining traditional hand tools with smart technology—think app-controlled spray systems or brushes with embedded sensors providing real-time feedback on paint thickness or coverage. Staying ahead of these trends requires a willingness to experiment with new equipment and adapt your process accordingly. Forecasters predict that automation and digital integration will further streamline maintenance routines, ensuring your surfaces stay immaculate for years. Exploring these emerging tools now can give you a substantial edge in DIY mastery and long-term house maintenance.
How can I keep my painting tools in top shape over time?
Implement a routine of thorough cleaning immediately after each use—using appropriate solvents and avoiding neglecting hidden bristle or roller core areas. Regularly inspect tools for wear or damage, replacing worn parts before they compromise your work. Applying protective coatings or conditioners specific to your tool material can prolong their lifespan. Also, store tools properly in organized containers to prevent bending or deformation. For detailed guidance on tool care, visit this resource on local painting strategies. As you hone your maintenance routine, you’ll notice an immediate improvement in finish quality and a reduction in rework—saving you both time and money.
Ready to elevate your house painting projects? Try incorporating a professional-grade paint sprayer for larger areas—it can drastically reduce the time and effort involved and can help achieve a more uniform finish. Transitioning to modern tools like these is a smart move for anyone serious about long-lasting results. For a step-by-step guide, check out innovative painting ideas for 2025.
What I Wish I Knew When Starting My Bathroom Makeover
One of the biggest lessons I learned is that small details make a huge difference. Overly relying on just color change without proper surface prep or understanding paint finishes can lead to less-than-ideal results. I once jumped straight into painting, skipping sanding and priming, and ended up with streaks and uneven coverage. Now, I know that patience and attention to detail—like choosing the right brush for edges or waiting adequate drying time—are what truly elevates the final look. Don’t underestimate how these subtle tips can revolutionize your space.
My Favorite Tools and Resources for Effortless House Painting
Over the years, I’ve come to trust a few key tools that make a significant difference. The Purdy Elite angled brush provides flawless edges, while my trusty Mohair roller ensures even, smooth coverage. For expert advice, I frequently refer to local painting strategies, which offer insights tailored to residential projects. Additionally, books like House Painting Made Easy have expanded my understanding. These resources and tools help me deliver professional results without the hefty price tag.
Push Yourself: Brighten Your Bathroom, Brighten Your Life
Embrace the challenge of transforming your small bathroom into a luminous haven. With the right techniques—like selecting light-reflecting colors and mastering brushwork—you’ll be amazed at how much bigger and brighter your space can feel. Remember, every stroke is an investment toward a more inviting home. Don’t wait for perfection; start today, and enjoy the confidence that comes with turning a daunting project into a rewarding experience. Your dream tiny bathroom is just a brushstroke away!
What has been your biggest challenge in painting small spaces? Share your story below—I’d love to hear your experiences and tips!
,