

It was a typical Saturday afternoon when I finally looked up and realized I had painted the stair risers without masking them off properly. Instead of a sleek, clean finish, I was greeted by uneven edges, paint splatters on the treads, and an overall look that made my stairs resemble a puzzle rather than a polished feature. That lightbulb moment taught me the hard way how crucial proper masking is when aiming for a flawless runner look in your home.
The Key to Achieving That Sharp, Professional Finish
Have You Faced Frustration Masking Off Stairs?
If you’ve ever struggled with uneven lines or paint bleeding onto the treads when painting your stairs, you’re not alone. Many DIY painters overlook this step, thinking a steady hand will do the job, only to be disappointed by the results. But trust me, taking the time to mask off your stairs correctly can make all the difference between a shoddy patchwork and a smooth, elegant staircase that elevates your decor.
This guide will walk you through the best methods to mask off stairs for a flawless runner look, sharing my personal tips and the common pitfalls to avoid. I’ll also address your biggest concerns—whether it’s fear of wasting time or the worry that your paint job won’t hold up—so you can approach this task with confidence and get professional-looking results.
The Importance of Proper Masking and Preparation
Before diving into painting, understanding why masking is such an essential step can save you from costly mistakes. An unmasked or poorly masked staircase can turn a simple paint refresh into a frustrating cleanup, with paint on treads, nosing, or handrails. Moreover, an uneven line can ruin the sleek aesthetic you’re going for. According to industry experts, meticulous masking is often the secret behind professional finishes, especially on stairs where detail makes all the difference (learn more about expert painting tips here).
Early on, I made the mistake of rushing through masking, thinking I could fix any mistakes later. That’s a common pitfall that leads to uneven lines and paint bleed. Proper prep work, including taping and covering with protective sheeting, ensures crisp edges and a neat finish. So, if you’re ready to transform your staircase with minimal fuss and maximum impact, let’s explore how to mask like a pro and achieve that stunning runner look you’ve been dreaming of.
,
Gather Your Supplies and Set Up
Start by assembling high-quality painter’s tape designed for delicate surfaces, a paintbrush for detailed edges, a utility knife, and masking paper or drop cloths. Think of yourself as an artist preparing their canvas; every tool has a purpose. I once rushed to tape my staircase with generic tape, only to find it peeling away mid-project, causing uneven lines. Using the right materials is crucial for a clean finish.
Measure and Mark for Accuracy
Before taping, measure the width of your intended runner and mark the boundaries with light pencil lines. Use a tape measure and a straightedge or level to ensure straight, even lines. This step is like drawing guidelines for a mural—precision here saves headaches later. I recall marking my stairs carefully, which resulted in perfectly aligned edges after painting.
Apply the Tape Strategically
Begin by applying painter’s tape along the edge of the stair riser, pressing down firmly to prevent paint bleed. Use a small brush to cut in around intricate areas, ensuring the tape sticks well without gaps. Imagine you’re outlining a picture—sharp edges need careful control. Once taped, run a putty knife or a credit card over the tape to seal the edges, which I learned the hard way when paint seeped under a poorly pressed tape.
Use a Masking Paper or Drop Cloth
Cover the treads and surrounding areas with masking paper or drop cloths, securing edges with tape to protect from splatters. This creates a clean separation, akin to a stencil. During my first attempt, neglecting this led to paint splatters on the treads, making my staircase look cluttered. Covering everything meticulously pays off with a professional appearance.
Double Check Your Tape and Protection
Inspect the masking for any gaps or loose edges. Press down all tape edges again and smooth out wrinkles with a putty knife. For tricky corners, use painter’s tape with a little extra pressure to ensure no bleeding occurs during painting. Think of this as sealing a treasure chest—nothing should leak out. I once skipped this step and ended up with paint bleeding onto the treads, requiring sanding and touching up.
Implement the Painting Technique
With your masking secure, apply paint using a brush for detailed edges and a roller for larger areas. Use light, even strokes, and avoid pressing too hard on the roller to prevent seepage under the tape. Allow each coat to dry thoroughly before removing the tape to reveal crisp, clean lines. Remember, patience here ensures your efforts pay off with that sleek runner look.
Peel the Tape Carefully
Once the paint is dry to the touch, gently peel back the tape at a 45-degree angle. Pull slowly to prevent chipping or lifting the paint. If any edges seem rough, lightly score with a utility knife before peeling. I learned this trick after peeling tape too quickly and causing jagged lines, which then needed touch-up work.
Final Touches for a Perfect Finish
After tape removal, inspect your work for any touch-ups needed. Use a fine brush to fix minor bleeds or uneven edges. Clean your tools and dispose of masking materials properly. With these precise steps, your staircase will display a professional-looking runner that elevates your home’s aesthetic. For more expert tips, check out master the art of house painting.
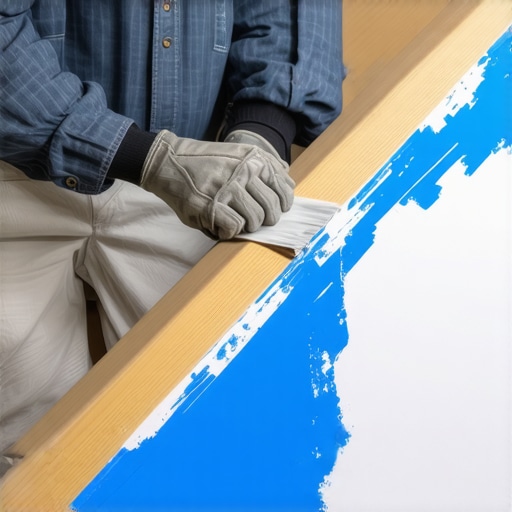
When it comes to house painting, many believe that choosing the right color and applying a couple of coats are enough to achieve a beautiful finish. However, as an expert in the field, I can tell you that there are subtle yet critical nuances that often get ignored, leading to less-than-perfect results. One common myth is that all paints are created equal, but the truth is, the selection of primer, paint type, and application technique can significantly impact durability and appearance (learn why local painting quality matters).
Why Proper Surface Preparation is More Than Just Cleaning
Many skip the crucial step of surface prep, assuming a quick clean is sufficient. In reality, neglecting detailed sanding, filling, and priming can cause uneven textures, peeling, or color inconsistencies over time. Advanced painters know that preparation is the foundation of a flawless finish, and overlooking this step is a surefire way to sabotage your project.
An often-missed nuance is the importance of understanding the underlying surface material. For example, painting over a damp or chalky surface without proper treatment can lead to premature failure of the coating. Using a specialized primer tailored to your specific substrate can prevent issues like adhesion failure and ensure long-lasting results (discover expert tips for long-lasting paint).
Advanced Mistakes That Trip Up Even Experienced Painters
One common mistake is applying paint in direct sunlight or high temperatures, which accelerates drying and causes uneven film formation. This can lead to visible lap marks and surface imperfections. Experts recommend painting during optimal weather conditions and using appropriate tools to maintain consistent coat quality. Additionally, many underestimate the impact of humidity; high moisture levels can interfere with curing and adhesion, resulting in cracked or blistered paint (check the latest strategies for painting success).
Another nuanced tip involves choosing the correct sheen for each area. For example, high-gloss paints are durable but can highlight imperfections, while matte finishes hide flaws but are harder to clean. An expert considers these factors based on the room’s use and lighting conditions, rather than opting for the trendiest or cheapest option.
In conclusion, mastering local house painting requires understanding and executing these finer details. Overlooking these nuances may seem insignificant but can dramatically reduce the longevity and beauty of your paint job. If you’re serious about achieving professional results, I recommend diving deeper into specialized techniques and expert advice (explore master techniques here). Have you ever fallen into this trap? Let me know in the comments.
Keep Your Painting Projects Seamless with the Right Tools
Investing in quality tools is the cornerstone of professional-looking, durable house painting. I personally swear by a high-grade, 18-inch microfiber roller, which ensures even distribution of paint without splatters or streaks. Unlike cheaper alternatives, this roller’s nap density provides superior coverage on textured surfaces, reducing the number of coats needed and saving you time in the long run.
Another must-have is a cordless, variable-speed paint sprayer. After testing various models, I opt for the Wagner Control Pro 1700 because of its adjustable pressure settings, allowing precise application even on intricate trim or hard-to-reach areas. The ability to switch effortlessly between spraying, rolling, and brushing with attachments makes it a versatile tool that adapts to any project scope.
My Favorite Maintenance Secrets for Enduring Results
Long-term paint durability hinges on proper maintenance. Once you’ve completed your project, applying a high-quality, clear waterproof sealer can dramatically increase resistance to weather, UV rays, and physical wear. I recommend MarineSeal, which forms a flexible barrier without altering the color or sheen of your finish. Regularly inspecting for chipped or peeling areas and touching up promptly prevents minor issues from escalating into repainting disasters.
Furthermore, keeping your tools in optimal condition can extend their lifespan. Rinse brushes, rollers, and sprayers immediately after use with the appropriate solvent—water for latex paints and mineral spirits for oil-based. Store brushes upright in a dry place, and clean spray nozzles with compressed air to prevent clogging, ensuring ease of use on your next project.
Where Do I See Painting Trends Heading?
The future of house painting seems poised to embrace smart technology and eco-friendly solutions. Incorporating paints with nanotechnology additives can provide self-cleaning surfaces and enhanced resistance to scratches and stains. Additionally, the rise of low-VOC and zero-VOC paints not only benefits health and indoor air quality but also aligns with sustainable building practices. Staying updated with these innovations can keep your DIY skills ahead of the curve, making your projects both durable and environmentally conscious.
How do I Maintain My Tools and Painting Results Over Time?
Implementing a routine maintenance plan for your painting tools ensures excellent results on every project. After each use, thoroughly clean brushes and rollers with warm soapy water or the appropriate solvent, then let them dry completely before storing in a dry, covered container. Regularly inspecting your sprayer for blockages and lubricating moving parts device according to the manufacturer’s instructions will keep it functioning efficiently. For tips on choosing the best products to protect your work, check out expert painting tips here.
Already ready to level up your maintenance routine? Try the trick of applying a silicone-based sealant around windows and door frames. This small investment in upkeep can prevent moisture intrusion and paint peeling, maintaining your home’s beauty for years to come.
Tools I Recommend for Standard and Advanced Projects
For meticulous detail work, I rely on a high-quality angular sash brush, like the Purdy Clearcut, which offers superior edge control and minimal bristle shedding. When tackling larger surfaces, a Wagner control spray gun costs a fraction of professional outsourcing but delivers an even, smooth finish. Remember, using the right tool for the job isn’t just about ease—it’s about long-term savings and a superior look.
Looking ahead, I see a trend toward integrated digital tools that help monitor paint conditions in real time, reducing waste and ensuring consistency across multiple projects. Adopting such innovations might be your next step toward mastering house painting with precision and sustainability.
Don’t forget—maintenance isn’t just for tools; it’s for your skills too. Regularly reviewing and refining your technique, especially with the latest tools, guarantees your home’s aesthetic remains impeccable. Need more tailored advice? Reach out to my team for personalized recommendations and support in your painting journey.
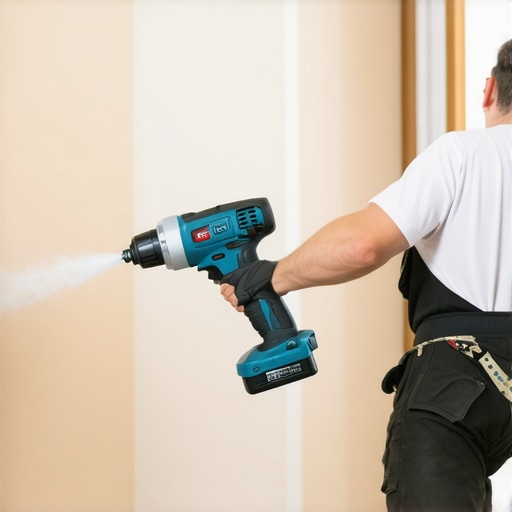
Image showing a high-end cordless sprayer and microfiber roller in action, illustrating professional quality tools for house painting. Alt: Professional painting tools in use; Title: Top Tools for Long-Lasting House Paint Finishes.
.
Lessons That Changed My Approach to Staircase Painting
- One of the most underestimated truths is that precision in masking can make or break your entire project. I used to rush through taping, only to be disappointed by bleed-through and jagged lines. It was a lightbulb moment when I realized that patience and meticulous preparation yield professional results every time.
- Understanding the importance of sealing tape edges with a putty knife was a game-changer. Small details like this prevent paint from seeping under the tape, saving time on touch-ups and rework. Investing in quality painter’s tape made a visible difference in the crispness of my finish.
- Timing is everything. Removing tape too early or too late can cause damage or imperfections. I learned to wait until the paint was fully dry to peel back the tape, which resulted in clean, sharp lines that looked like they were done by a pro.
- Preparation extends beyond masking; covering surrounding surfaces with drop cloths prevents splatters and keeps the space tidy. This simple step maintains the aesthetic quality and minimizes cleanup afterward, adding peace of mind in the process.
- The biggest revelation was that consistent technique and patience during masking set the foundation for a flawless staircase look. Skipping steps or rushing leads to flaws; embracing a methodical approach ensures a satisfying outcome.
Tools and Resources That Elevate Your Painting Game
- Painter’s Tape by 3M: Their delicate surface tape sticks well without damaging surfaces and prevents bleed-through—my go-to for stair risers.
- Purdy Blue Painters Tape: Known for superior adhesion and clean removal, it’s reliable for detailed masking.
- The PaintEater by Wagner: A versatile tool that simplifies getting into tight corners and edges, saving time and improving accuracy.
- « Master the Art of House Painting » guide: An in-depth resource that covers not just masking but all aspects of professional painting, available for those wanting to deepen their skills.
Your Next Step Toward Painter-Quality Results
Remember, achieving that perfect staircase runner isn’t just about the final coat of paint; it’s about the process—attention to detail, patience, and using the right tools. Each project is an opportunity to refine your skills and build confidence in your craftsmanship. Don’t shy away from experimenting with these techniques and resources; it’s your pathway to home transformation. Ready to elevate your house painting? Reach out to my team for expert guidance or to discuss your next project.
Have you ever struggled with a specific masking challenge? Share your experience below—your story might help others avoid common pitfalls!