

I was crouched on my hands and knees, sweat dripping off my nose, staring at a three-foot section of baseboard that looked absolutely perfect… until I looked down. I had spent hours prepping, or so I thought. I had used the premium tape. I had laid out the expensive drop cloths. But as I pulled that blue strip away, I didn’t see a crisp, professional line. I saw a fuzzy, green-tinted disaster where the paint had wicked into the cream-colored pile like a thirsty sponge. I spent the rest of my Saturday frantically searching for how to clean paint off a carpet before it dries, and let me tell you, the results were mediocre at best. It was a humbling moment that taught me one vital lesson: carpet is the ultimate enemy of a clean paint line if you do not know how to fight back. [image_placeholder_1]
Why Your Carpet is Actively Trying to Ruin Your Paint Job
The problem isn’t your technique or your choice of brush; it is the physics of the carpet itself. Think of your carpet as a collection of thousands of tiny vertical straws. When you lay tape flat across the top of those fibers, the paint doesn’t just sit on the tape’s edge. Gravity and capillary action pull the wet paint down the fibers and underneath the adhesive backing. I made the mistake of treating my guest bedroom like it had solid flooring. If you have ever looked at how to properly mask a hardwood floor before painting baseboards, you know that a flat surface is a dream for tape. But carpet is a moving target. To get a professional result, you have to create a mechanical seal that actually compresses the fibers down and away from the wood. Today, I’m going to share the “tuck and tape” method I’ve perfected over years of house painting—the only method that guarantees you get the only way to get a sharp line between your wall and woodwork without a single drop hitting the floor.
Will this method actually save me from buying a new rug?
It is totally normal to be skeptical, especially if you have tried those plastic paint shields that slip every time you move your arm. I used to be the guy who thought he could just “wing it” with a steady hand and a small brush. That confidence lasted until a slight slip led to a permanent “abstract art” piece on a client’s Berber rug. According to the Paint Quality Institute, liquid coatings can experience significant capillary action in porous materials, drawing wet paint deep into fibers before the drying process even begins. This is why a simple strip of tape is never enough. By mastering the art of house painting with these pro tips, you will learn that the goal isn’t just to cover the carpet, but to physically displace it. Have you ever had a “quick touch-up” turn into a full-blown carpet cleaning nightmare? Let me know in the comments, because I have certainly been there. Before we open the paint can, let’s talk about the specific tools you need to create a barrier that actually works.
Clean Your Carpet Before You Even Touch the Tape
First thing’s first: your vacuum is your best friend. Most people skip this, but if there is any pet hair or dust at the base of your trim, the tape simply won’t stick. I learned this the hard way back in 2019 while working on a house with plush shag. I was rushing, skipped the vacuuming, and by the time I reached the second wall, the tape was sagging like an old clothesline. I had to peel everything off and start over, which was a massive waste of time. While you are down there cleaning, take a second to inspect the wood itself. If you see any dings or dents from vacuum cleaners or furniture, use the hammer and cloth trick for fixing dented trim before painting to level things out before you begin.
Force the Tape Under the Wood
This is where the magic happens. Don’t just lay the tape on the floor and hope for the best. You need a 2-inch wide roll of painter’s tape and a 5-inch stiff putty knife. Lay the tape so about an inch is on the carpet and an inch is sticking up against the baseboard. Then, take your putty knife and physically shove the tape down into the crevice where the wood meets the floor. You are basically creating a “valley” that the paint cannot escape. This mechanical seal is what separates a DIYer from someone who has spent years mastering the art of house painting with these pro tips. 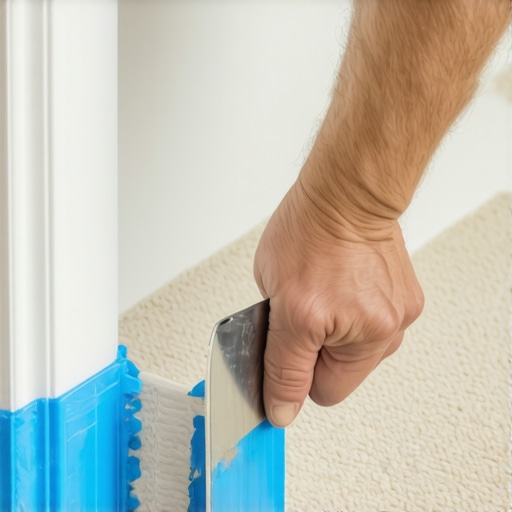 If you feel resistance, don’t force it too hard; you just want the carpet fibers compressed enough to tuck that tape edge underneath the bottom lip of the baseboard.
Don’t Ignore the Foundation
Before you even think about your topcoat, consider the prep of the wood itself. You might be tempted to just slap paint on, but understanding why using the wrong primer causes your trim paint to chip is a lesson you don’t want to learn after the tape is pulled. Use a high-quality bonding primer if your trim is pre-painted with an old oil-based finish. This ensures the paint stays on the wood and doesn’t flake off onto your newly protected carpet when you pull the tape away.
Paint with a Horizontal Motion
When you finally load your brush, the direction of your stroke is everything. Think of your brush like an airplane taking off—you want to start on the wood and move horizontally across the surface. Never “poke” the brush into the corner where the carpet is. Poking pushes paint into the tape’s seal and increases the risk of it wicking through. Instead, use long, smooth strokes. If you find your brush is getting stiff or dragging, check out the trick to keeping your paint brushes soft for years to keep your tools in top shape. If you happen to overload the brush and see a drip heading for the carpet, stay calm. You can learn how to fix a run in your paint without starting over by catching it while it’s still wet and feathering it back into the main body of the trim with a dry brush.
Most DIY guides tell you to wait until the paint is bone dry before removing your tape. In my years of experience, that is the fastest way to ruin a clean line. When the paint dries completely, it forms a continuous film—a ‘bridge’—between the tape and the wood. When you pull the dry tape, you risk tearing that film right off the baseboard, leaving a jagged edge. For the best results, pull the tape at a 45-degree angle while the paint is still ‘tacky’ to the touch. This ensures the edge stays sharp and the paint film breaks exactly where it should. This is just one of many ways of mastering the art of house painting with these pro tips that separates a clean job from a messy one. According to technical bulletins from the Painting and Decorating Contractors of America (PDCA), managing the ‘open time’ and the timing of tape removal is crucial for successful masking and a professional finish. 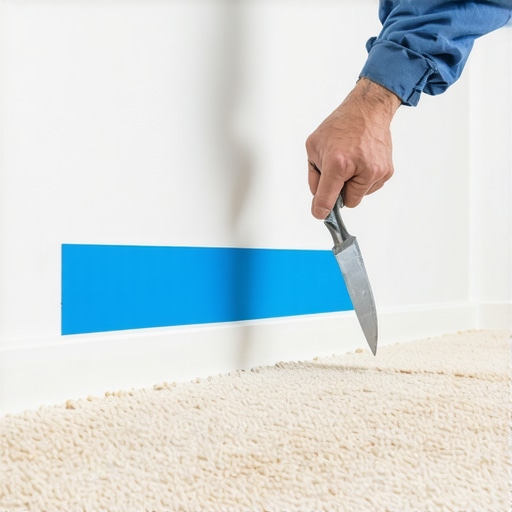
Don’t Fall for the Over-Compression Trap
While I advocate for tucking the tape, there is a point of diminishing returns. If you shove the putty knife too hard, you can actually score the wood trim or break the factory seal on the bottom of the wood. This creates a microscopic pocket where moisture can seep in, leading to future rot or peeling. Also, if you understand the difference between contractor grade and premium paint, you will notice that cheaper paints have a much higher water content and are more prone to wicking under the tape if the seal is not absolute. If you have already made a mess by loading too much paint onto the brush, stay calm; you can still learn how to fix a run in your paint without starting over by feathering the drip before it sets.
Does Local Humidity Change Your Taping Strategy?
Absolutely. If you are working in a damp basement or during a particularly humid summer week, your tape’s adhesive can become gummy. I have seen tape leave a permanent, sticky residue on high-end carpets because the humidity caused the chemical adhesive to break down. This environmental factor is why I often advise homeowners on why you should never paint your kitchen cabinets during a rainy week, and the same logic applies to your baseboards and flooring. High moisture in the air keeps the paint ‘open’ longer, which sounds like a benefit, but it also gives the liquid paint more time to find a capillary path through the carpet fibers and under your tape. Have you ever fallen into this trap? Let me know in the comments.If you want to move beyond the ‘weekend warrior’ phase, you have to stop buying those $5 multipack brushes at the big-box store. I used to think a brush was just a brush until I picked up a 2.5-inch Wooster Silver Tip. The difference is in the filament stiffness; a softer, thinner filament allows the paint to flow off the brush without leaving those deep ridges that scream ‘DIY job.’ When you are working against carpet, you need a brush that holds its shape under pressure. This is why I always suggest mastering the art of house painting with these pro tips before you even crack the lid on a premium gallon. For the tape itself, I’ve moved exclusively to FrogTape Green because it contains a polymer that reacts with the water in latex paint to create a gel barrier. It’s the closest thing to a failsafe I’ve found in fifteen years of painting.
How can I keep my trim looking fresh for years?
Maintenance is the part everyone forgets once the tape is pulled and the room looks great. To prevent that beautiful finish from chipping, you need to understand the ‘cure time’ versus ‘dry time.’ While the paint might feel dry in an hour, a high-quality acrylic alkyd can take up to 30 days to fully reach its maximum hardness. During this window, keep the vacuum cleaner away from the baseboards. I’ve seen more perfectly painted trim ruined by a stray vacuum head in the first week than by actual foot traffic. If you find that your paint is still surprisingly soft after a few days, you might want to look into the reason your front door stays tacky for days after painting, as the environmental factors often cross over into interior projects. 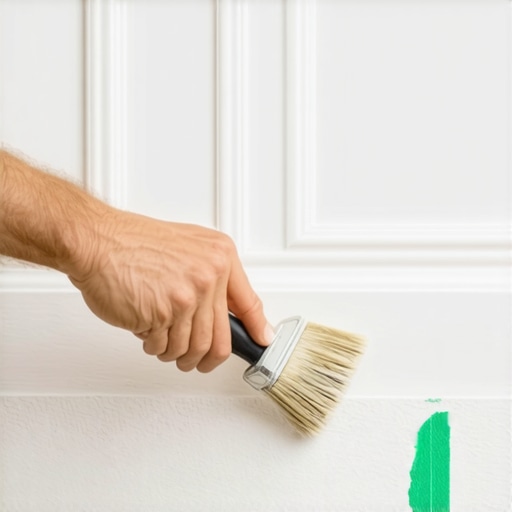 For long-term cleaning, avoid harsh chemicals. A simple microfiber cloth dampened with warm water and a drop of mild dish soap is all you need. According to the Master Painters Institute (MPI) Standard #141, high-performance architectural coatings are designed for ‘scrubbability,’ but abrasive cleaners will eventually dull the sheen and make the surface more porous. This leads to the very scuffing you’re trying to avoid. In the near future, I expect we will see a massive shift toward ‘self-healing’ coatings—nanotechnology that can actually bridge micro-scratches in the paint film when exposed to heat. Until then, your best defense is a high-quality product. If you are still on the fence about budget, remember the difference between contractor grade and premium paint often comes down to the resin quality, which dictates how well the paint stands up to your mop. I highly encourage you to try the ‘back-brushing’ technique on your next project; it’s an advanced move where you lightly run an almost dry brush over your wet paint to settle the finish perfectly. Once you see that glass-like surface, you’ll never go back to rolling trim again.
The Hardest Lessons I Learned from Carpet Disasters
After years in the field, I have realized that the biggest mistakes do not happen because of a lack of skill, but a lack of patience. Here are the lightbulb moments that changed my approach to painting near flooring:
- Respect the Adhesive: Never leave your tape on the carpet for more than a day or two. If the room is warm, the adhesive can melt into the synthetic fibers, leaving a gummy residue that is incredibly difficult to remove without damaging the pile.
- The Double Check: Right before the brush touches the wood, do one final pass with your putty knife. Carpet is resilient; those fibers are constantly trying to push back up against your tape line as you move around the room.
- Lighting is Everything: I used to paint in the shadows of the baseboards. Now, I use a dedicated work light. If you can not see the bottom 1/8th of an inch of the trim where it meets the tape, you are just guessing and risking a bleed-through.
- The Cleanup Plan: Always have a damp rag ready. Even with the best prep, accidents happen. Knowing how to remove dried paint drips without sanding the whole wall is a great skill, but catching it wet is even better.
#IMAGE_PLACEHOLDER_E#
My Reliable Toolkit for a Mess-Free Job
You do not need a truck full of equipment, but you do need these specific items to guarantee a professional result every time you tackle a room with carpeting:
- FrogTape Green: I mentioned this before, but it is worth repeating. The PaintBlock technology is the only thing that actually stops wicking. It is the cornerstone of expert house painting tips for 2025.
- 5-Inch Stiff Putty Knife: Avoid the flexible plastic versions. You need the rigidity of steel to really compress the carpet pile down so the tape can slide under the wood lip safely.
- High-Lumen LED Work Light: This allows you to spot gaps in your tape seal that would otherwise be invisible in standard overhead room lighting, ensuring a total seal.
Stop Worrying and Pick Up the Brush
It is easy to feel overwhelmed by the technicalities, but remember that every pro started exactly where you are—staring at a roll of tape and hoping for the best. By following the tuck-and-tape method, you are already ahead of most DIYers. The satisfaction of pulling back that tape to reveal a razor-sharp line is worth every minute of prep work. Whether you are experimenting with innovative house painting ideas to refresh your living space or just freshening up a hallway, you now have the knowledge to do it right. Your house painting project deserves a finish that looks like it was done by a professional crew. Have you ever tried the tuck method, or do you have another secret for keeping paint off your rugs? Let me know in the comments below!