

I remember the frustration vividly. I had just finished painting my living room, feeling proud of the fresh, smooth walls. But then, I noticed it—those tiny, uneven patches where I had repaired drywall, glaringly obvious under the flat paint finish. No matter how carefully I applied subsequent coats, they refused to hide. It was a lightbulb moment for me—realizing how tricky it can be to conceal drywall patches when using flat paint. If you’ve ever faced this struggle, you’re not alone. The good news is, through a bit of trial, error, and practical know-how, I’ve discovered effective ways to make drywall repairs virtually disappear under flat paint. Today, I promise to share those secrets so you won’t have to live with visible patches or settle for less-than-ideal results.
The Challenge of Hiding Drywall Repairs with Flat Paint
Flat paint is a popular choice for many homeowners because it provides a sophisticated, non-reflective finish that can mask minor surface imperfections. However, it also makes any flaws, like drywall patches, stand out even more if not properly concealed. Early in my painting journey, I made a common mistake: assuming that just sanding the patch well and applying a couple of coats would do the trick. Turns out, drywall repairs can be stubborn, especially when painted with a matte finish that emphasizes texture differences rather than hiding them.
What I needed was a technique that would give my repairs a seamless look, matching the surrounding wall perfectly. After experimenting with different primers, sanding techniques, and paint mixes, I found that the key lies in the right preparation and application methods. This discovery didn’t just improve my painting projects — it transformed the way I approach any drywall repair. If you’re eager to learn how to hide those pesky patches under flat paint, keep reading. We’ll delve into proven strategies that help achieve a flawless, undetectable finish.
Is It Worth the Extra Effort for Flat Paint?
One of the biggest skeptics’ questions I hear is whether it’s truly worth investing extra time and effort into prepping drywall for flat paint. Honestly, I used to think that a quick sanding and some good paint would suffice. But I quickly realized that cutting corners results in patches that mock you every time you glance at the wall. The truth is, proper preparation—including priming and careful sanding—significantly enhances the flat paint’s ability to hide imperfections. I learned this the hard way early on, when I trusted DIY tips that recommended skipping primer. The result? My drywall patches looked even more glaring. For more advanced insights on professional painting techniques, I recommend checking out this resource.
Prepare Your Surface Like a Pro
Start with thorough sanding to create a smooth, even surface. I once rushed this step and ended up with patches showing through the flat paint—the mistake was a visible reminder of why preparation matters. Use a fine-grit sandpaper to feather the edges of the repair, blending it seamlessly into the surrounding wall.
After sanding, wipe down the area with a damp cloth to remove dust. Dust can cause your primer and paint to adhere unevenly, making patches stand out. Don’t skip this; clean walls are the foundation of a flawless finish.
Use the Right Primer for Flat Paint
Apply a high-quality stain-blocking primer specifically designed for matte finishes. A primer acts like a bridge, evening out differences in texture and color. I recommend a primer with built-in pigmentation—this reduces the number of paint coats needed and minimizes the risk of patches showing through.
When priming, use a brush for corners and a roller for large areas. Allow it to dry completely before moving to the next step. Think of primer as the primer coat on a canvas—without it, your artwork (or paint job) doesn’t stand a chance of looking professional.
Apply Flat Paint Carefully
Choose a high-quality flat paint with good coverage properties. For my project, I used a premium matte finish from a reputable brand, which made a noticeable difference. Use a roller with a nap size suited for your wall texture; typically, a ⅜-inch nap works well for smooth walls.
Apply the paint in thin, even coats—thin coats dry faster, level out better, and reduce streaks. I learned this the hard way during a past project, ending up with streaks and uneven patches. Patience here saves time in the long run. Avoid overworking the paint; multiple thin coats outperform a single thick one.
If the patch area still shows through after the first coat, apply a second coat once the first is dry. Don’t be tempted to rush; flat paint dries to a matte finish that emphasizes surface differences, so patience and layering are your allies.
Finish with Skilled Touches
Once the final coat is dry, lightly sand any imperfections with a very fine grit (like 400 grit). Then, wipe the wall clean. This step smooths out any minor inconsistencies, giving you a nearly invisible repair. I found that taking this extra step made my repairs indistinguishable from the rest of the wall.
For more advanced tips on painting techniques that elevate your home’s look, check out professional painting tips. Remember, patience combined with proper technique is your best strategy when working with flat paint to hide drywall patches effectively.
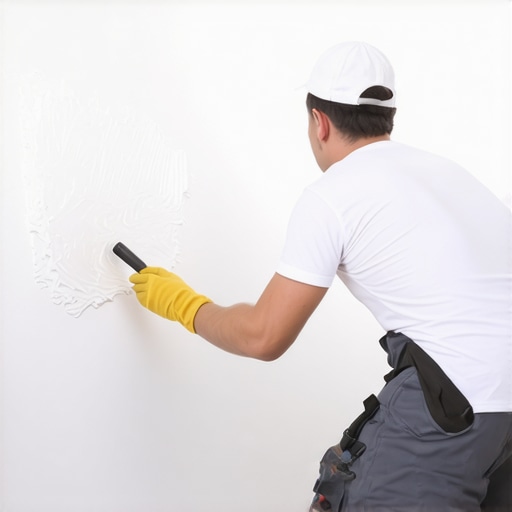
” alt=”Close-up of a painter applying primer on a wall” title=”Applying primer on Walls for a Flawless Finish”/>Many homeowners and even new painters often believe they understand the fundamentals of house painting, but in reality, there are subtle pitfalls and misconceptions that can undermine a project’s outcome. Let’s dig deeper into these overlooked aspects to elevate your painting proficiency. Contrary to popular belief, the choice of paint finish is not just about aesthetics; it also impacts how well imperfections are concealed. For instance, flat or matte finishes may hide surface flaws in certain contexts, but as I discovered, they can also accentuate uneven textures if not applied correctly. Many assume that a single coat is sufficient for good coverage, but professional painters know that multiple, thin coats combined with proper surface prep yield far superior results. **A common mistake is neglecting the importance of surface adhesion—skipping proper cleaning and sanding can lead to peeling or uneven coloration down the line, especially on high-traffic areas or surfaces exposed to moisture.**
For advanced practitioners, understanding the nuances of primer selection is crucial. Using a self-priming paint might seem convenient, but in reality, a dedicated primer can dramatically improve adhesion and color uniformity, especially when transitioning between different colors or covering stains. Studies have shown that proper priming can improve paint durability and appearance, saving time and money in the long run.
< h3 >What about the trap of relying solely on color samples?< /h3 >
Many rely on small color swatches or digital previews, but these can be misleading due to lighting conditions and surface texture differences. The real test is painting test patches in the actual space, observing how natural and artificial light affect the color throughout the day. This detail often separates amateur results from professional-grade finishes.
Plus, beware of the myth that expensive paints automatically mean better protection; there are cost-effective brands that outperform premium options when used with proper techniques. Always consider factors like weather resistance, VOC levels, and compatibility with existing coatings. External sources, such as the insights from industry experts, confirm that understanding the chemistry and properties of different paints can prevent costly mistakes.
Finally, managing expectations about drying times and recoat windows is more than just reading the label. Environmental factors like humidity, temperature, and airflow can significantly influence paint curing and adhesion. Rushing the process can lead to adhesion failure or an uneven surface. Professional painters often use fans, dehumidifiers, and controlled environments to optimize results, a practice worth emulating.
In summary, mastering house painting involves more than picking a color and slapping on a brush. It requires attention to surface prep, understanding materials, and anticipating environmental influences. These nuances distinguish casual DIY projects from professional finishes—and being aware of common myths helps you avoid costly mistakes. Want to dive even deeper? Check out why local painting truly matters or explore our professional tips for house painting. Remember, informed decisions lead to stunning results.
Keep It Working: Essential Tools for Long-Term Painting Success
Achieving professional-looking results isn’t just about the initial application; maintaining your painted surfaces over time is equally important. Having the right tools on hand makes all the difference. I swear by a high-quality paint sprayer, like the Graco Magnum series, because it offers consistent coverage and reduces brushstrokes, especially for large projects. For detailed work, a fine synthetic brush ensures clean edges without the streaks that cheap brushes often leave. When it comes to surface prep, a good electric sander with variable speed settings helps create smooth and uniform surfaces, making your paint last longer and look better. Regularly inspecting your tools and replacing worn-out parts prevents uneven application and saves you time and effort in the long run.
Choosing Software for Color and Project Planning
If you’re considering repainting multiple rooms or updating your home’s color scheme, leveraging digital tools can be a game-changer. Programs like Sherwin-Williams ColorSnap Visualizer allow you to preview color palettes in your actual space, helping you avoid costly mistakes. I personally use Home Depot’s Project Color app to experiment with shades before committing. Planning ahead with these apps ensures your chosen colors complement your furniture and lighting, and helps schedule the project efficiently, minimizing disruption. As technology continues to evolve, integrating these digital tools can streamline your project and enhance results.
Long-Term Results: Keeping Your Paint Looking Fresh
Protecting your painted surfaces involves more than just the initial coat. Applying a clear, matte varnish or sealant every few years can preserve color vibrancy and prevent scuffs. I recommend using a water-based polyurethane, which provides durability without yellowing over time. Regular cleaning is vital—use gentle solutions and avoid abrasive scrubbing to prevent the paint from deteriorating. Institute a routine inspection schedule to catch issues like peeling or cracking early on. Addressing minor problems promptly, such as touching up small chips or scratches, prevents these areas from worsening and guarantees lasting beauty and protection.
How do I maintain my painted surfaces over time?
Start with a gentle cleaning regimen using soft cloths and mild soap to remove dirt and dust. For high-traffic areas, consider applying an additional protective coating or gloss finish to resist stains and fingerprints. Periodic touch-ups with matching paint can seamlessly restore damaged spots, making your walls look like new. For best results, use a fine brush to apply touch-up paint, following the original application method. Also, avoid exposing painted surfaces to excessive moisture or direct sunlight, as these can accelerate fading or peeling. For guidance on selecting suitable primers or sealants for different environments, check out advanced house painting ideas. Lastly, always store your paint and tools properly—airtight containers and hanging tools in a dry, cool place ensure longevity and optimal performance.
Implementing these maintenance strategies, supported by the right equipment and digital planning, ensures your investment in house painting remains vibrant and durable. As trends lean toward eco-friendly and smart coatings, staying updated with industry innovations can help you adapt and improve your maintenance routine. For a detailed guide on elevating your home with professional techniques, explore professional painting secrets.
” alt=”A homeowner using a quality sander to prep walls” title=”Surface Preparation Tools for Lasting Paint”/>
The Costly Lessons I Overlooked When Painting with Flat Finish
One of the most valuable lessons I learned was to never underestimate the importance of meticulous surface preparation before applying flat paint. Skipping thorough sanding or primer application can transform what should be a seamless wall into a glaring mosaic of patches and imperfections. Also, I realized that even the best paint can’t hide flaws if the surface isn’t perfectly smooth and clean—I now always invest time in cleaning and sanding, which saves me headaches later. Finally, patience is key; applying thin, even coats and waiting for each to dry thoroughly consistently yields a near-invisible repair that matches surrounding walls perfectly. These insights transformed my approach, and I wish I had grasped them earlier in my DIY journey.
Tools and Resources That Elevated My Painting Game
Over the years, I’ve discovered certain tools and resources that make a real difference. A high-quality stain-blocking primer tailored for matte finishes is indispensable—without it, patches tend to show through regardless of how many coats I apply. For tools, a fine-nap roller and a good quality brush help create smooth, even layers that blend well—cheap tools often leave streaks and uneven textures. I also rely on digital apps like Sherwin-Williams ColorSnap to experiment with color schemes in my own space before committing, which has saved me from costly mistakes. Lastly, professional blogs and guides, especially those found on Elite Painter Pro, provide in-depth tips that go beyond the basics, helping me achieve truly professional results.
Your Next Painting Project Awaits—Stay Inspired
Remember, every brushstroke brings you closer to transforming your home into a space that reflects your style and care. Embracing patience, investing in quality tools, and continuously learning will elevate your flat paint projects from amateur to professional-looking. So, don’t shy away from tackling drywall patches—armed with the right techniques, you’ll make repairs nearly invisible and achieve a flawless finish. The joy of seeing your walls restored to perfection is well worth the effort. Now, are you ready to try these tips on your next painting project and surprise yourself with the results? Share your experiences or questions below, and let’s learn together.