

It was a chilly Saturday morning when I finally decided to give my living room a fresh coat of paint. Eager and a little overconfident, I rolled up my sleeves and started prepping the walls. But halfway through, I noticed something strange—tiny bubbles forming beneath the paint. My heart sank. Why was this happening? Turns out, I had ignorned a crucial aspect: humidity.
Many homeowners, like myself early on, underestimate how the moisture in the air can sabotage a painting project. The wrong humidity level not only leads to uneven finishes and bubbling, but can also cause paint to peel prematurely. It was a frustrating lesson, but one that taught me the importance of controlling my indoor environment.
If you’ve ever painted your living room only to be disappointed with the results—whether it’s streaks, blistering, or a dull finish—then understanding the ideal humidity range can save you time, money, and a whole lot of frustration. Today, I’m here to share what I’ve learned from personal experiments, expert advice, and a bit of trial and error about maintaining the best humidity levels for painting.
The Critical Role of Humidity in Painting
Humidity is one of those sneaky factors that quietly influences how paint behaves once it’s applied. When the air is too moist, paint can take forever to dry, leading to problems like uneven texture or unsightly bubbles. On the flip side, if it’s too dry, the paint might dry too quickly, leaving streaks or causing it to peel away from the wall.
According to a study from the *Master Painter’s Association*, maintaining a humidity level between 40-50% is optimal for most interior residential painting projects. This range helps the paint cure evenly, adheres well to the surface, and reduces the risk of surface defects. But temperature also plays a big part—ideally between 65-85°F—to complement the humidity.
Recognizing this, I began to think about practical ways to measure and control my indoor environment. Do you find yourself battling similar issues? Have you faced unexpected blemishes after painting? If so, you’re not alone. And understanding the science behind humidity can make all the difference.
For more insights on environmental factors affecting paint, check out this detailed guide on humidity and exterior painting: Humidity and Exterior Painting.
Getting a handle on the right humidity level is just the first step. Next, let’s explore how to measure and adjust your indoor moisture to ensure your paint job stands the test of time.
Measure Your Indoor Air Precisely
Start by checking your room’s humidity with a reliable hygrometer. I once tried painting my bathroom without measuring humidity; the result was streaky walls and peeling paint within months. Using an accurate device saved me from repeating that mistake. Place the hygrometer in the center of the room, away from windows and vents, to get a true reading.
Set a Target Humidity Range
Aim for a humidity level between 40-50% for optimal paint adhesion and drying. If your house measures above this, the paint will dry too slowly, risking bubbles and blistering. If below, rapid drying causes uneven textures. During winter, I found my home’s air was often too dry, so I used a humidifier. Conversely, in humid summer days, a dehumidifier kept moisture in check.
Use Proper Equipment to Control Moisture
Humidifiers and dehumidifiers are your best friends here. Place them in the room before painting begins, set to maintain the desired humidity. I recommend setting the device with a timer—run the humidifier when the air dips below 40%, and the dehumidifier if it rises above 50%. This automated approach helps create a stable environment.
Timing Is Everything: Paint During Ideal Conditions
Check the weather forecast to choose days with moderate humidity and temperatures between 65-85°F. In my experience, painting on humid days led to a bubbled wall that I had to sand down and repaint. If outdoor conditions threaten your efforts, consider installing temporary weather controls, like plastic sheeting, to stabilize indoor conditions.
Prepare the Surface Thoroughly
Before applying paint, ensure walls are clean, dry, and free from previous peeling or bubbling. A dusty surface traps moisture and causes adhesion issues. I used a damp cloth and allowed the surface to dry fully before painting, especially after adjusting humidity levels.
Test Before Committing to a Full Coat
Always do a small patch test. Wait 24 hours to evaluate whether the paint dries evenly and without bubbles. I tested on a hidden wall corner, which revealed that increased humidity levels could cause blistering, prompting me to adjust my environment accordingly.
Monitor and Adjust as Needed
Keep an eye on your hygrometer during the painting process. If humidity spikes or drops unexpectedly, pause and readjust your equipment. I learned this the hard way when a cold front moved through, causing my indoor humidity to plummet, making paint dry too fast and crack. Adjust your devices to keep consistent conditions.
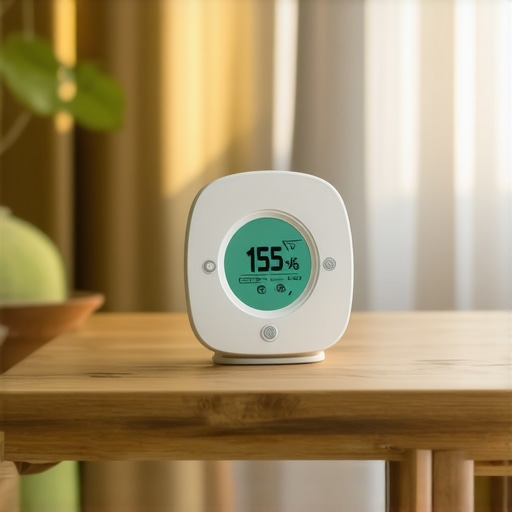
Visual representation of a hygrometer placed in a well-lit room showing a 45% humidity level, illustrating ideal conditions for painting.
Many DIY painters are often misled by common myths about house painting that can undermine their efforts despite basic knowledge. One of the most persistent misconceptions is that applying multiple coats is always necessary for perfect coverage. While it’s true that thicker coats may seem better initially, overapplication can trap solvents and lead to cracking or peeling later, especially if the underlying surface isn’t properly prepared. Experts emphasize that proper surface preparation and understanding paint chemistry are more crucial than sheer coats—more information can be found in detailed guides on primer and paint compatibility.
Another overlooked aspect is temperature’s nuanced impact on paint drying and curing. Many believe that painting in any warm, dry condition is ideal. However, excessive heat can cause paint to dry too quickly, resulting in brush marks or uneven texture; conversely, overly humid environments may prolong curing and cause surface defects. Maintaining stable conditions within a narrow temperature and humidity window is essential for professionals, as highlighted in industry research.
A common trap is neglecting to recognize the different properties of interior vs. exterior paints. Homeowners often assume that one type can be used interchangeably. In reality, exterior paints are formulated with UV inhibitors and weather resistance, making them unsuitable for interior walls that require better cleanliness and less sheen. Applying the wrong paint can lead to issues like early deterioration or unrealistic aesthetic finishes. Inside help guides recommend choosing products tailored to specific environments.
For advanced painters, understanding the importance of surface adhesion testing is vital. The simple tape test isn’t enough to guarantee a durable bond, especially on tricky substrates like glossy or previously painted surfaces. A more thorough approach involves a adhesion primer or testing small areas with different paints before committing to a full repaint. This precaution can prevent costly failures down the line.
Applying unproven techniques without expert guidance often leads to pitfalls that are difficult to fix later. For example, rushing through surface cleaning or ignoring the need for proper sanding can trap debris or create uneven surfaces, significantly affecting paint adhesion and longevity. In my experience, consulting detailed preparation procedures saves both time and money, preventing issues like peeling or discoloration.
The tricky part is that some myths, like the belief that all paint can be mixed together to create custom shades, are false. Mixing different brands or types of paint can result in unpredictable finishes and compromised durability. Experts recommend sticking to the same brand and formulation when blending to ensure consistency, as confirmed by paint manufacturers.
Finally, ignoring the importance of proper lighting during application can cause uneven coverage or missed spots. Natural light reveals the true color and texture, avoiding patchiness that might not be visible under artificial lighting. Learning to inspect your work meticulously during the process makes a significant difference.
Are you aware of these nuanced mistakes that can ruin your carefully planned paint job? Have you ever fallen into this trap? Let me know in the comments! To avoid more pitfalls, check out our comprehensive post on why your ceiling looks patchy when viewed from the side and other expert tips.Maintaining your home’s paint job over time requires more than just applying a good coat. Investing in the right tools and adopting precise methods can extend the lifespan of your paint, ensuring your walls look pristine for years. A reliable digital moisture meter, for example, is invaluable for detecting hidden dampness that may compromise adhesion. I personally prefer the Tramex Moisture Meter because it provides instant, non-destructive readings which help me verify that surfaces are sufficiently dry before painting or touch-up work. This way, I avoid issues like peeling and bubbling down the line.
Another essential tool is a high-quality handheld electric sander, such as the DeWalt Random Orbital Sander. It allows me to smooth out rough patches and prepare surfaces thoroughly before applying new paint coats. Proper surface prep not only enhances adhesion but also helps prevent long-term problems like cracks or flaking. I’ve found that investing in the right sandpaper grit—starting with 120 grit for smoothing and finishing with 220 for a fine finish—makes a noticeable difference in durability.
When it comes to maintaining painted surfaces, I recommend using a telescoping pole with a microfibre extension pad. This simple tool enables spot cleaning without the need for ladders or chairs, reducing the risk of damage to your walls and ensuring consistent cleaning, especially on high or tricky spots.
Looking ahead, the trend is shifting toward smart painting solutions; for example, fiber-optic inspection cameras are starting to be used for detecting moisture behind walls and assessing previous paint layers’ integrity—saving both time and guesswork. As technology advances, expect more AI-integrated tools to assist homeowners and professionals in monitoring paint health remotely.
How do I keep my paint looking fresh? Regular inspection and proactive touch-ups are key. Use your moisture meter periodically to catch any dampness early, especially in basements or exterior walls exposed to seasonal weather changes. When a section shows signs of wear, lightly sanding and applying a primer before repainting can considerably prolong the lifespan of your work. Remember, preparation is everything; well-maintained tools and diligent care will save you money and frustration over the long haul. For more detailed guidance, see our article on preventing paint from rubbing off during cleaning. Try using a moisture meter to monitor your walls this season—it’s a game changer for long-term results.
Lessons Learned From a Bubbly Wall
One of the most profound insights I gained was realizing how overlooked humidity truly is in the painting process. I used to think a fresh coat of paint was just about the right tools and paint type, but temperature and moisture can make or break your project.
My biggest lightbulb moment was remembering that every home has its unique environment. Embracing the use of a reliable hygrometer helped me understand my home’s specific needs. Now, I adjust indoor humidity proactively, which significantly improves my results.
Another lesson: patience pays off. Rushing a project without ensuring optimal conditions often led to defects like bubbling or peeling—costing me time and money. Now, I check weather forecasts and indoor levels regularly, and my finishes are smoother and longer-lasting.
Finally, I discovered that controlled environments are often the difference between a good paint job and a disaster. Investing in simple tools like humidifiers and dehumidifiers makes a tremendous difference, especially during seasons with fluctuating weather patterns.