

One summer morning, I stepped outside to start a fresh coat of paint on my home’s exterior, only to discover a sticky mess of tree sap splattered across the siding. My heart sank. I had spent hours preparing the surface, and now I faced a stubborn obstacle that threatened to ruin my project. That lightbulb moment made me realize how often homeowners overlook this pesky issue until it’s too late. If you’ve ever experienced the frustration of trying to paint over sap or worse, noticed it right before a big project, you’re not alone.
Why Removing Tree Sap Matters Before Your Exterior Makeover
Tree sap isn’t just an unwanted stain; it can seriously affect how your new paint adheres and lasts. Sap contains resins and sugars that can cause uneven coloring, peeling, or long-term damage if left untreated. Leaving it untouched might mean you’ll have to redo your work sooner than expected, wasting time and money. Plus, I learned the hard way—trying to paint over sap without proper removal often results in a finish that looks dull and patchy. Trust me, taking the time to clean it properly is well worth the effort, especially if you want that smooth, professional look.
Is it really worth the hassle, or just a waste of time?
Early on, I made a mistake by rushing to paint over fresh sap, thinking it would fade or come off easily. Spoiler alert: it didn’t. Instead, I ended up with patches that refused to stick and a job that looked amateurish. That’s why I emphasize the importance of properly removing sap before starting your painting project. It can seem daunting, but with the right tools and techniques, you’ll be amazed at how effortlessly you can restore your home’s curb appeal. For more expert advice, check out these professional house painting tips.
Scrape Excess Sap with Precision
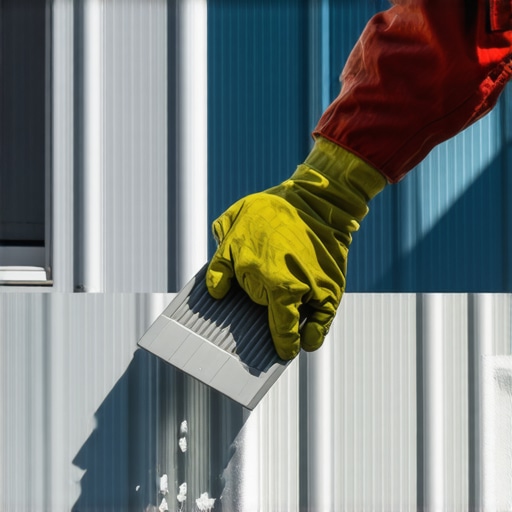
Start by gently scraping off thick, sticky sap using a plastic putty knife or a soft scraper to avoid damaging the siding. I once used a plastic card, similar to a credit card, to pry off larger chunks without scratching the surface. This initial step reduces the amount of sap that needs chemical treatment, making the cleaning process more efficient.
Apply a De-Glosser or Solvent
Next, use a commercial de-glosser or a solvent like mineral spirits. Dampen a clean rag with the solvent and gently rub the affected area in circular motions. Think of it as dissolving the sap like sugar in hot tea—gradually breaking down the resin bonds. Be sure to wear gloves and work in a well-ventilated space. I found that applying the solvent with a soft-bristled brush helped reach textured areas, ensuring thorough coverage.
Check for Effectiveness
After a few minutes, wipe the area with a clean cloth to check if the sap has loosened. If stubborn spots remain, reapply the solvent. Remember, patience is key; rushing can leave residues that compromise your paint job, as I learned when hurried cleaning resulted in uneven adhesion.
Use Gentle Cleaning Techniques
For residual residues, a mixture of warm water and a mild detergent can be effective. Use a soft sponge or cloth to gently scrub the surface, similar to cleaning a delicate piece of china. Avoid abrasive tools that can scratch the siding—scratches will trap more dirt and sap over time. Rinsing thoroughly with water removes any remaining solvent and soap, preparing the surface for priming and painting.
Dry and Inspect
Allow the area to dry completely before painting. To speed up drying, gently pat with a dry cloth or use a blower. Inspect the cleaned area for any missed spots or residue. My own experience taught me that skipping this step led to adhesion problems and blotchy paint, especially over textured surfaces that trap residues. Proper cleaning ensures your new coat adheres smoothly, resulting in a professional finish.
Remember, taking the time to properly remove tree sap is a crucial step that saves you time and money in the long run. For expert techniques and additional tips on local painting strategies, visit this resource. It will help you achieve the best results on your home improvement project.
Many homeowners believe that the key to successful house painting lies solely in choosing the right color or applying multiple coats. However, as an experienced painter, I can tell you that overlooking the finer details or common pitfalls can derail even the best-laid plans. One pervasive myth is that any paint will adhere well if the surface looks clean. In reality, subtle surface conditions like microscopic residues, surface porosity, or incompatible primer layers often trap moisture or prevent proper adhesion, leading to peeling or uneven finishes over time. Advanced techniques, such as proper surface profiling and selecting the ideal primer based on the substrate, can make a significant difference, as detailed in expert resources like this guide.
Another common mistake is underestimating the importance of environmental conditions. Many assume that painting on a slightly humid or overcast day doesn’t affect the outcome. Yet, humidity levels exceeding 50% can hinder paint curing, leading to blistering and longer drying times, especially with modern latex paints. An advanced mistake I often see is ignoring the nuances of paint chemistry—for instance, using exterior alkyds in conditions suited for water-based paints and vice versa. This mismatch can result in a brittle finish or color fading faster than expected, contrary to popular belief that all paints respond similarly across conditions. Research conducted by industry experts confirms that understanding the chemical formulation and environmental compatibility is crucial for longevity.
Why do some homeowners still struggle despite these insights?
The ‘oops’ factor here is often rooted in a neglect of proper surface preparation and understanding advanced product specs. For example, many skip the necessary adhesion tests, like the tape or scrape test, which can reveal hidden issues before painting begins. This oversight can cause failures that aren’t immediately visible but surface months later—an expensive lesson many learn the hard way. To truly elevate your house painting skills and avoid these traps, it’s worthwhile to explore local painting secrets, which include mastering surface prep, environmental timing, and product selection for specific conditions.
So, next time you plan to paint, remember that the devil is in the details. Ignoring the nuanced factors can reduce a project from professional to amateurish. Have you ever fallen into this trap? Let me know in the comments. Proper knowledge and attention to these advanced nuances will save you time, money, and frustration—and most importantly, deliver a stunning result that lasts.
#IMAGE_PLACEHOLDER_C#
}
Keep Your Investment in Top Shape with Proper Maintenance
Achieving and maintaining a stunning paint job requires more than just the initial brush strokes. Regular upkeep ensures your home’s exterior remains vibrant and protected against weather, dirt, and wear over the years. I recommend establishing a proactive maintenance routine that includes periodic inspections, gentle cleaning, and timely touch-ups. For example, using a soft wash with a mild detergent and a soft-bristled brush can remove dirt and prevent mold buildup, extending the lifespan of your paint. Additionally, addressing minor issues like cracking or peeling early before they worsen is crucial. This approach not only preserves your aesthetic appeal but also saves money in the long run, as delaying repairs can lead to more extensive—and costly—repairs later.
Essential Tools for Maintaining a Beautiful Finish
When it comes to upkeep, having the right tools is essential. I personally swear by a high-quality extendable pole brush, which makes cleaning hard-to-reach areas without climbing a ladder much safer and more efficient. For spot touch-ups, a fine synthetic brush corresponding to your paint’s finish—be it matte, eggshell, or semi-gloss—ensures precision and neatness. A spray bottle filled with a diluted mild detergent works wonders for preemptive cleaning; just spray and gently rinse off with a garden hose. For larger areas, a low-pressure power washer on the correct setting can be beneficial, but only if used carefully to avoid damaging the surface or stripping paint prematurely. Remember, always choose tools that match your project’s scope; overspending on heavy equipment isn’t necessary for small repairs or touch-ups.
Managing Long-Term Results and Scaling Up
Looking ahead, today’s maintenance habits set the foundation for the long-term beauty and durability of your paintwork. As your needs evolve—whether you’re updating color schemes or expanding your home’s exterior—it’s vital to have scalable strategies. Investing in durable tools like a professional-grade sprayer with adjustable pressure settings can simplify larger projects, making future repainting or touch-ups more manageable. Modern software solutions, such as project management apps tailored for homeowners, help schedule inspections and keep track of when to reapply protective coatings. The key lies in developing a routine that adapts to your home’s unique environment and your personal timeline. For inspiration on scaling your house painting endeavors, explore this guide.
Predicted Trends in Painting Maintenance and Tools
Looking to the future, innovations like smart paint sensors that monitor surface conditions in real-time are emerging. These technologies will enable homeowners to receive alerts when it’s time for maintenance, preventing issues before they become visible. Additionally, eco-friendly, long-lasting coatings are gaining popularity, reducing the frequency of repainting and repairs. Staying informed about these advancements ensures you’re prepared to adapt your maintenance routines accordingly and maximize your home’s aesthetic and protective qualities.
How do I keep my house paint looking fresh over time?
Implementing a regular maintenance schedule—cleaning with appropriate tools, inspecting for damage, and performing needed touch-ups—will help your paint last longer and look better. For more detailed techniques and recommended products, visit this resource. Try incorporating a gentle, periodic wash using a soft brush and mild detergent; it’s a simple yet effective step to keep your exteriors vibrant and protected for years to come. Remember, proactive care is the best way to preserve your home’s curb appeal and avoid costly repairs.
What I Learned the Hard Way About Surface Prep in Painting
One of the most overlooked yet critical aspects of house painting is thorough surface preparation. I once skimmed over this step and paid the price with peeling paint within a year. The lightbulb moment came when I realized that even the tiniest residue or uneven primer layer can sabotage your entire project. Now, I always spend extra time sanding, cleaning, and priming—it’s the secret sauce to a durable and flawless finish. This experience taught me that investing in proper prep isn’t a waste—it’s the foundation of professional results.
Tools and Resources I Swear By
Over the years, I’ve curated a set of tools and resources that make traditional house painting significantly easier. For example, a high-quality brush from this trusted source ensures smooth edges and minimizes drips. I also rely on insider tips on local strategies which save time and money. These tools and insights have transformed my approach from guesswork to confidence, turning a daunting task into a manageable art.
Why Giving Yourself Time Pays Off
In a hurry to finish, I used to rush the drying process, only to end up with smudges and uneven texture. It took a few learning experiences to realize that patience is truly a virtue in exterior painting. Allowing each coat to cure properly, especially in variable weather, creates a level of durability and appearance that shortcuts can never match. Now, I schedule my projects with extra drying time, and the results speak volumes—a durable, beautiful finish that lasts longer, with fewer touch-ups. Remember, when it comes to house painting, generous drying periods are an investment in longevity.
Real-Life Secrets for a Lasting Finish
Beyond the typical advice, I discovered that small tricks—like lightly sanding between coats or using specific primers based on siding material—make a huge difference. For textured surfaces, I adapt my technique with a thicker roller to avoid missed spots. Additionally, I always inspect and touch up high-traffic areas periodically, preventing minor issues from becoming major problems. These details might seem small but they compound into remarkable results. If you’re eager to elevate your painting game, check out this guide for more advanced strategies that stand the test of time.