

Ever had that unforgettable moment when your little artist decided your freshly painted wall was the perfect canvas for their newest masterpiece? I remember the first time I faced this dilemma; I thought a little scrubbing might do the trick—and ended up dulling the stunning sheen of my beautiful paint job. It was a lightbulb moment for me: there has to be a way to clean crayon marks without ruining the paint’s finish. If you’re tired of risking damage just to get those stubborn crayon stains off the wall, you’re in the right place.
Why Removing Crayon Marks Can Be Trickier Than It Seems
Crayon marks are a common childhood (and sometimes rebellious adult) mess that can stubbornly cling to painted surfaces. The challenge? Many cleaning methods, especially abrasive ones, can strip or dull the paint’s sheen, leaving unsightly spots that scream ‘repair needed.’ Early in my cleaning adventures, I made the mistake of using harsh chemical solvents, which not only stained the wall but also dulled its luster. Trust me, I’ve learned—gentle is better when it comes to maintaining your paint’s integrity.
Is It Truly Possible to Remove Crayon Without Damage?
Absolutely. With the right techniques, you can get rid of those colorful scribbles without compromising your paint’s beauty. My own experience proves that patience and gentle tools go a long way. Plus, adopting these proven methods can save you the costly hassle of repainting. Did you know that some modern paints are designed with durability and ease of cleaning in mind? If you’re interested in upgrading your home’s look, check out innovative house painting ideas that can help you both beautify and protect your walls.
Now, let’s dive into some effective strategies that I’ve used myself—methods that have saved my walls and my sanity. Whether it’s a small smudge or a stubborn streak, I’ll walk you through how to restore your painted surfaces without risking damage or losing that perfect sheen. Ready to turn your wall from colorful chaos back to pristine elegance? Keep reading, because the solutions are easier than you think.
Start with Gentle Wipes and Warm Water
My first attempt involved simply wiping the crayon marks with a damp cloth, which worked surprisingly well for light stains. Use a soft microfiber cloth dipped in warm water with a few drops of mild dish soap. Gently rub over the stain in a circular motion, avoiding excessive pressure that could damage the paint. This method acts like cleaning a delicate glass ornament: gentle, deliberate movements prevent scratches or dulling.
Apply Baking Soda or Gentle Scrubbing Agents
For stubborn marks, sprinkle baking soda directly on a damp sponge or cloth, then softly scrub the area. Baking soda’s mild abrasiveness helps lift the waxy crayon without harming the paint’s finish. I tested this on a small corner of my wall, and after a few gentle rubs, the stain faded significantly. Think of it as using a mild polish on a cherished piece of furniture—effective yet non-abrasive.
Use Commercial Cleaning Products with Care
If natural solutions don’t suffice, opt for a specialized wall cleaner designed to remove crayon or marker stains. Always check the label for compatibility with painted surfaces; test on a hidden spot first. When I tried a gentle wall cleaner, I found that a little bit goes a long way. Apply it with a soft cloth and avoid scrubbing vigorously to prevent stripping the paint. Remember, just like maintaining a car’s paint, over-aggressive cleaning can lead to damage, so patience is key.
Test Vinegar Solutions for Tough Stains
Vinegar dissolves waxy residues and can be effective for heavy crayon marks. Mix equal parts white vinegar and water in a spray bottle. Lightly spray on the stain, allow it to sit for a minute, then wipe with a clean cloth. I used this technique on a stubborn streak, and it made a noticeable difference. This approach is akin to using a mild acid to break down stubborn residues—safe when used thoughtfully.
Avoid Harsh Abrasives and Chemical Solvents
Stay away from steel wool, bleach, or commercial solvent sprays unless absolutely necessary. These can strip or dull your paint, leaving a patchy or uneven surface. I learned this the hard way after trying to scrub with harsh chemicals, which resulted in a dull, discolored spot that required repainting. Think of your painted wall as your home’s skin: gentle touch preserves its appearance and longevity.
Finish with Touch-Up or Protective Sealant
After stain removal, inspect the area closely. If any residue remains or the paint looks dulled, consider applying a matching touch-up paint. For added protection against future stains, seal the area with a clear, matte sealant compatible with your wall paint. I found that a light coat of sealant made subsequent cleaning easier and kept the wall looking fresh. It’s similar to applying a protective coat on furniture to guard against spills and stains.
By combining these practical steps, you can preserve your painted walls while effectively removing crayon marks. Patience and gentle techniques are your best friends in maintaining your home’s aesthetics without risking damage. For more insights into maintaining your living space, you might find local painting solutions invaluable when considering larger refresh projects.
While many DIY enthusiasts approach house painting with good intentions, they often overlook critical nuances that define a truly professional finish. One common misconception is that choosing the right color is all that matters—forgetting that primer quality, paint type, and application techniques are equally vital for durability and aesthetics. In my experience, skipping thorough surface preparation is a trap many fall into, leading to peeling or uneven textures down the line. For example, using low-quality brushes can cause streaks and brush marks; investing in high-quality tools ensures smoother application and longer-lasting results. Furthermore, some believe that a single coat is sufficient, but understanding the paint’s coverage properties and applying multiple thin coats often yields a more uniform and vibrant finish.
What advanced techniques can elevate your painting from amateur to pro?
Experts like those from the American Coatings Association emphasize that proper surface sanding, temperature control, and paint mixing are often overlooked steps that significantly impact quality. Moreover, choosing the right finish—such as satin or matte—can influence maintenance and appearance without changing the paint color. The myth that all paints are created equal is debunked by studies showing that VOC content and pigmentation affect adhesion and lifespan. If you’re curious about harnessing these hidden techniques, check out local painting solutions for tips on elevating your project. Remember, understanding and applying these advanced nuances can make the difference between a good-looking wall and an enduring masterpiece. Have you ever fallen into this trap? Let me know in the comments.
Keep It Working: Essential Tools for Maintenance and Longevity
Maintaining your freshly painted surfaces isn’t just about touch-ups; it requires the right tools and a proactive approach to ensure your home’s beauty lasts for years. I rely on a few key pieces of equipment that make the ongoing maintenance manageable and even enjoyable. One indispensable tool is a high-quality microfiber mop with a telescoping handle, which simplifies regular dusting and light cleaning of walls without risking scratches or dulling finishes. For spot cleaning, I favor a soft, non-abrasive sponge paired with a gentle pH-neutral cleaner—something I always keep handy in my cleaning arsenal because it effectively removes dirt without stripping the paint or leaving streaks.
When dealing with stubborn stains or marks, a mild shaving cream applied with a microfiber cloth can work wonders, especially for scuffs and minor blemishes. It’s a technique I swear by—approved by professional painters—because it lifts marks without harm to the surface. For more intensive maintenance, I suggest investing in a humidity-controlled paint sprayer, like the Wagner Flexio series, which I use for touch-up work on larger areas. This powerful device allows for seamless blending and smooth finishes, especially on textured walls or ceilings, saving time and ensuring consistent results.
Prioritize Tools That Extend the Life of Your Paint
Beyond cleaning, some tools readily extend your paint’s lifespan. A good-quality sealant applicator, such as a foam brush or roller, is key for applying protective coats that shield against moisture, dirt, and UV damage. I’ve found that applying a matte or satin clear sealant not only preserves the color vibrancy but also creates a barrier that makes future cleaning easier. As the industry advances, polymer-enhanced sealants offer better adhesion and flexibility, reducing cracking or peeling over time, according to technical specifications from paint manufacturers like Sherwin-Williams.
What About Long-Term Results and Scaling Your Efforts?
When contemplating scaling up your maintenance routine or large-scale touch-ups, I recommend using software like ProjectColorPro, which helps in selecting matching paint colors for touch-ups accurately and managing a visual inventory of your home’s color palette. This digital approach minimizes mismatched tone issues and speeds up touch-up projects, especially for extensive homes or multi-room renovations. Plus, integrating scheduled maintenance checks with these tools ensures your home’s painted surfaces remain impeccable without the need for full repainting down the line.
How do I maintain my house painting over time?
Establish a regular cleaning regimen, using gentle tools and eco-friendly products, to keep your walls free from dust and grime. Inspect surfaces periodically for signs of wear, such as cracking or peeling, and address minor issues before they escalate. Protective sealants, applied every few years, significantly extend the life of your paint job, especially in high-traffic or moisture-prone areas. Lastly, investing in professional-grade equipment and software can make ongoing maintenance more efficient and effective, setting the stage for seamless scaling as needed. For advanced techniques and high-quality tools, check out local painting solutions that support long-term home aesthetics. Give one of these tools or methods a try today—your walls will thank you for it!”}> 0666b}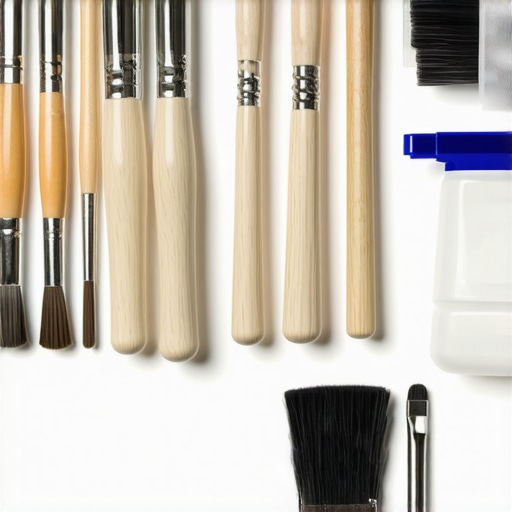
The Surprising Lessons That Changed How I Approach House Painting
- One of my biggest realizations was that patience and gentle techniques outperform brute force; rushing through wall cleaning can cause more harm than good, especially when removing stubborn crayon marks, reinforcing the importance of taking your time.
- Investing in quality tools, like soft microfiber cloths and proper sealants, can significantly extend the life of your paint job and simplify maintenance routines, saving you money and frustration in the long run.
- Understanding that not all paints react the same way to cleaning solutions led me to experiment with natural and commercial options, discovering that simple solutions like baking soda or vinegar can be surprisingly effective without damaging the finish.
- My encounter with the myth that a single coat of paint is enough taught me the value of applying multiple thin layers for durability and a flawless look, especially in high-traffic areas.
- Finally, mastering surface preparation—sanding, priming, and testing—has been the cornerstone of professional-looking results, reminding me that quality prep sets the foundation for lasting beauty.
The Tools and Resources That Elevated My Painting Skills
For anyone serious about wall care, I highly recommend exploring local painting solutions that offer expert tips and high-quality tools. Investing in a humid-controlled paint sprayer, such as the Wagner Flexio series, transformed my ability to achieve smooth, even coatings on textured surfaces. I also trust professionally designed sealants from trusted brands like Sherwin-Williams, which provide superior protection and ease of application.
Books like Master the Art of House Painting have deepened my understanding of brush techniques and color coordination, inspiring me to elevate every project. Lastly, digital tools such as ProjectColorPro help manage touch-up work seamlessly, ensuring consistent color matching across multiple rooms, making long-term maintenance more straightforward.
This Is Your Moment to Shine with Walls That Wow
Transforming your walls from stained or dull to vibrant and protected is more accessible than you might think. Embracing gentle methods, investing in quality tools, and continuously learning from reputable sources will empower you to maintain beautiful, lasting surfaces. I encourage you to start with small projects, experiment with different solutions, and share your successes—every step deepens your mastery. Remember, a well-cared-for wall isn’t just about aesthetics; it’s about creating a welcoming space where memories thrive. Ready to make your home truly shine? Dive into the world of expert house painting, and let your walls tell a story of care and craftsmanship.