

You know that sinking feeling when you peel back a stubborn layer of outdated wallpaper, expecting a smooth surface underneath but instead revealing gouged drywall or peeling paint? I’ve been there, tangled in paper that refused to budge without taking chunks of my wall with it. One afternoon, after hours of scraping and frustration, it struck me—there has to be a smarter way. Today, I want to share a game-changing approach, tested in my own home, to strip away 1980s wallpaper without destroying the wall beneath.
Why Removing Wallpaper Properly Matters
Why bother with these careful methods? Well, preserving your wall’s integrity saves you money, time, and headaches down the line. Damaged drywall or flaky paint can turn a simple refresh into a full-blown renovation. Plus, removing wallpaper isn’t just about aesthetic makeover—it’s about creating a clean slate for new paint or wallpaper, ensuring it adheres properly and looks professional. According to home renovation experts, improper removal can lead to uneven surfaces, peeling paint, and even mold issues if moisture gets trapped. So, treating your walls right from the start is essential.
Is Wallpaper Removal Really That Big of a Deal?
Absolutely. I once rushed into peel-and-scrape mode, thinking tough wallpaper meant brute force. Early on, I made the mistake of using sharp tools directly on the wall, which caused gouges and uneven textures. That regret cost me extra patching and repainting. Now, I understand that patience and proper prep make all the difference. For more professional tips on elevating your home’s curb appeal through better painting techniques, check out this comprehensive guide.
Prepare Your Walls Like a Pro
Start by clearing the room and covering floors with drop cloths. Use a utility knife to gently score the wallpaper surface, making small cuts without pressing too hard—think of it as lightly scratching a cat’s back to avoid scratching its skin. This helps moisture penetrate deeper easier. When I did this in my living room, I carefully scored only the wallpaper, avoiding deep gouges that could compromise the drywall’s integrity.
Choose the Right Solution and Apply It
Mix a solution of warm water and a few drops of dish soap or specialized wallpaper stripper. Using a spray bottle, saturate the wallpaper thoroughly—imagine watering a plant to soften the soil. Let it sit for 10-15 minutes. During my recent project, I sprayed in sections, using a paint roller for even coverage, which prevented drips and ensured better penetration. This soaking step is crucial to loosen the adhesive without brute force.
Peel Off the Wallpaper Carefully
Start at a corner or seam, and gently lift the edge with a putty knife or your fingers. Think of peeling off a sticker without tearing the paper—be patient and work slowly. If you encounter resistance, reapply the solution and wait. I found that using a plastic scraper reduced wall damage compared to metal tools. Do not force; if the paper resists, re-saturate and wait a few more minutes.
Manage Stubborn Areas Effectively
For areas that refuse to come off, re-saturate with your solution and cover with a plastic wrap or damp cloth to trap heat and moisture—similar to how a damp cloth helps loosen a tight jar lid. When I faced a stubborn patch on my bedroom wall, I left the wrap for about 20 minutes, which made peeling effortless and avoided tearing the drywall paper beneath.
Clean and Prepare for the Next Step
Once the wallpaper is removed, wash the walls with clean water and a sponge to remove any residual adhesive—think of rinsing a muddy shoe before stepping inside. Let dry completely before priming or painting. Skipping this step can lead to peeling paint or uneven surfaces, which is the last thing you want after all your effort. For detailed guidance on prepping walls for painting, check out this article on proper interior wall preparation.
When it comes to house painting, many homeowners are led astray by traditional beliefs that may do more harm than good. One widespread myth is that applying multiple thin coats is inferior to a single thick coat. In fact, thin coats dry faster, resist drips, and adhere better, leading to a smoother finish. Rushing through the process, expecting quick results, often results in uneven coverage and peeling over time. An advanced mistake is believing that brand-name paints guarantee a flawless job. While quality paint matters, improper application, preparation, and understanding surface nuances play a larger role. According to industry experts, even premium paints will fail if not applied correctly. Furthermore, many assume that outdoor paint can be used indoors or vice versa, but each formula is tailored for specific environments to handle moisture, temperature swings, and UV exposure. Beyond myths, some homeowners overlook subtle but vital steps, like thoroughly cleaning surfaces or choosing the right finish for each space, leading to issues like paint bubbling or premature wear. For a deeper understanding of what truly makes a paint job last, visit top expert painting tips for 2025. Remember, mastering these nuances can elevate your home’s aesthetic and longevity. Have you ever fallen into this trap? Let me know in the comments.Maintaining your home’s fresh paint and finishing jobs requires more than just selecting the right colors; it involves proper tools, routine upkeep, and an understanding of what prolongs your results. One essential aspect is choosing the right equipment that not only delivers professional quality but also makes the ongoing maintenance manageable. For example, investing in a high-quality extension pole, like the [Wagner Flexio Airless Spray Gun](https://elitepainterpro.com/transform-your-home-with-expert-house-painting-tips-for-2025), allows for quicker touch-ups on large wall areas without climbing ladders repeatedly, saving you time and effort. Regular cleaning tools such as microfiber cloths and gentle scrub brushes help remove dirt, dust, and mildew buildup that can degrade paint over time. Remember, a clean surface is crucial for repainting or touch-up work to adhere properly. When it comes to long-term results, applying an upscale, UV-resistant topcoat can significantly extend the life of exterior paints, especially in areas with harsh sunlight, as discussed in industry reports.
How do I maintain my paint job to last for years?
Routine inspections are key; look for peeling, chipping, or fading, and address small issues immediately before they escalate. Power washing is a highly effective way to clean exterior surfaces safely—utilize a soft spray setting and a proper nozzle to avoid damaging the paint. Additionally, integrating smart maintenance routines such as sealing cracks and filling gaps will prevent moisture penetration, which can cause paint bubbling and rot. Looking ahead, technological advances in eco-friendly, self-cleaning paints may soon reduce the need for frequent upkeep, transforming the way we preserve our walls. To stay ahead of the curve, consider trying the tip of reapplying a clear, protective coating every few years using a sprayer for uniform coverage. This proactive approach ensures your investment remains vibrant and intact for decades, aligning with expert advice available at innovative painting ideas. Mastering simple maintenance routines makes your home not only look pristine but also extends the lifespan of your paint work, preserving your curb appeal and interior charm longer. Ready to give your walls a fresh boost? Start by scheduling a quarterly inspection and applying a protective sealant as needed. Your future self will thank you! 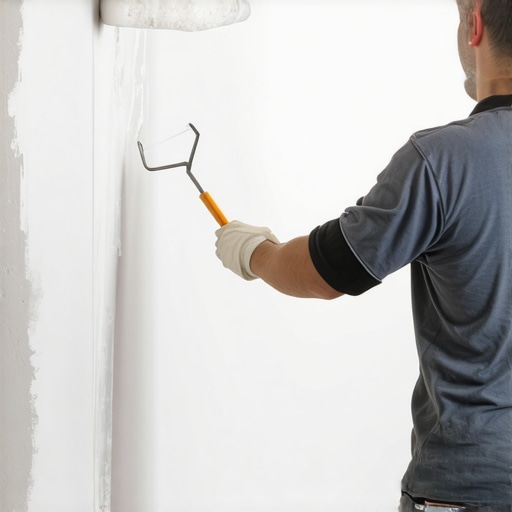
What I Wish I Knew Before Starting
One of the biggest lessons I learned is the importance of patience and preparation. Rushing often leads to wall damage or uneven surfaces, making the repaint or re-wallpaper process more complicated. Taking the time to score, soak, and gently peel saved me from costly repairs later on.
Another insight was understanding the type of wallpaper and its adhesive. Some wallpapers respond well to water-based solutions, while more stubborn options may require specialized strippers. Knowing this helped me choose the right method and avoid unnecessary frustration.
Also, I realized that proper wall cleaning after removal is crucial. Leftover adhesive can prevent paint from adhering smoothly, resulting in peeling or bubbling. Washing walls thoroughly with water and letting them dry ensures a clean, ideal surface for your next project.
Tools That Made the Difference
I found that quality tools like a plastic scraper, a spray bottle with a adjustable nozzle, and a wallpaper scoring tool made my job much easier. Investing in reliable tools saved me hours of hassle and reduced wall damage, which in turn saved money and stress.
Additionally, eco-friendly, commercial-grade wallpaper removers can make stubborn patches much easier to handle. I trust brands recommended by professional painters, which you can explore for more expert insights.
Transform Your Approach—And Your Walls
My biggest encouragement to you is to approach wallpaper removal not as a chore but as an opportunity to refresh and restore your walls. When you understand the nuances, you’ll find that the process becomes more manageable—and even satisfying. For a comprehensive plan to prepare your walls for painting afterward, check out this expert guide. Starting with the right mindset and tools sets the stage for a professional-looking finish that lasts for years. Are you ready to give your walls the care they deserve? Let me know your biggest wallpaper removal challenge below.”}}uraiSUPERHOST {