

It was a chilly spring morning when I realized I’d made a rookie mistake. As I watched my newly painted house gleam in the sunlight, I noticed something troubling—my beloved perennials, which I’d carefully nurtured for years, were starting to wilt and look battered. Turns out, I hadn’t considered how the house painting process could threaten my garden treasures. That lightbulb moment drove me to discover better ways to shield my plants, and now I want to share that knowledge with you.
Why Protecting Your Garden Matters During Exterior Painting
Perennials are more than just pretty plants; they’re a labor of love, a splash of personality in your yard. When it’s time to update your home’s exterior, the last thing you want is to see your garden suffer from overlooked precautions. Painting near your garden without proper protection can lead to chemical drips, overspray, and even direct contact with toxic fumes—all of which damage or kill your plants.
After my own experience, I realized how many homeowners inadvertently expose their gardens to harm. Protecting your perennials isn’t just about keeping plants healthy; it’s about respecting the effort you’ve put into your landscape. Fortunately, with some simple strategies, you can enjoy a fresh new look for your house without sacrificing your garden’s vitality.
As an expert in local painting strategies, I often share advice at local painting solutions that prioritize both home improvement and garden preservation. Trust me, a little planning goes a long way.
What’s the Biggest Skepticism About Protecting Your Plants?
Many homeowners wonder if it’s really necessary to take extra steps or if it’s overkill. Isn’t it enough to just paint around the garden? Or perhaps, will all this protection be too cumbersome? I get it—your time is valuable, and painting can already feel overwhelming.
Early in my journey, I made the mistake of thinking quick fixes would suffice. I didn’t cover my flower beds thoroughly and ended up with paint splatters that took months to remove. That mistake taught me a valuable lesson: proper protection saves time, money, and your treasured plants. To see a comprehensive approach, check out my guide on mastering house painting the right way.
Are you worried about your perennials surviving the next big paint job? Well, don’t worry. In the next sections, I’ll walk you through proven steps to safeguard your greenery, ensuring both your home and your garden flourish side by side.
Cover Your Perennials Before Painting Begins
Start with a clear plan to shield your plants. Use thick drop cloths or plastic sheeting, securing edges with painter’s tape, to create a barrier that blocks overspray. I once laid down a tarp over my rose bushes on a breezy morning, fastening it securely with bricks—resulting in no paint splatters and healthy plants afterward.
Create a Buffer Zone Around Your Garden
Establish a safe perimeter by installing temporary fencing or separating your garden with caution tape. This physical barrier alerts painters and keeps foot traffic, reducing accidental damage. During my last paint job, I set up a plastic curtain on stakes to create a perimeter, which kept my garden untouched despite nearby spray.
Use Proper Equipment for Precise Painting
Employ brushes and painters tape to avoid drips near delicate plants. When painting window frames, I used a fine brush and painter’s tape to create clean edges—preventing any accidental splatters on my perennials. For large surfaces, a sprayer with a controlled nozzle can minimize overspray if used carefully.
Schedule Painting During Optimal Weather
Opt for mild, windless days to reduce airborne paint particles that could settle on your garden. I once scheduled a project during a calm, overcast afternoon, which resulted in fewer paint particles reaching my garden beds. Always check the weather forecast before starting.
Clean Up and Remove Protective Materials Carefully
Once painting completes, gently remove tarps and tape, ensuring no paint or debris falls into your garden. I remember peeling back the plastic sheeting slowly, watching for stray paint drops—nothing hit my plants, and cleanup was quick. Afterward, wash off any residual dust or paint splatters from your garden to ensure plant health.
Regularly Inspect Your Garden Post-Painting
Follow up with a thorough check of your perennials after a few days. Look for signs of paint or chemical exposure and rinse with water if needed. I discovered a few small paint spots on a leaf and gently rinsed it off, avoiding any long-term damage. This proactive approach helps keep your garden thriving alongside your freshly painted home.
While many homeowners believe that the biggest mistake in house painting is choosing the wrong color or rushing the prep work, seasoned professionals understand there are deeper layers of nuance that can make or break a project. One common misconception is that quality paints alone ensure a flawless finish—that’s only part of the equation. Proper surface preparation, optimal weather conditions, and application techniques are equally critical, yet often overlooked. For example, applying paint directly onto a damp or unclean surface can lead to bubbling, peeling, and uneven textures, regardless of the paint’s quality. In fact, a study by the Paint Quality Institute highlights that surface prep accounts for roughly 80% of a successful and durable paint job.
Keep It Working: Essential Tools for Durable Painting Results
When it comes to house painting that stands the test of time, selecting the right tools is as crucial as the paint itself. I personally swear by high-quality, precision spray systems like the Graco Magnum ProX17, which allows for smooth, even application on both exterior and interior surfaces. This sprayer’s adjustable pressure and tip selection provide unmatched control, reducing overspray and improving finish quality—saving you time and rework. For detailed edging and tight corners, I rely on angled brushes such as Purdy’s 2½-inch >Quantum< series, which offers durability and precision, especially when working on intricate trims and window frames. 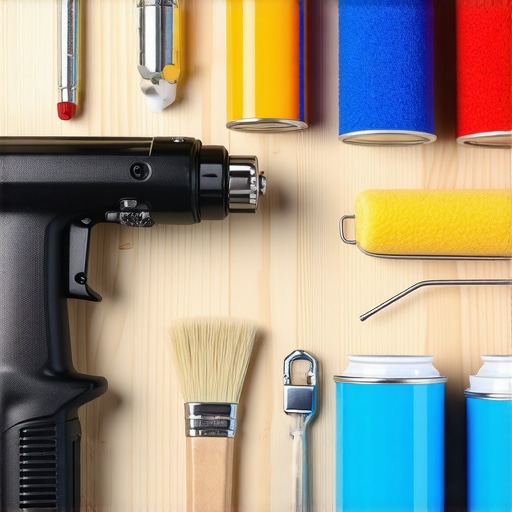
In addition, I use painter’s tape like 3M’s ScotchBlue Delicate Surface tape, which stays put without damaging surfaces but peels cleanly after drying. Proper masking ensures sharp lines and prevents accidental paint on unwanted areas, extending the life of your work. My other trusted tool is a high-nap roller like Wooster’s ¾-inch Gold Edge, great for textured surfaces—providing uniform coverage and minimizing streaks. Choosing the correct roller nap is essential, as it influences both application speed and film thickness, impacting durability.
For surface prep and maintenance, microfiber cleaning cloths are indispensable—they remove dust and residues without scratching. I also recommend investing in a quality extension pole for reaching high areas without ladders, improving safety and consistency.
Looking ahead, technological advancements such as low-VOC, Nano-coatings, and eco-friendly paints will further enhance longevity and environmental sustainability. Expect more brushless, cordless spray options and smart paint sensors to help you monitor dry times remotely.
**How do I maintain my painting tools over time?** Regular cleaning immediately after each use, using appropriate solvents or water depending on the paint, is critical. Drying tools thoroughly before storing prevents rust and prolongs their effectiveness. For spray guns, I recommend disassembling and cleaning nozzles and filters weekly, following manufacturer guidance to avoid clogs and ensure consistent performance. Proper maintenance ensures your tools remain in top shape to deliver professional results, saving you money and effort in the long run.
Don’t underestimate the value of quality equipment. Try upgrading your sprayer or brushes with high-end options—these investments pay off by enhancing durability, appearance, and ease of application. To explore more advanced strategies and equipment, visit mastering house painting with expert tips and take your projects to the next level.
Lessons Only Experience Can Teach About House Painting and Gardens
- Trust me, overlooking simple protections can lead to costly regrets—my own garden once bore the brunt of a rushed paint job, teaching me the importance of thorough prep.
- Timing is everything; scheduling your painting project during calm, mild weather isn’t just tradition—it’s a game-changer for plant safety and finish quality.
- Every tool has a voice. Investing in quality brushes, sprayers, and protective gear pays dividends in durability and precision, especially when safeguarding your garden.
Tools and Resources That Keep My Garden Safe and Stunning
- High-quality painter’s tape like 3M ScotchBlue—it’s gentle on plants yet sticks firmly during work, ensuring clean edges without damage.
- Reliable spray systems such as the Graco Magnum ProX17—for precise application that minimizes overspray onto your garden beds.
- Comprehensive guides from elitepainterpro.com—they’ve helped me develop a foolproof plan for protecting my plants and achieving a professional finish.
- Weather apps with real-time updates—for choosing the perfect days to paint, reducing the risk of chemicals reaching your garden.
Your Garden Deserves My Passion and Precision
Remember, safeguarding your perennials isn’t just a chore—it’s an extension of your love for your home and landscape. By applying proven strategies and arming yourself with quality tools, you can enjoy a stunning house and thriving garden simultaneously. Embark on your next project with confidence, knowing you’re giving your plants the protection they deserve. Ready to start? Share your biggest gardening protection challenge below—I’d love to help you find the perfect solution.