

I’ll never forget the moment I first took on a project to paint over wood paneling in my old living room. I was eager, full of energy, ready to transform that space into something modern and fresh. But as I rolled on the paint, I realized something was terribly wrong—the grooves and ridges of the paneling started to show through, turning my sleek new coat into a patchwork of imperfections. It was a frustrating sight that made me question if I’d wasted my time and money.
The Hidden Challenge of Wood Paneling
Wood paneling has been a popular choice for decades, thanks to its nostalgic charm and affordability. But when it comes to updating its appearance, many homeowners find themselves facing a common dilemma: how to paint over it without accentuating the grooves and seams. The truth is, traditional painting methods often fall short, leaving you with a less-than-perfect finish that betrays your effort.
Is Painting Over Wood Paneling Really Worth the Effort?
Early in my adventure, I made a classic mistake: I ignored the surface’s unique texture and just applied primer and paint like I would on a smooth wall. The result? The grooves, which I thought would disappear beneath the layers, actually became more prominent. That was my lightbulb moment—understanding that you have to work smarter, not harder. Today, I want to share what I’ve learned so you don’t have to go through the same struggle. With the right techniques, you can achieve a beautiful, smooth finish on wood paneling that looks professional and polished. When properly executed, painting over wood panels can dramatically boost your home’s aesthetic and even add value, as highlighted by experts who say that well-maintained walls significantly improve curb appeal (source). Now, let’s get into how you can do it without those aggravating grooves ruining the look.
Start with Proper Surface Preparation
Before applying primer or paint, clean the paneling thoroughly with a mixture of mild detergent and water to remove dust, grease, and grime. Use a sponge or cloth, and rinse with clean water. Once dry, inspect for any loose or chipped paint and sand these areas smooth using medium-grit sandpaper. Remember, a clean and smooth surface is the foundation of a professional-looking finish. I once spent hours trying to fix an uneven patch on my wall, only to realize I skipped the cleaning step, which caused the paint to cling poorly and highlight imperfections.
Apply a High-Build Primer for Wood Paneling
Choose a high-quality, stain-blocking primer designed for wood surfaces. Look for products labeled for paneling or cabinets, as they are formulated to fill in grooves and seams. With a roller and brush, apply the primer generously, working it into the grooves so that it fills gaps and creates a uniform base. I vividly remember using a thick primer on my previous project, which filled most of the grooves and made subsequent paint layers glide smoothly, dramatically improving the final look. For added coverage, consider applying two coats of primer, allowing proper drying time between coats.
Sand the Primer for a Smooth Canvas
Once the primer is fully dry, lightly sand the surface with fine-grit sandpaper (220 grit). Focus on any high spots or uneven areas. This step removes excess primer and ensures adhesion for the topcoat. Think of this as smoothing out the wrinkles before painting your masterpiece. During my last attempt, skipping this step resulted in a bumpy finish where the grooves still showed prominently, so don’t skip it if you want a flat, polished look.
Choose the Right Paint and Technique
Opt for a semi-gloss or satin finish paint, which provides durability and a slight sheen that helps conceal minor imperfections. Use a high-quality synthetic brush to reach into grooves and detailed areas, and a roller with a medium nap (3/8 inch) for larger flat surfaces. Apply the paint in thin, even coats, working from top to bottom. I learned this the hard way when I applied thick coats, which dripped and pooled in the grooves, making cleanup and sanding more difficult. Consistent, thin layers build up a smooth, durable finish.
Consider Applying a Second Coating
For the most professional appearance, allow the first coat to cure completely, then lightly sand again before applying a second coat. This extra step helps eliminate any remaining brush marks or unevenness. During my recent project, this method resulted in a mirror-like smoothness that rivaled professional paint jobs. It may take a little extra time, but the payoff is worth it—an impeccable finish that truly transforms the space.
Final Touches and Details
Once all coats are dry, inspect your work in different lighting conditions. Touch up any areas needing refinement with a small brush. For baseboards and trim, use painter’s tape to ensure clean edges. Remember, patience and attention to detail make all the difference in achieving a flawless, modern look. If you want to explore more techniques on local painting strategies, visit here.
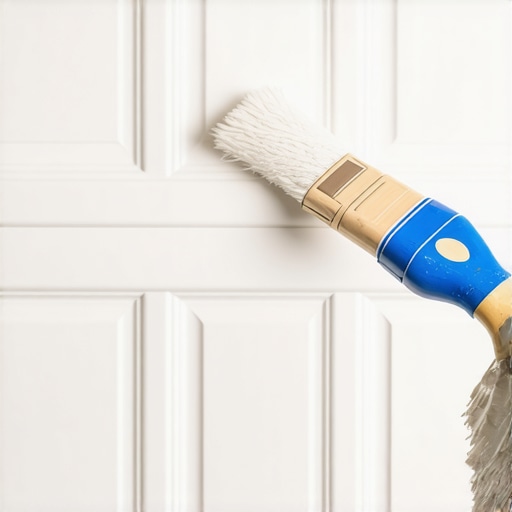 While many think that choosing the right paint color or applying a fresh coat is all it takes to elevate a home’s appearance, the reality is far more complex. One common misconception is believing that elaborate prep work isn’t necessary, leading homeowners to skip critical steps like thorough cleaning or proper surface sanding. This oversight can result in uneven finishes or premature peeling, undermining the entire effort. Experts like painting instructors emphasize that neglecting surface preparation is a primary cause of failure in house painting projects, as detailed in [this detailed guide](https://elitepainterpro.com/painting-your-home-top-local-painting-strategies-revealed). Moreover, there’s a myth that all paints behave similarly; in truth, using low-quality or inaccurate formulations can cause issues such as chalking or color fading, especially on exterior surfaces. Advanced painters understand that selecting a premium, appropriate primer—sometimes tailored to specific materials like metal or masonry—is crucial for durability and a high-end look, as highlighted in [this expert advice](https://elitepainterpro.com/why-you-should-never-paint-over-old-masonry-without-a-breathable-coating).
What Advanced Mistakes Do Even Experienced Painters Make When Choosing Techniques?
One nuanced trap involves over-relying on modern, fast-drying paints without considering long-term weathering patterns or the compatibility of topcoats and primers. For instance, applying latex over oil-based primer without proper adhesion promoters can cause bubbling or cracking down the line. Seasoned professionals advocate for understanding the underlying chemistry—knowing, for example, that oil-based paints adhere better to certain older substrates—an insight underpinned by research from industry leaders. This meticulous attention to materials and layering techniques can mean the difference between a mediocre and a breathtaking finish. Don’t fall into the trap of assuming that rapid results trump proper process; investing time in correct primer selection, surface preparation, and application techniques yields more lasting satisfaction and enhances your home’s value, as discussed in [this resource](https://elitepainterpro.com/why-local-painting-matters-boost-your-homes-value). Have you ever fallen into this trap? Let me know in the comments.
Keep It Working: Tools I Recommend for Durable House Painting
Achieving a flawless and durable paint job isn’t just about technique—having the right tools can make all the difference. Over the years, I’ve refined my toolkit to ensure every project stands the test of time. From surface preparation to finishing touches, investing in high-quality equipment improves efficiency and guarantees lasting results. Let’s explore some of the essential tools I personally rely on for house painting projects that last for years.
Surface Preparation Made Easy with the Right Equipment
Preparation is the foundation of long-term durability. A powerful, adjustable pressure washer is invaluable for thoroughly cleaning exteriors and removing old, peeling paint. I recommend models like the Sun Joe SPX3000, which offers variable pressure settings and different nozzles for versatile cleaning. For interior surfaces, a high-quality vacuum with a HEPA filter helps eliminate dust and debris from drywall and wood, providing a pristine surface for primer adherence.
Choosing the Best Painting Consistency with Professional-Grade Instruments
Mixing paint correctly is crucial. I suggest using a paddle mixer attachment that fits a cordless drill—this ensures uniform consistency, especially for thicker paints or custom-mixed colors. It saves time and prevents streaks or uneven coverage. When it comes to applying paint, I rely on high-performance sprayers like the Graco Magnum, which allows for fast, even coverage on large surfaces and reduces the risk of lap marks or drips.
Maintaining Tools to Extend Their Lifespan
Proper tool maintenance is an often-overlooked aspect of long-term results. After each project, thoroughly clean brushes, rollers, and sprayers with the appropriate solvents—like water for latex paints and mineral spirits for oil-based coatings. Regularly inspecting and replacing worn brush bristles or roller covers prevents uneven application and guarantees smooth finishes in future projects. Following manufacturer guidelines, such as those from Sherwin Williams, can prolong your tools’ lifespan significantly.
Technology’s Role in Modern Painting Projects
Advancements in digital tools are transforming how we plan and execute painting jobs. I USE specialized quality control apps like JobDock to track project progress, colors, and supplies. These digital solutions simplify project management and help avoid costly mistakes or oversights. Looking ahead, I predict that integrating augmented reality (AR) apps for visualization will become standard—enabling homeowners and painters to preview color schemes in real-time before opening a single can of paint.
How do I maintain painting equipment over time?
Regular maintenance is key. Clean sprayers immediately after use with appropriate solvents, and lubricate moving parts periodically. Store tools in a dry, covered environment to prevent rust and degradation. Replacing worn brushes or nozzles promptly ensures consistent application quality. Invest in quality storage solutions—like foam-lined cases or wall-mounted organizers—to keep tools organized and protected. These practices not only extend the life of your equipment but also ensure that every project delivers professional results like those showcased in local painting success stories.
Incorporating these tools and habits into your routine will significantly affect the longevity and quality of your painted surfaces. Don’t underestimate the power of professional equipment—try upgrading your spray gun or investing in a top-tier pressure washer to see the difference firsthand. Mastering the maintenance of your tools guarantees ongoing excellence in your house painting endeavors, making your investment worthwhile for the long haul.
Lessons from the Trenches: What I Wish I Knew About Local Painting
One of the biggest revelations I had was realizing that proper surface prep isn’t just a tedious step—it’s the secret sauce for lasting beauty. Skipping thorough cleaning and sanding often leads to peeling or uneven finishes that frustrate homeowners and painters alike. I learned this the hard way and now always prioritize surface preparation to get that smooth, professional look.
Another insight was the importance of primer selection. Using a high-quality, stain-blocking primer designed specifically for wood paneling transformed my projects. It filled in grooves and minimized imperfections, saving me endless hours of touch-ups and sanding. Don’t underestimate the power of the right primer—it’s the foundation for a perfect finish.
The myth that all paints are created equal couldn’t be further from the truth. Choosing durable, suitable paints in the right finish—like satin or semi-gloss—makes a significant difference in concealment and longevity. I’ve seen how a well-chosen paint can mask minor imperfections and withstand daily wear, boosting both aesthetics and home value.
My Toolbox for Lasting Results
A quality sprayer like the Graco Magnum has completely changed how I approach large surfaces, offering smooth, even coverage without brush strokes. Pairing it with quality brushes and rollers ensures consistent application, especially in tricky corners or textured walls. Regularly maintaining my tools—cleaning and inspecting—has extended their lifespan and kept my finishes sharp.
For project management, I rely on digital apps like JobDock to track colors, costs, and progress. These tools help me stay organized and avoid costly mistakes, ensuring clients get the best results every time. Incorporating the latest technology into my workflow isn’t just a luxury—it’s a necessity for modern, efficient house painting.
Embrace the Challenge and Transform Your Space
Remember, decorating your home with paint isn’t about perfection—it’s about progress and enjoying the journey. Every project teaches us something new, and with patience and the right techniques, you can master the art of house painting. Don’t shy away from trying new methods or investing in quality tools; the reward is a stunning transformation that reflects your hard work and attention to detail.
What step in your painting process do you find most challenging? Share your experiences below and let’s learn from each other!
**Disclaimer:** This article is for educational purposes and does not replace professional advice. For complex projects, always consult with a certified house painting expert.