

I remember the first time I tried to freshen up a room with shiny, high-gloss trim. I thought a quick coat of paint would do the trick — simple, fast, satisfying. But hours later, I was still battling stubborn, uneven surfaces, and the gloss was fighting me every step of the way. It was like trying to write on a mirror with a dull pencil. Sound familiar?
Why Tackling High-Gloss Trim Can Feel Like an Impossible Task
High-gloss finishes are notorious for their shining, smooth surface. They reflect light and hide imperfections, which is great when you’re aiming for a sleek look. But when it comes to repainting without the hassle of endless sanding, that shiny coating becomes an obstacle. The paint refuses to adhere properly, leading to peeling, chipping, or a patchy finish. I used to think I had to sand every inch until my arm was sore, and honestly, that felt like a punishment.
But what if I told you there’s a smarter way?
Today, I want to share proven techniques I’ve picked up over years of frustration, mistakes, and finally, success. By understanding what makes high-gloss trim such a pain and knowing the right approach, you can skip the endless sanding and still get a durable, beautiful finish.
For a long time, I believed that sanding was the only solution to ensure paint stick and last. I’d start with coarse grit, hoping to rough up the surface, but honestly, I’d end up with dust everywhere and still not achieve perfect adhesion. That was a mistake I made early on — thinking that mechanical abrasion was always necessary when, in many cases, proper surface preparation can be achieved with less effort.
Did you know that many professional painters avoid unnecessary sanding by using specialized primers? According to industry experts, a high-quality bonding primer can create a perfect surface even on slick, high-gloss finishes, allowing you to paint over without the grind. To learn more about transforming your home efficiently, check out [this guide on expert house painting tips for 2025](https://elitepainterpro.com/transform-your-home-with-expert-house-painting-tips-for-2025).
In the sections ahead, I’ll walk you through how to prep your trim correctly, choose the right products, and finally, get that smooth, lasting finish without turning your project into an all-day ordeal. Ready to make your high-gloss trim look fresh and flawless — without sanding until forever? Let’s get started.
Clean and Degrease Thoroughly
Start by wiping down the trim with a damp cloth to remove dust, dirt, and grease. For stubborn grime, use a mixture of warm water and a few drops of dish soap. I once ignored this step and ended up with paint peeling off in patches, so don’t skip this crucial cleaning stage.
Remove Surface Oils with a Mild Cleaner
High-gloss surfaces often have residual oils that hinder paint adhesion. Use a degreasing cleaner or a mixture of isopropyl alcohol and water to wipe down the trim. Think of it like priming your skin before applying makeup — it creates a clean canvas.
Light Sanding for Better Grip
Lightly sand the glossy surface with fine-grit sandpaper (220-grit). This isn’t about removing all the high shine but just dulling it enough for the primer to grip. Remember, you’re not trying to sand it to raw wood, just enough to create tiny scratches for the primer to latch onto.
Tip: Use a sanding sponge or block for flat, even pressure, and avoid creating gouges. I once used a power sander on trim and ended up with uneven patches — a mistake to avoid.
Apply a High-Quality Bonding Primer
Choose a bonding primer designed for slick surfaces, like Zinsser Bondz or Kilz Max. Prime the entire trim, making sure to cover every inch evenly. Trust me, this step is a game-changer; it bridges the glossy finish and your new paint, much like a translator facilitates conversation between two different languages.
Follow with Your Chosen Paint
Once the primer is dry (usually 1-2 hours), apply your paint of choice. Use a brush with synthetic bristles for precision and smoothness. For the best results, avoid thick layers — multiple thin coats yield a better finish. I remember rushing the second coat and ending up with brush marks; patience here makes all the difference.
Final Tips for Success
Allow ample drying time between coats as specified by the manufacturer. If you want an even smoother look, lightly sand with very fine grit between coats. And don’t forget to protect your work with painter’s tape and drop cloths to avoid accidental dings or drips.
This proven process saves you from endless sanding, reduces frustration, and delivers a professional-looking, durable finish. Remember, proper prep is the secret to transforming your high-gloss trim into a stunning feature. For more expert tips on house painting, check out this comprehensive guide.
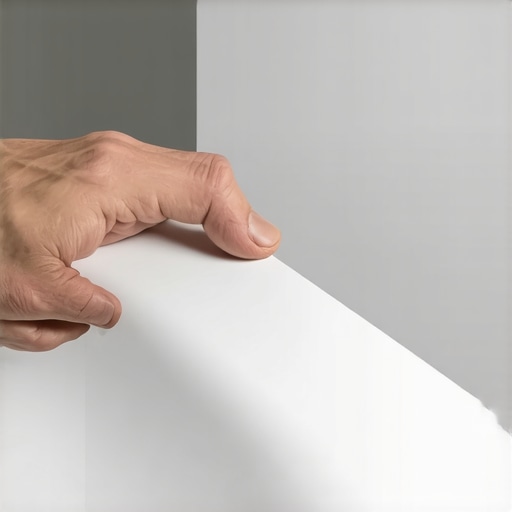 When it comes to house painting, many assume that a fresh coat of paint simply involves choosing a color and slapping it on the wall. However, this oversimplification often leads to disappointing results, and understanding the nuanced aspects of painting can make the difference between a professional finish and a costly mistake. Let’s dig deeper into what most people overlook.
One common myth is the belief that using any primer will do the job. In reality, the selection of primer is critical; a generic primer may not adhere well to glossy surfaces, leading to peeling or uneven coverage. Industry experts emphasize the importance of using a bonding primer specifically designed for slick surfaces, such as Zinsser Bondz or Kilz Max, to ensure durability and a smooth finish. For more insights on selecting the right products, visit this guide on professional painting techniques.
Another misconception is that prepping involves only cleaning the surface. But in reality, improper preparation can undermine the entire project. For instance, many are unaware that light sanding, especially on glossy trim, significantly improves paint adhesion. Using fine-grit sandpaper (around 220-grit) to dull the surface avoids the need for endless sanding and prevents future peeling. Remember, proper surface preparation is more than just cleaning; it’s about creating an ideal bond between surfaces and paint.
A widespread mistake involves applying multiple thick coats of paint, believing it will save time. This approach often results in drips, uneven texture, and longer drying times. Instead, applying multiple thin coats and allowing each to cure properly produces a more professional, long-lasting finish. Light sanding between coats with fine grit can further smooth out imperfections. For advanced tips on achieving a flawless look, check out mastering the art of house painting.
What about the timing of painting? A common oversight is painting in improper weather conditions — too hot, cold, or humid. Excessive moisture can cause paint to bubble or fail to cure properly, leading to cracking or peeling down the line. According to studies by the Painting and Decorating Contractors of America, ideal conditions involve moderate temperatures and low humidity. Planning your project around suitable weather is crucial for a flawless outcome.
Finally, many DIY painters underestimate the importance of lighting when assessing their work. Poor lighting can hide defects like uneven coverage or drips, giving a false impression of perfection. Always inspect freshly painted surfaces under natural or bright artificial light to catch mistakes before it’s too late.
Making these advanced considerations ensures your painting project not only looks great initially but stands the test of time. Have you ever fallen into this trap? Let me know in the comments. For more expert strategies on transforming your space, explore local painting solutions for every budget.Maintaining your painted surfaces requires the right tools and consistent care to ensure longevity and appearance. I personally swear by a high-quality microfiber cleaning cloth combined with a soft scrub brush for routine cleaning, as these tools effectively remove dust and grime without damaging the paint, unlike abrasive sponges. Investing in a good paint sprayer, such as the Wagner Flexio 5000, simplifies touch-ups and detailed work, especially in hard-to-reach areas, and saves me hours compared to brushes. When it’s time for a refresh, I recommend using a liquid deglosser like Krud Kutter, which prepares surfaces by removing gloss without the need for extensive sanding, aligning with professional recommendations for less labor-intensive maintenance. Plus, a sturdy extension pole can turn your standard tools into more effective reach devices, giving you better control and reducing fatigue. As trends move toward eco-friendly solutions, I predict a rise in low-VOC cleaners and tools that combine efficiency with sustainability. How do I keep painted surfaces pristine over time? Regular inspections, prompt touch-ups to chips or scuffs, and routine cleaning with gentle tools are key. Remember, a well-maintained finish not only looks good but also resists wear and damage longer, saving you money in the long run. For deeper insights into protecting your investment, check out the wide array of local painting resources and solutions designed to fit your budget.
Lessons I Still Carry After My Worst Painting Fumbles
One of the biggest realizations I had was that rushing into repainting high-gloss trim without proper prep only leads to frustration, wasted time, and subpar results. I learned the hard way that patience, the right products, and proper technique are worth every minute spent—especially when working on slick surfaces. If I could go back, I’d tell myself to skip the unnecessary sanding and focus on surface preparation with a high-quality bonding primer, transforming the project from a dreaded chore into an achievable task.
Another insight is that small tweaks, like cleaning with isopropyl alcohol and lightly sanding with fine grit, make a huge difference in adhesion and final appearance. No more battles with peeling or uneven coats—just smooth, durable, and professional-looking trim that enhances my space. These lessons turned my painting from a nightmare into a satisfying craft, and they can do the same for you.
Tools and Resources That Changed My Approach
Over the years, I’ve relied on some game-changing tools and references. The expert house painting tips guide opened my eyes to advanced techniques that save time and improve quality. A good bonding primer like Zinsser Bondz has become my go-to for slick surfaces, ensuring paint sticks without endless sanding. For versatile tools, a Wagner Flexio 5000 paint sprayer allows for quick, even coverage—making touch-ups and large projects less daunting. Lastly, ongoing learning from trusted sources keeps my skills sharp, helping me deliver results that rival professionals.
Empower Your Home Transformation Journey
Picking up a brush or roller might seem simple, but the true mastery lies in understanding surface nuances and applying the right materials with patience. Don’t let the fear of high-gloss surfaces hold you back; with the right prep, products, and attitude, you can achieve pristine, long-lasting results that boost your home’s beauty and value. Every project is an opportunity to learn, improve, and take pride in your work. Ready to tackle your next painting adventure? Remember, your eyes and effort are your best tools—trust them and enjoy the process.