

I stood in the doorway of my spare bedroom, paint tray in hand, staring at what I thought was a masterpiece. I’d chosen a deep, velvety charcoal for the far wall, convinced it would add “depth.” Five hours later, the room felt like it had physically shrunk by three feet. It was oppressive, like the walls were leaning in for a secret. I’d made the cardinal sin of innovative house painting gone wrong: I hadn’t accounted for the visual weight. If you’ve ever felt that instant “oh no” regret after the first coat dries, believe me, I’ve been there. I know that sinking feeling in your stomach when you realize your weekend project just made your favorite room feel like a walk-in closet.
Why Your Last Bold Paint Choice Might Have Felt Like a Mistake
Choosing a color is only half the battle; the other half is understanding how that color interacts with your square footage. When I first started out, I thought any wall was a good candidate for an accent. I was wrong. I once painted a wall in a narrow hallway bright orange, thinking it would “warm it up.” Instead, it made the hall feel like a tunnel. We often forget that mastering the art of house painting requires looking at the room as a whole system. If you pick a wall that’s already cluttered with furniture or lacks a window, a dark color will swallow the light and pull the wall toward you. This is why expert house painting advice often emphasizes balance. Today, I’m going to share the exact framework I use now to ensure every accent wall adds character without sacrificing space. We’re going to talk about light-reflective values, the “continuous floor” trick, and why your accent wall might be clashing with your existing decor.
Will a Dark Color Actually Make My Room Feel Like a Cave?
This is the number one fear I hear from neighbors and friends. “I love navy, but my living room is tiny!” Here’s the reality: dark colors don’t actually shrink rooms; poorly placed lines and lack of contrast do. My biggest mistake early on was ignoring the ceiling height and the trim. If you don’t use the only way to get a sharp line between your wall and woodwork, the transition looks messy, which creates visual “noise” that makes a room feel cluttered. Have you ever faced this specific problem where a color looked great on the swatch but felt like a dungeon on the wall? Tell me about it! I want to help you avoid the frustration of repainting. Interestingly, a study published by the University of Texas found that color saturation can influence our perception of distance, meaning a well-placed dark wall can actually make a room look longer if handled correctly. It’s about leveraging local painting secrets to create an illusion of depth where none exists. Before you pick up that roller, let’s dive into how to avoid the “lap marks” that ruin the finish and learn the trick to painting large rooms so they stay looking open and airy.
Check the Secret Number on Your Paint Chip
Before you even crack the lid on a gallon of paint, you have to look at the back of the color swatch for the LRV, or Light Reflective Value. It’s a scale from 0 to 100, where zero is absolute black and 100 is pure white. If you’re painting a small room and pick a color with an LRV below 40, you’re basically installing a sponge that soaks up every bit of natural light. I learned this the hard way in a cramped guest suite where I used a deep forest green. By noon, the room felt like a basement because the walls weren’t bouncing any light back. This is exactly why your commercial office needs light-reflective value assessments just as much as your home does. If the LRV is too low, you have to compensate with massive amounts of artificial lighting, or the space will feel biologically ‘off.’
Stop the Shadow Before It Swallows Your Space
To prevent that ‘cave’ feeling, you must observe how the sun travels through the room. A color that looks like a soft dove gray at the store can easily shift into a muddy lavender depending on the time of day. This is the phenomenon of why natural sunlight changes the way your gray paint looks. I always tell people to paint a large 2-foot by 2-foot sample directly on the wall and watch it for 24 hours. Don’t just look at it at noon; look at it when the lamps are on at 8:00 PM. 
The Only Way to Get Crisp Edges Every Time
Most people think a steady hand is the secret to a professional look, but it’s actually in the prep. If your transition between the accent color and the white ceiling is jagged, it draws the eye to the corner, making the ceiling feel lower. I remember my first ‘big’ job where I skipped the tape and tried to freehand the corner; the line looked like a mountain range, and the whole room felt chaotic. Now, I use the only way to get a sharp line: I apply a thin bead of paintable caulk over the edge of my tape, wipe it tight, and paint immediately. When you pull that tape, the line is laser-straight. This lack of visual ‘noise’ is what makes a room feel professionally designed and spacious.
Why Your Floor Dictates Your Paint Color
You cannot pick a wall color in a vacuum. Your flooring acts as a giant reflector that bounces its own tint onto your walls. If you have warm wood floors, a cool blue wall will often look ‘sickly’ because the orange tones of the wood fight the blue of the paint. This is a primary reason why your accent wall might be clashing with your existing environment. If you’re stuck with older finishes, you need to learn how to choose a paint color that works with honey oak trim or similar warm tones. The goal is to find a color that complements the floor’s undertones rather than creating a visual war at the baseboards. Finally, when you start rolling, always maintain a ‘wet edge.’ If you let one section dry before overlapping the next, you’ll end up with those ugly vertical stripes. Use the trick to painting large rooms without leaving lap marks by working in small sections and never letting the roller get too dry. Think of it like mowing a lawn; you want a slight overlap with every pass to ensure the sheen is perfectly uniform.
The Expensive Paint Myth
Most people think that walking into a high-end store and buying the most expensive gallon on the shelf guarantees a perfect finish. It doesn’t. In my experience, even the most premium products fail if you don’t understand the substrate. For instance, many DIYers are shocked when their budget is blown because your new drywall is drinking your paint so fast. The paper and joint compound of fresh drywall have different porosities, and without the right sealer, your topcoat will look blotchy regardless of the price tag. This is where mastering the art of house painting goes from being a hobby to a science.
Is Your Wall Secretly Working Against the Bond?
One of the most sophisticated mistakes I see involves moisture levels that the naked eye simply cannot detect. The USDA Forest Products Laboratory suggests that for optimal paint adhesion, the moisture content of wood or drywall should be below 12%. If you live in a humid climate and jump the gun, you are essentially trapping water behind a film. I’ve seen homeowners face the nightmare of exterior paint bubbling just weeks after application because they didn’t wait for a dry spell. Before you start, you should always check if your drywall is too damp for the first coat using a simple pinless moisture meter. Have you ever fallen into this trap of painting too soon after a storm or a humid day? Let me know in the comments! 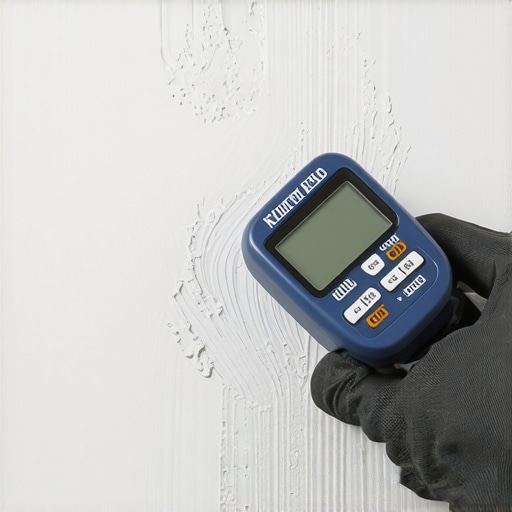
Don’t Let High Gloss Reveal Your Walls’ Secrets
There is a common belief that high-gloss finishes are the gold standard for durability. While they are easy to clean, they are also incredibly unforgiving. If you have an older home with settled walls and minor plaster imperfections, high gloss paint is a nightmare for older walls because the sheen acts like a spotlight on every bump and crack. Instead, the pro move is to use local painting secrets like choosing a ‘satin’ or ‘eggshell’ finish that masks defects while still providing washability.
The Invisible Chemical War on Your Trim
The ‘Oops’ factor often happens when we ignore what was painted before us. If you try to put a modern water-based latex directly over an old oil-based finish, the new layer will literally peel off in sheets within months. You must learn how to successfully paint over oil-based finishes with water-based paint by using a bonding primer. Skipping this step is why using the wrong primer causes your trim paint to chip at the slightest bump. These nuances are why local painting matters to boost your home’s value; a professional-grade finish is built on layers of correct chemical bonds, not just a pretty color. If you’re feeling overwhelmed by the technicalities, you can always contact us for a consultation to ensure your next project is a success.
Why I Only Carry Three High-End Brushes to Every Job
I used to be the guy who bought the $5 multi-pack of brushes at the hardware store, thinking I was saving money. It was a lie. Those cheap bristles fall out and get stuck in your wet finish, and they don’t hold enough paint to create a smooth stroke. Now, I swear by a 2.5-inch angled sash brush made of a synthetic nylon-polyester blend. This specific tool allows me to master the art of house painting because it provides the right amount of ‘flex’ for cutting into corners. If you want a professional look, you have to invest in professional gear. But buying them is only half the battle; you need to learn the trick to keeping your paint brushes soft for years. I never let paint dry past the halfway point of the bristles, and I use a dedicated stainless steel brush comb during the cleaning process. Many people reach for harsh chemicals when they’re done, but you should know why you should avoid using cheap white spirit for cleaning brushes. It strips the natural oils from the bristles, making them frizzy and useless for your next project. 
How can I make my house painting results last for a full decade?
The secret isn’t a magic paint brand; it’s a dedicated maintenance schedule. According to the Painting and Decorating Contractors of America (PDCA) Industry Standard P1, proper surface preparation and post-application care are the only ways to prevent premature coating failure. For exteriors, this means a low-pressure wash every two years to remove salt and mildew that eat away at the binder. If you stay on top of it, you can maintain your newly painted exterior for ten years or more without needing a full scrape and prime. Indoors, it’s about choosing the right sheen for the right room. If you’re working with tight finances, transforming spaces with local painting solutions for every budget often means spending slightly more on a washable matte finish for high-traffic areas so you don’t have to repaint every time a scuff appears.
The Future of Your Walls is Getting Smarter
We are moving toward a world where paint does more than just look pretty. I’m already seeing a shift toward ‘cool-roof’ technology and self-cleaning exterior coatings that use photocatalytic reactions to break down organic dirt. In the next few years, I expect we’ll see widespread use of AI-driven apps that don’t just show you a color, but calculate the exact fading rate based on your home’s GPS coordinates and sun exposure. This level of the ultimate guide to house painting to boost curb appeal will make the guesswork of 2025 look like the dark ages. For now, my best advice is to stop viewing painting as a ‘one-and-done’ event and see it as an investment in your home’s envelope. If you’re ready to step up your game, I challenge you to try the ‘caulk-over-tape’ method on your next trim project; that single pro-level move will change how you feel about your DIY capabilities forever.
The Hardest Lessons I Learned While Holding a Paint Roller
Spending years with a brush in my hand taught me that the most expensive mistakes aren’t the ones you make with the paint, but the ones you make with your timing. First, never trust your memory for a color; always buy a sample pot because a tiny swatch in a big room is a recipe for regret. Second, the weather is your boss. I’ve seen homeowners rush a project only to face exterior paint bubbling just weeks after application because they ignored the humidity. Finally, remember that your home is a living environment where the floor, furniture, and light are constantly talking to each other. If you don’t listen to those undertones, you’ll end up with a room that feels ‘off’ even if the application is perfect.
Gear That Transforms a DIY Job Into a Pro Finish
If you want to stop feeling like an amateur, you have to stop using amateur tools. I personally swear by a 2.5-inch angled sash brush for all my trim work because it gives you the control needed for those crisp edges. To keep that investment in top shape, you must learn the trick to keeping your paint brushes soft for years by using a dedicated brush comb. I also recommend keeping a pinless moisture meter in your kit; it is the only way to know how to tell if your drywall is too damp for the first coat before you start rolling. These tools aren’t just accessories; they are the foundation of a durable finish.
Now It Is Your Turn to Pick Up the Brush
The difference between a house and a home often comes down to the colors we choose to live within. Don’t be paralyzed by the fear of making a mistake; every wall is just a canvas that can be reimagined. Whether you are transforming spaces with local painting solutions for every budget or trying an ambitious new accent, the key is to start with a plan and finish with patience. You now have the framework to master the art of house painting in your own space. If you ever feel stuck or need a professional eye to guide your vision, feel free to contact us for a consultation. What is the one bold color you have always been too scared to try on your walls? Let me know in the comments below!