

I remember the first time I painted my garage floor, thinking I was all set for a fresh look. The excitement was short-lived when I noticed those pesky tire marks starting to peel mere weeks later. It was a frustrating wake-up call that I had skipped a crucial step—something so simple yet so essential that it changed how I approach floor painting forever.
Why Settling for Chipped, Lifting Garage Floors Is a Just-Okay Solution
If you’re like most homeowners I talk to, tackling a garage floor project feels like a straightforward task. But then, reality hits when your shiny new coating starts lifting every time your car rolls in. That’s a common nightmare, one I’ve personally experienced and learned from—a mistake I want to help you avoid.
Skeptical? Here’s Why It Truly Matters
Let me be honest: I used to think that any paint would do for the garage. I believed that applying a quick topcoat was enough to withstand those heavy tires and temperature swings. Turns out, I was dead wrong. Skipping proper surface prep or choosing the wrong type of paint can lead to peeling and lifting, wasting time and money. Did you know that improper preparation is responsible for up to 80% of paint failures? (Source: Elite Painter Pro)
This realization was a game-changer for me—and it will be for you too. So, let’s dive into how you can paint your garage floor so it stays put, no matter how many tires roll over it.
Are you tired of touching up your garage floor every few months? If so, keep reading, because I’ll walk you through the proven methods to ensure your paint stays intact for years to come. It’s easier than you think, and with a few simple steps, you’ll have a durable, professional-looking surface that resists lifting and peeling. Ready to transform your garage into a space you’re proud of? Let’s get started.
Preparing the Surface Properly
Start with a thorough cleaning to remove dirt, grease, and debris. I once used a stiff-bristle brush and degreaser on my garage floor, which helped lift stubborn grime. Rinse well and let it dry completely—this step is crucial, as any moisture will compromise adhesion. Next, grind down any peeling paint or rough patches with a concrete grinder or sanding disc, creating a smooth, even surface. Think of it as sanding a wooden table before staining; the smoother the surface, the better the paint sticks.
Applying a Quality Primer
Choose a high-quality epoxy or concrete primer suitable for garage floors. When I painted my floor, I applied a coat of primer with a roller, ensuring even coverage. Primer acts like the foundation of a house—without it, the paint might peel or lift prematurely. Use a brush for edges and tight spots, and a roller for the main surface. Allow the primer to cure as per manufacturer instructions—that’s your guarantee for better adhesion.
Using the Right Paint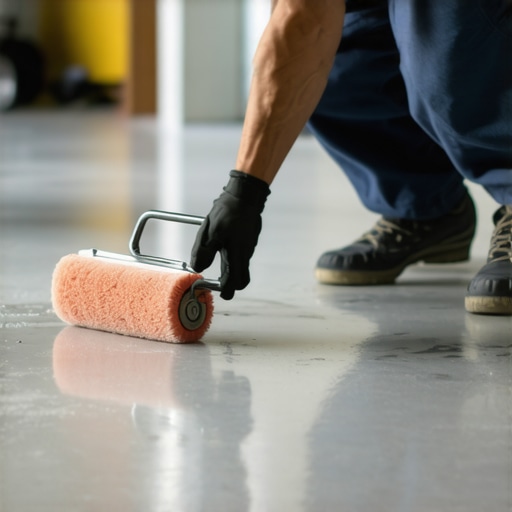
Select a high-grade, UV-resistant epoxy or latex floor paint designed for concrete. During my project, I used a two-part epoxy for maximum durability. Mix it thoroughly according to instructions, and apply in thin, even coats with a roller or brush. Thick coats tend to crack or peel as they cure. Always work in well-ventilated, temperature-controlled conditions—high humidity or cold weather can hinder proper drying and adhesion.
Applying Multiple Coats for Lasting Results
After the first coat dries, lightly sand the surface to remove imperfections—this creates a better grip for subsequent layers. I learned this the hard way when my first coat seemed streaky; sanding fixed the issue and improved adhesion. Apply at least two coats, allowing sufficient drying time between each. This builds a resilient layer that resists tire marks, chemicals, and temperature fluctuations.
Sealing and Curing
Once the final coat is dry, consider applying a clear sealant for added protection. This final step acts like a shield, preventing chips and lifting. Pay attention to curing times—walking or parking vehicles too soon can damage the finish. Once fully cured, your floor will be ready for heavy-duty use and look professional for years to come.
Remember, attention to detail during preparation and application is the key to success. Skipping steps or rushing can lead to peeling and lifting down the line. For a comprehensive understanding of local painting techniques and how to elevate your space with expert care, check out local painting secrets. For personalized advice or to ensure your project is flawless, consider reaching out through contact us. Mastering these core steps guarantees a durable, aesthetic finish that stands the test of time.Many homeowners assume that hiring a local painter means the job will be straightforward, but this oversimplification often leads to overlooked details that can compromise the quality of your project. One widespread myth is that a fresh coat of paint can cover surface imperfections, but in reality, neglecting proper surface preparation often results in peeling and uneven finishes, no matter the skill level of the painter. Advanced homeowners should recognize that not all primers are created equal; using a generic primer on complex surfaces like wood or metal can cause adhesion issues, undermining the durability of your paint job.
What are the advanced mistakes even seasoned DIYers make?
For example, many underestimate the importance of climate conditions—painting in high humidity or low temperatures can extend drying times and cause paint failure. Interestingly, a study by the Paint Quality Institute highlights that improper timing and environmental neglect contribute to over 60% of avoidable paint failures. Additionally, a common oversight is choosing the wrong sheen for high-traffic areas, which can lead to faster wear and difficulty cleaning. Remember, a professional touch often involves selecting the appropriate finish tailored to each space’s use, something that many DIYers overlook in their haste to finish quickly. Connect with experts through this link for personalized advice. Don’t fall into the trap of believing that more coats always mean better coverage; applying thin, even layers with adequate drying time ensures a smoother, more durable finish. Once you understand these nuances, your next project will not just look good but last for years, saving you money and headaches down the line. Remember, quality painting is an investment—skip the basics at your peril. Curious about how to avoid common pitfalls? Check out why local painting matters for insights into professional strategies. Have you ever fallen into this trap? Let me know in the comments.
Keeping It Working: Essential Tools for Durable House Painting
Achieving a long-lasting paint job isn’t just about selecting the right paint; it also hinges on using the proper tools and maintaining them. I personally swear by high-quality extension poles, such as the Wooster Big Ben, which allows me to reach ceilings and high walls effortlessly, reducing strain and ensuring even application. For detailed work, I rely on fine-quality angled brushes like the Purdy Elite, which help prevent streaks and give crisp edges, especially around trim and corners. Electric paint sprayers, such as the Graco Magnum, are invaluable for large exterior surfaces, providing fast coverage and a smooth finish if maintained properly. When using a sprayer, I always rinse and flush the system immediately after finishing each project to prevent clogs and prolong the equipment’s lifespan.
Additionally, for surface preparation and cleanup, I recommend a durable microfiber roller cover, like the Wooster Microfiber, which maintains its integrity over multiple uses and cleans easily. To keep your tools in prime condition, thorough cleaning with warm water and mild detergent (or solvent for oil-based paints) is essential after every use. Proper tool maintenance extends their lifespan and ensures consistent results for future projects.
How do I maintain my painting tools over time?
Keeping your tools in top shape requires a disciplined cleaning routine. After each use, spray out sprayers with water or solvent, depending on your paint type, and brush out residual paint with the appropriate solvent—water for latex, mineral spirits for oil-based paints. Store brushes and rollers horizontally or hang them to maintain their shape. Periodic replacement of worn-out roller covers or brushes prevents defects in your paint finish. Investing in quality tools and caring for them effectively saves you money while maintaining the professional quality of your work. As technology advances, newer tools like cordless ergonomic edgers and magnetic brush holders continue to make painting easier and more efficient—I’ll be watching these innovations closely, and I predict they’ll become standard in the next few years.
If you’re ready to elevate your painting game, try managing your tools with labeling and organized storage solutions to streamline your workflow. Remember, proactive maintenance of your equipment ensures perfect results and saves you from costly replacements in the long run. For more tips on professional house painting techniques, check out mastering pro tips, and consider reaching out through this contact link for personalized guidance in your next project.
The Hidden Wisdom Behind a Lasting Paint Job
One of the most eye-opening lessons I learned was that surface preparation is everything—skipping it can turn a promising project into a repaint nightmare. I once tried to save time by rushing through cleaning and sanding, only to face peeling months later. That experience taught me that slow, deliberate prep doesn’t just improve aesthetics; it saves money and stress in the long run.
Another insight was understanding the importance of climate conditions. Painting in high humidity or cold weather might seem convenient, but it often results in uneven drying and adhesion issues. Now, I plan my projects around optimal weather, ensuring the paint cures properly, which makes the finish more durable and beautiful.
The third lesson is choosing the right tools for each stage—from quality brushes that prevent strokes to sprayers that ensure even coats on large surfaces. It’s tempting to cut costs here, but investing in the right equipment pays off with a flawless, long-lasting finish. Remember, every detail—from surface prep to tool selection—contributes significantly to the final look.
Tools That Turn Dreams into Reality
My go-to resource for mastering finishing techniques is this collection of professional tips. It’s packed with actionable advice that helped me avoid common pitfalls and elevate my home projects. Additionally, I rely on specific tools like the Purdy Elite brush for crisp edges and the Graco Magnum sprayer for efficient large-area coverage. These tools, combined with proper technique, make all the difference in achieving professional results.
The final piece of my toolkit is continuous learning—reading expert blogs, watching tutorials, and staying updated on new products. The universe of small upgrades, like high-quality microfiber rollers or eco-friendly primers, can significantly improve durability and appearance. For trusted sources and detailed guides, I recommend checking out local painting solutions that fit any budget.
Your Next Step: Make It Count
Your home’s transformation starts with a commitment to quality and attention to detail—don’t settle for shortcuts. Embrace thorough preparation, select the right tools, and stay patient through the curing process. Every expert began with a decision to do better, and now it’s your turn to craft a space that truly reflects care and craftsmanship. Ready to take your home improvement journey a notch higher?
Have you ever faced challenges with surface prep or choosing the right tools? Share your experiences below—I’d love to hear what’s worked for you in local house painting projects.