

The sun was starting to dip below the horizon, and I was just inches away from finishing the living room. I was tired, my back ached, and I made the classic amateur move: I overloaded my brush just to get that last corner done. Five minutes later, I looked back and my heart sank. A thick, sluggish ‘tear’ of paint was weeping down the drywall, ruining my perfectly smooth finish. In a moment of pure panic, I grabbed a wet rag and tried to wipe it away. Big mistake. I didn’t just remove the drip; I created a massive, smeared crater that looked worse than the original run. It’s a gut-wrenching feeling when you realize your shortcut just doubled your workload.
Stop Reaching for the Wet Rag Right Now
I’ve been there more times than I care to admit. When you see a run, your instinct is to fix it immediately while the paint is still wet. But unless you catch it in the first sixty seconds, you’re likely to cause more harm than good. Today, I’m going to show you exactly how to navigate this mess. We are going to save your project without the need to strip everything back to the studs. You can actually remove dried paint drips without sanding the whole wall if you have a little bit of patience and the right tools. We’ll talk about the ‘wait and scrape’ method and how to feather your edges so the patch is invisible even in direct sunlight. Have you ever tried to ‘fix’ a wet drip only to make it ten times larger? I know I have, and it’s a lesson you only want to learn once.
Can you really make a drip disappear?
I know what you’re thinking because I thought it too: ‘There’s no way this won’t look like a patch job.’ Skepticism is healthy in home improvement. However, professional finishes aren’t about being perfect; they are about knowing how to hide the imperfections. Even the pros deal with runs, especially when working with high-gloss finishes or thin stains. According to the Master Painters Institute, most surface defects like runs or sags are the result of poor film thickness control. If you master the art of house painting with these pro tips, you’ll realize that the secret isn’t a magical brush, but the technique used to recover from gravity’s inevitable pull. We’re going to tackle the physics of why paint runs and how to use a razor blade like a surgeon to level the playing field.
The Mistake That Cost Me Three Hours
Earlier in my DIY journey, I assumed that more paint meant better coverage. I was wrong. Applying a thick coat to avoid a second pass is the fastest way to invite sags and curtains. I once spent an entire Saturday morning fixing a hallway because I was too lazy to do two thin coats. Now, I always tell my neighbors to check for ‘skating.’ If you find how to stop your roller from skating across the wall, you’ll prevent half these drips before they even start. If the paint is already dry and hard, don’t worry—there is a path forward that doesn’t involve a belt sander or a mental breakdown. We are about to dive into the surgical steps of leveling that drip and blending it back into the rest of the wall seamlessly.
The Surgical Approach to Leveling Out Drips
The biggest hurdle in local painting isn’t the physical labor; it’s the psychological battle of waiting. When a drip is fresh, it’s a liquid mountain. If you touch it now, you’re just spreading the mountain into a plateau. You have to let the paint cure until it is hard enough to resist a fingernail. I remember a humid Tuesday when I was working on a nursery. I saw a sag on the window casing and, in my haste, hit it with a power sander while the core was still ‘chewy.’ The result? The paint rolled up into a gummy ball that actually tore the drywall paper underneath. It was a three-hour setback for a three-second mistake. To avoid this, use the knife test for checking if your paint is truly dry before you even think about picking up a tool.
Let the Surface Dry Until It Bites Back
Think of a dried paint drip like a tiny, stubborn scab. If you try to remove it too early, you leave a scar. If you wait until it’s fully set, it can be removed cleanly. Most house painting projects go sideways because we underestimate the ‘curing’ time versus the ‘touch-dry’ time. For a thick run, this might mean walking away for a full 24 hours. Once the drip is rock hard, it becomes a solid object you can manipulate rather than a liquid mess. If you are dealing with tricky surfaces, knowing how to successfully paint over oil-based finishes with water-based paint will help you understand how different resins cure at different rates, which is vital when you’re waiting for that drip to stabilize.
Shave the Peak Before You Sand the Valley
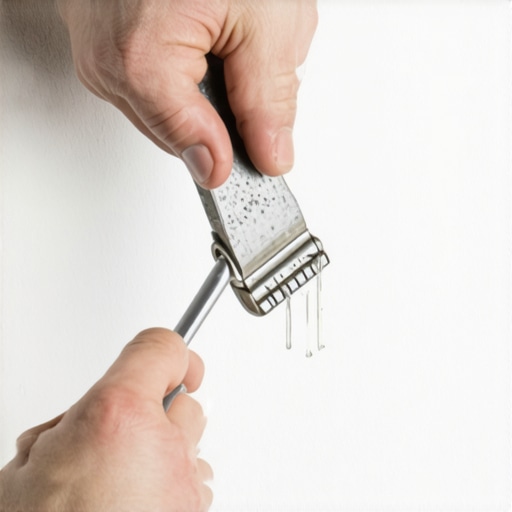
Now, we get to the actual surgery. You don’t want to start with sandpaper; that’s like trying to level a mountain with a broom. Instead, take a brand-new, single-edge razor blade. Hold it with both hands, perpendicular to the wall, and slightly bow the blade so the corners are lifted away from the surface. Gently—very gently—draw the blade downward over the drip. You are literally ‘shaving’ the top off the drip, layer by layer. It’s incredibly satisfying to see those tiny curls of dry paint fall to the floor while the surrounding wall remains untouched. If you master the art of house painting with these pro tips, you’ll find that a sharp blade is often more precise than any abrasive paper could ever be.
Blending the Patch for an Invisible Finish
Once the drip is level with the wall, you’ll likely see a slight color difference or a tiny ‘halo’ where the paint was thicker. This is where 320-grit sandpaper comes in. Lightly scuff the area in a circular motion to feather the edges. You aren’t trying to remove more paint; you’re just blurring the lines between the old drip and the original coat. After dusting it off with a tack cloth, you’ll need to re-apply paint to that spot. To ensure the texture matches perfectly, you must choose the right roller nap for your specific wall. Using a brush on a rolled wall will leave a visible mark that screams ‘repair job.’ By using a small 4-inch ‘weenie’ roller with the same nap as the rest of the room, the new paint will stipple into the old, making the drip disappear into the sunset.
The Great One-Coat Paint Deception
We’ve all seen the flashy marketing for ‘one-coat’ coverage paints. It sounds like a dream for any DIY enthusiast, but here is the cold, hard truth: those paints are often the primary cause of the drips and sags we’ve been trying to fix. Because these formulas are incredibly high in solids and viscosity, they are designed to go on thick. However, if your technique isn’t perfect, that extra weight works against you. When you look at expert house painting advice for 2025, you’ll find that professionals almost always opt for two or even three thinner coats over one heavy application. A thick film traps moisture against the wall, creating a surface that is dry to the touch but chemically unstable underneath.
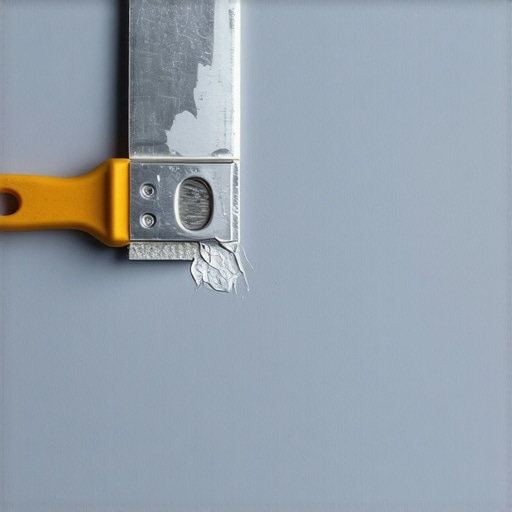
According to the Painting Contractors Association (PCA) P1 Standard, maintaining precise ‘wet film thickness’ is the only way to ensure the structural integrity of the coating. If you try to force a one-coat finish, you’re essentially asking for gravity to take over. I’ve found that why your new home needs a third coat of white paint often comes down to this very issue: depth and durability beat thickness every single time. It’s a common trap to think you’re saving time, but you’re actually just setting yourself up for a weekend of scraping and sanding.
Heat is Your Secret Enemy on the Job
One of the most overlooked nuances in house painting is the ‘surface temperature’ versus the ‘air temperature.’ I’ve seen people painting a room that feels a perfect 70 degrees, yet their paint is bubbling and sagging. Why? Because the wall itself was 50 degrees due to a lack of insulation or overnight cold. This temperature differential prevents the paint from ‘biting’ into the substrate. Similarly, why professional painters refuse to work in direct sunlight isn’t just about comfort; it’s about preventing the paint from ‘flashing’ or drying too fast on the surface while remaining wet underneath. This creates a skin that can easily slide down the wall, forming those dreaded curtains.
Why does my finish look chalky despite a perfect application?
This is a question I get from advanced DIYers all the time. You followed the steps, you shaved the drips, but the final result looks dull or chalky. Usually, this is the result of over-working the paint. Every time you run your roller over a section that has already begun to ‘set,’ you are essentially tearing the microscopic resin bonds. This leads to a loss of sheen and a texture that feels like fine sandpaper. If your project involves high-traffic areas, you’ll realize that why using the wrong primer causes your trim paint to chip is often the culprit here too. The primer must provide enough ‘tooth’ for the topcoat to hang onto without absorbing all the moisture from the finish layer too quickly.
The Trap of the Hidden Moisture Pocket
Here is an ‘oops’ factor I learned the hard way: never trust a wall that looks dry if the humidity is over 65 percent. I once finished a beautiful accent wall only to have the entire thing peel off in sheets three days later. The moisture from the air had settled into the microscopic pores of the drywall before I started. Even the best local painting strategies can’t overcome basic physics. You have to ensure the substrate is truly thirsty for paint, not already saturated with environmental moisture. Have you ever fallen into this trap and had to restart a project from scratch? Let me know in the comments. It’s these hidden nuances that separate a ‘good enough’ job from a professional masterpiece. Take your time, respect the curing process, and remember that the best tools in your kit are your eyes and your patience.
Once you’ve successfully surgically removed those drips, you start to realize that the difference between a frustrating weekend and a professional-grade result often comes down to the items in your toolbox. I used to think a brush was just a brush, but that changed the moment I invested in a high-quality synthetic blend. If you want to unlock the power of professional painting for a stunning home, you need to stop buying the three-pack of ‘utility’ brushes at the big-box store. I personally swear by the Wooster Alpha; the unique tri-length filament design holds a massive amount of paint and releases it with a level of control that prevents those sags we just spent so much time fixing.
How do I maintain the look of my walls over time?
Maintenance isn’t just about the occasional wipe-down; it’s about understanding the chemistry of the film you’ve applied. According to the ASTM D4214-07 standard, which professionals use to evaluate the ‘chalking’ of exterior coatings, environmental degradation is inevitable, but it can be slowed. Inside your home, you should wait at least 30 days before scrubbing your new walls to allow the resin to fully cross-link. To keep things fresh, you need to know how to maintain your newly painted exterior for ten years or more by performing annual soft-washes to remove salts and pollutants that eat away at the sheen.
Keep Your Paint Cans From Turning Into Crusty Disasters
There is nothing more disheartening than opening a half-full can of expensive paint six months later only to find a ‘skin’ of dried rubber on top. To prevent this, I use a simple but effective technique: before sealing the lid, I lay a piece of plastic wrap directly on the surface of the liquid paint to eliminate the air pocket. You can also use the rubber band trick for keeping paint cans mess-free, which involves stretching a band across the open top to wipe your brush, keeping the rim clean so the lid seats perfectly every time. If you’re in the middle of a multi-day project, don’t wash your equipment every night; learning how to save a paint roller from drying out overnight by wrapping it in airtight plastic will save you gallons of water and hours of cleanup time.
The Future of Precision in House Painting
Looking ahead, I suspect we are going to see a massive shift toward specialized additives and augmented reality tools for DIYers. We are already seeing paint conditioners that extend ‘open time’ in hot weather, making it nearly impossible for a novice to leave lap marks. In the near future, I predict AR apps will do more than just show us colors; they will likely track our brush speed in real-time to tell us if we are applying the coat too thin or too thick. For now, we rely on our eyes and the ‘knife test’ to ensure quality. If you really want to elevate your game, I challenge you to try using a paint conditioner like Floetrol on your next trim project—it levels the paint so smoothly you’ll swear it was factory-sprayed. Taking these extra steps is how you master the art of house painting with these pro tips and ensure your hard work doesn’t just look good today, but stays vibrant for years to come.
The Painting Lessons That Actually Cost Me Money
Over the years, I’ve realized that the difference between a messy weekend and a gallery-quality finish isn’t just about the paint can. First, lighting is your best friend or your worst enemy; I now never paint a room without a handheld LED work light to spot those sags before they dry. Second, the ‘one more pass’ urge is a trap. If the paint has started to set, touching it again will only create texture you’ll have to sand off later. Finally, remember that local painting is as much about chemistry as it is about color—if you respect the drying times, the paint will do the work for you. I used to rush, but I learned that the clock is just as important as the brush.
The Gear That Separates Amateurs from Pro Finishers
I don’t believe in having a hundred tools, but I do believe in having the right four. A high-quality synthetic brush is non-negotiable; you can unlock the power of professional painting for a stunning home simply by switching to a brand like Wooster or Purdy. I also keep a stash of fresh, single-edge razor blades for those surgical shaves we discussed. For any trim work, a splash of paint conditioner is my secret weapon to eliminate brush marks and extend the open time. If you really want to master the art of house painting with these pro tips, start viewing your tools as an investment in your home’s value rather than a chore-day expense.
#IMAGE_PLACEHOLDER_E#
Ready to Turn That Mess into a Masterpiece?
Mistakes are just part of the process, and now you have the surgical skills to fix them without breaking a sweat. Whether you are freshening up a guest room or diving into expert house painting advice for 2025, remember that patience is the most valuable tool in your kit. Don’t be afraid of the drips; they are just opportunities to refine your technique. Every stroke you take is a step toward a more beautiful home environment. Have you ever tried to fix a paint run only to find yourself sanding the entire wall in frustration? Let me know your biggest painting ‘oops’ moment in the comments below!