

It was a day like any other when I decided to give my living room a fresh coat of paint. I was excited—until I accidentally knocked over the paint can, and a splatter of vibrant white dripped right onto my cherished hardwood floor. Instantly, panic set in. I knew harsh chemicals could damage the finish, but I also needed to clean that mess before it set permanently. That lightbulb moment revealed just how tricky it can be to remove paint splatters without harming beautiful hardwood surfaces.
The Challenge of Cleaning Paint Off Hardwood Without Damage
If you’ve ever faced a similar situation, you know the anxiety of trying to clean up without making things worse. Hardwood floors are a substantial investment—warm, inviting, and full of character. Yet, they’re also sensitive to the wrong cleaning methods. Popular quick fixes often involve scrubbing or harsh solvents, but those can strip the finish or cause discoloration. Early on, I made the mistake of using strong paint removers, which left ugly dull spots and required expensive refinishing. That experience taught me the importance of gentle, proven techniques that respect the wood’s integrity.
Today, I want to share a reliable, neighborly approach to removing those stubborn paint splatters safely and effectively. Whether it’s latex, oil-based, or spray paint, there’s a method that preserves your floor’s finish while getting the job done. Keep reading, because I’ll guide you through simple steps that I’ve personally tested and refined over the years.
Is Gentle Really Effective? Myths About Hardwood Cleaning
Honestly, I used to think that the only way to remove paint was with aggressive scraping or potent chemicals. But those methods often caused more harm than good. In fact, I learned that patience, combined with the right tools, creates better results—preventing costly repairs. Early on, I also neglected to test any cleaning solution on a hidden corner, risking irreversible damage. Now, I always perform a small patch test first, and I recommend you do the same to avoid surprises. Want to discover the safest and most effective ways? There are techniques that don’t involve risky substances—check out options like using a blow dryer for delicate paint removals, which you can learn more about in this article on the hairdryer trick for removing painter’s tape.
If you’re tired of wrestling with stubborn spots and worried about damage, you’re in the right place. Let’s dive into tried-and-true methods that will help keep your hardwood looking pristine—without turning a small accident into a costly repair job.
Start with Gentle Heat to Loosen Paint
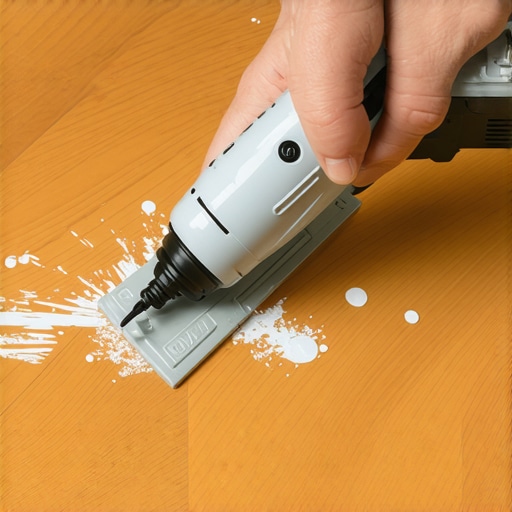
Begin by setting a hairdryer to a medium heat setting and holding it a few inches above the paint splatter. Slowly move the dryer in circular motions to warm the paint, which softens it and makes it easier to remove. I once used this method on a stubborn latex splatter that refused to scrape off with a putty knife. After about a minute of gentle heating, the paint softened enough to lift effortlessly with a plastic scraper, leaving no damage behind.
Use a Plastic Scraper for Controlled Removal
If the paint has softened sufficiently, slide a plastic putty knife or paint scraper under the edges and gently lift. Avoid metal tools which can scratch the finish. Particularly for oil-based paints, I prefer using a plastic instrument to prevent gouging the wood. Applying slight pressure and working in small sections guarantees better control. Once the paint starts to lift, pull it away carefully rather than forcing it, reducing the risk of damaging the wood surface.
Apply a Mild Solvent for Persistent Spots
For remaining stubborn areas, dab a soft cloth with a small amount of mineral spirits or denatured alcohol—test this on a hidden corner first to ensure it doesn’t affect the finish. Gently dab the paint spot, allowing the solvent to penetrate and loosen the bond. I learned this firsthand when a small dab helped dissolve a latex spill that resisted heat alone. Remember, use minimal solvent to avoid harming the varnish or stain, and wipe away excess immediately.
Prevent Over-application
Over-soaking the wood with solvent can cause damage, similar to over-wetting a sponge until it leaks. Keep the application controlled and work in small zones. Frequently check your progress to avoid unintended effects. This cautious approach preserves the integrity of your flooring while removing unwanted paint.
Clean the Area Thoroughly
After paint removal, clean the area with a damp cloth and mild soap. This step removes any residual solvent or loosened paint particles. It’s analogous to washing off excess glue after a craft project—leaving the surface clean and ready for refinishing if needed. For a perfect finish, compare your work to the smooth factory finish standard.
Final Touches for a Pristine Floor
If necessary, gently buff the spot with a soft cloth to restore shine. Should discoloration occur, consider a light touch-up with matching finish or varnish to blend seamlessly. Remember, patience is key—rushing can cause scratches or remove too much finish. With careful handling, your hardwood can look flawless once again without the expense of refinishing or replacement.
** **When it comes to house painting, many homeowners and even some professionals fall prey to widespread misconceptions that can compromise the quality and durability of the finish. Let’s dig deeper into some nuanced truths that are often misunderstood, so you can avoid costly mistakes and achieve professional results. Contrary to popular belief, choosing the thickest paint or the highest-gloss finish doesn’t always guarantee better coverage or durability. In fact, this approach can lead to visible brush marks, uneven sheen, or difficulty in application, especially on textured surfaces. **Understanding the specific properties of different paint finishes and their suitability for various surfaces is crucial—this is where many amateurs go wrong, opting for paint types that aren’t designed for your project’s demands.** It’s a common trap to believe that using multiple coats is unnecessary or an overly cautious step. However, skipping the recommended number of coats can result in uneven color, poor adhesion, or early peeling, especially on surfaces with previous coatings or uneven textures. Quality often depends on proper preparation and patience, not just the paint itself.
Are All Home Paints Created Equal, or Does Brand Matter?
Many assume that all paints from reputable brands are interchangeable, but expert studies highlight that labeled quality grades and formulations significantly impact longevity. For example, low-quality paints tend to chalk and fade within a few years, especially in exterior applications exposed to harsh weather—this can be seen in research from the National Paint Association, emphasizing the importance of investing in higher-grade paints for long-term savings.
Another overlooked nuance involves the environmental conditions during painting. Painting in high humidity or extreme heat can cause issues like blistering, cracking, or improper curing. It’s tempting to think that temperature and humidity are minor factors, but a study published in the Journal of Coatings Technology and Research confirms that environmental control ensures the adhesion, smoothness, and durability of your paint job. Ignoring these factors leads to issues that only become visible months after project completion.
Additionally, many underestimate the importance of surface preparation. Cleaning, sanding, and priming are often rushed or skipped altogether, especially on older surfaces with lead-based paint or existing finishes. Failing to address these preparatory steps can cause the new coat to peel or fail prematurely—something that many overlook but can be critical to your project’s success. For more insights on proper prep, check out this guide on lead paint dangers and preparation.
Finally, a common myth is that painter’s tape is a failsafe for sharp lines. While it helps, improper tape application or removal can lead to messy edges or peeling paint. For the perfect finish, consider techniques like the proper way to paint clean lines. Remember, attention to detail and understanding the nuances can elevate your painting project from amateurish to professional quality. Have you ever fallen into this trap? Let me know in the comments.
Maintaining the quality and longevity of your paintwork requires more than just good brushes and paint; it demands reliable, high-precision tools tailored for specific tasks. As someone deeply involved in local painting projects, I’ve found that investing in the right equipment not only streamlines the process but also ensures long-term durability. Today, I want to share my recommendations for essential tools that have consistently delivered professional results and how you can incorporate them into your maintenance routine.
Invest in a Quality Paint Sprayer for Consistent Coverage
A professional-grade paint sprayer, like the Graco Magnum series, offers unparalleled control and efficiency, especially for large surfaces. Unlike traditional brushes or rollers, a sprayer applies paint evenly, reducing streaks and texture inconsistencies. I use my sprayer to quickly refresh exteriors and interiors, saving hours while achieving a smooth finish. Modern models come with adjustable pressure controls, making it easy to switch between textures and finishes. Prediction indicates that future advancements might include smarter control systems with built-in sensors to optimize spray patterns automatically.
Keep a Digital Moisture Meter Handy
One often overlooked aspect of long-term maintenance is surface moisture. Excess moisture can cause paint to peel or blister prematurely. A digital moisture meter allows you to check humidity levels within walls or siding before repainting, ensuring conditions are optimal. I rely on my device to verify that previous layers are thoroughly dry—saving me from repainting over damp surfaces, which can lead to primer failure. For more on surface prep, check out proper preparation methods for metal surfaces.
Sanding Tools for a Flawless Finish
Maintaining painted surfaces over time often involves sanding down imperfections or old paint. A random orbital sander paired with high-quality abrasive papers simplifies this process. I prefer the orbital sander because it minimizes swirl marks and ensures a flat, smooth surface. For detail work or tight corners, a foam sanding block offers better control. Regularly inspecting and re-sanding minor cracks or chips prolongs the need for complete repainting, making your maintenance efforts more cost-effective.
Laser Distance Measurer for Precise Planning
When scaling projects or planning touch-ups, accuracy is essential. A laser distance measurer provides instant, precise measurements of walls, ceilings, or exterior areas. This device helps you gauge the amount of paint needed, preventing waste and ensuring color consistency across different sections. I’ve found that accurate measurement also helps avoid overloading paint cans or running short mid-project. As the trend shifts toward smarter tools, future laser measures may integrate with mobile apps for detailed planning and color matching.
How do I keep my painting equipment in top shape over time?
Proper maintenance is key to extending the life of your tools. After each project, thoroughly clean brushes, rollers, and sprayers according to manufacturer instructions. For brushes, I use a mix of warm water and mild soap for latex paints, or mineral spirits for oil-based coatings—detailed methods are available in this cleaning guide. Lubricate moving parts of your sprayer periodically to prevent rust and ensure smooth operation. Storing tools in a dry, cool environment also prolongs their usability and prevents damage. Investing in quality storage racks helps keep everything organized, so your equipment is always ready for the next maintenance task.
Looking ahead, I predict that integration of smart technology—like Bluetooth-enabled sensors and app-controlled calibrations—will revolutionize how we maintain our painting tools. Staying updated with these innovations ensures you benefit from advances that simplify maintenance and improve results. For example, adopting a digital moisture meter has already saved me countless hours and rework.
One tip I highly recommend trying is regularly calibrating your spray guns using manufacturer-specific cleaning kits, which minimizes clogging and maintains spray quality over time. This small step can make a big difference in the longevity and performance of your equipment.
Lessons I Wish I Learned Before Starting My Painting Journey
- One of the biggest surprises was realizing that patience and gentle techniques always trump rushing or using aggressive chemicals. I used to think that applying more paint or scrubbing harder would get faster results, but I learned that slow, deliberate actions preserve the integrity of your surfaces.
- Another insight was understanding surface prep’s true importance. Skipping steps like cleaning and priming seemed harmless at first, but I saw firsthand how overlooked prep causes peeling and uneven finishes, costing more in repairs later.
- Discovering the value of high-quality tools changed my entire process. Investing in a good brush, sprayer, or sander made every project smoother and more professional-looking, saving time and effort in the long run.
Tools and Resources That Elevate My Painting Craft
- Graco Magnum paint sprayers have transformed how uniformly I can apply paint, especially on large areas, ensuring no streaks or missed spots.
- A hairdryer specifically for paint removal has saved me from costly repairs when removing painter’s tape or softening stubborn splatters.
- The proper priming and surface prep guides provided by trusted sources have prevented countless issues related to adhesion and longevity.
- My digital moisture meter helps me determine the optimal times for repainting, ensuring surfaces are dry and ready, avoiding future peeling or bubbling.
Embrace the Future of House Painting with Confidence
Your house painting projects can reach a new level of perfection with every brushstroke when you apply these insider techniques and utilize trusted tools. Remember, the difference between a good paint job and a professional finish often boils down to your attention to detail and patience. Your home deserves the best, so take the time to prepare, select quality materials, and work methodically.
What’s one painting technique or tool you’re excited to try on your next project? Share your thoughts below and let’s elevate our craftsmanship together!