

Ever had that sinking feeling while repainting your kitchen walls? You know, the moment you step back and realize those greasy fingerprints and splatters are still lurking beneath your fresh coat? I’ve been there. I once embarked on a painting project, all excited to give my kitchen a makeover, only to find the walls smeared with years of cooking residue. Talk about a frustrating surprise! That lightbulb moment made me realize: cleaning greasy kitchen walls isn’t just a chore—it’s the secret sauce for a flawless paint job.
Why Skipping the Wall Prep Can Ruin Your Beautiful Finish
Let me ask you—have you ever painted right over greasy walls, only to see the grime bleed through within months? It’s discouraging, right? The truth is, grease and grime don’t just sit there silently; they sabotage your paint’s adhesion, causing peeling, cracking, and dull finish. The oil from cooking turns into a stubborn barrier that prevents paint from sticking properly. This is why understanding how to clean your kitchen walls thoroughly before painting is crucial. Not doing so is like putting a fancy coat of paint on a dirty windshield—you might look good for a bit, but the underlying mess will always surface eventually.
Is It Really Worth the Effort? Believe Me, It Is.
I admit, early in my DIY journey, I often underestimated this step. I’d simply wipe with a damp cloth, thinking that would do the trick. Spoiler: it doesn’t. I overlooked the importance of using the right cleaning solutions, and my paint jobs showed it. The walls looked clean at first but soon revealed greasy patches and peeling paint. Trust me, taking the time to properly clean is a game-changer. It’s worth every minute. If you want your freshly painted walls to stay vibrant and look professional, you’ll want to follow in the footsteps of experienced painters. For more pro tips on perfecting your house painting, check out this comprehensive guide.
So, what’s the most effective way to clean greasy kitchen walls? That’s what we’ll explore next. Get ready for some tried-and-true methods that won’t just make your walls sparkle—they’ll ensure your paint sticks for years to come.
Prepare Your Supplies and Set Up Properly
Gather your cleaning agents: a bucket of warm water, degreasing solution like trisodium phosphate (TSP), baking soda, or a mild dish soap, along with clean, soft sponges or scrub brushes, and protective gear such as gloves and goggles. Clear the area of furniture or cover it with drop cloths to prevent water or cleaning solution splashes. Turning off the power to switches and outlets nearby is also wise to avoid accidents.
Test a Small Hidden Area First
Before tackling the entire wall, apply your cleaning solution to a discreet spot. This micro-story saved me from discoloration; I once used a strong TSP solution on a painted wall, only to find the paint slightly faded. Testing helps ensure your cleaning method won’t harm the paint or wallpaper underneath.
Remove Surface Dust and Loose Dirt
Begin with a dry microfiber cloth or a vacuum with a brush attachment to eliminate dust, cobwebs, and loose grime. Think of this as sweeping the surface before mopping—a crucial step to prevent scratching the paint during scrubbing.
Apply a Grease-Cutting Solution
Mix warm water with a few drops of mild dish soap or use a dedicated degreaser like TSP, following the product instructions. For particularly greasy areas, concoct a paste of baking soda and water, which acts like a gentle abrasive. Apply the solution with a sponge or soft brush, focusing on stained patches. Don’t scrub aggressively, as this may damage the paint; instead, use circular motions to lift the grime.
Be Systematic and Patient
Work from top to bottom, rinsing your sponge frequently to avoid re-depositing grease on the wall. I once spent an afternoon on a stubborn patch behind the stove, using a gentle TSP solution and a soft scrub brush. The result was a clean, grease-free surface that painted beautifully afterward—no peeling or smudges.
Rinse Thoroughly to Remove Residual Cleaning Agents
After scrubbing, wipe the walls with clean, damp cloths sequenced to remove all soap and grease residues. Residual cleaners can interfere with paint adhesion, so ensure no streaks or film remain.
Dry Completely Before Primer or Painting
Use a dry towel or cloth to absorb excess water, and allow the walls to air dry completely—preferably overnight. Damp surfaces trap moisture, leading to paint adhesion issues or bubbling.
Remember, investing time in this cleaning process is like laying a solid foundation for a skyscraper; it ensures your beautiful paint job lasts for years. For advanced techniques or specific scenarios, check out this professional guide or explore local painting secrets that elevate your space effortlessly.
Address Persistent Grease Patches
If greasy stains refuse to budge, repeat the cleaning process or consider applying a primer designed to seal grease before painting. This extra step will prevent greasy residues from bleeding through your new paint layer.
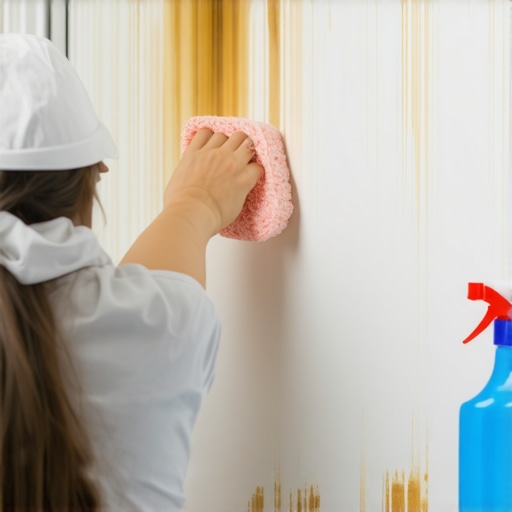
The image above demonstrates the proper technique of scrubbing greasy spots using a sponge with a degreasing solution—visualize how methodical cleaning paves the way for a flawless finish.
When it comes to house painting, many enthusiasts and even seasoned painters fall prey to misconceptions that can compromise the final result. One widespread myth is that layering additional coats always guarantees a better finish. However, over-application without proper surface preparation can lead to drips, uneven textures, or even paint peeling prematurely. As expert painters know, the key to a stunning finish isn’t just about more coats but about understanding the nuances of surface preparation, paint quality, and application techniques. For instance, using high-quality primer and ensuring surfaces are correctly sanded and cleaned often far outweighs simply applying extra paint layers. Additionally, many assume that choosing a darker color will make a space feel smaller or more intimate; in reality, darker shades can accentuate imperfections and require more skillful application to avoid blotchiness. Dive into the details of color application and how to master brush and roller techniques to elevate your project.
An often-overlooked aspect is the significance of lighting conditions during painting. Painting under harsh midday sun or dim evening light can hide flaws or create false impressions of color consistency. Expert painters recommend working in diffused natural light or consistent artificial lighting to accurately assess color and finish. Moreover, a common mistake involves not considering the underlying surface’s moisture levels, which can cause paint to bubble or peel over time. Experts suggest measuring humidity and temperature before starting to ensure optimal drying conditions.
For those eager to refine their skills, understanding advanced finishing techniques can make all the difference. Techniques like feathering, layering, and using specialized brushes or rollers can produce seamless transitions and professional-looking edges. Incorporating these methods requires practice but pays off with a polished appearance that can rival professional results. Also, selecting the right type of paint finish—matte, eggshell, satin, or semi-gloss—depends on both aesthetics and functionality. For instance, eggshell finishes offer a soft sheen that hides wall imperfections while being durable enough for high-traffic areas.
Have you ever fallen into this trap of oversimplifying house painting or overlooked a critical nuance? Let me know in the comments. To deepen your understanding, check out this comprehensive guide that covers everything from surface prep to finishing techniques. Remember, mastering the subtleties of painting not only enhances your home’s look but also ensures your effort endures over time.
Keeping Your Painting Tools in Top Shape
To ensure professional-quality results, maintaining your brushes, rollers, and other equipment is essential. I personally recommend investing in high-quality synthetic brushes like Purdy’s Square Cut series, which resist wear and flex smoothly for even application. Regularly clean brushes immediately after use with warm water and mild soap; this prevents paint buildup that can ruin brush stiffness and glide. For rollers, I prefer foam or high-density nap synthetic rollers for smooth finish; cleaning them promptly with water or solvent depending on the paint type extends their lifespan, saving you money in the long run. Storing tools properly—wrapping brushes in plastic or hanging rollers—prevents them from deforming or drying out, keeping them ready for your next project.
When it comes to sprayers, I use airless models like Graco’s Magnum Series, which allow rapid application on larger surfaces with minimal overspray. To maintain them, dismantle and rinse spray tips and filters thoroughly after each use, and lubricate moving parts periodically. Using the right tools and maintaining them properly reduces defects like streaks or uneven coats, resulting in vibrant, durable finishes.
As our industry progresses, there’s a trend towards eco-friendly and smart equipment. Digital color-matching devices streamlines choosing perfect shades, while low-VOC brushes and tools with ergonomic grips enhance comfort and environmental safety. Expect this shift to accelerate, making maintenance more sustainable and efficient.
How do I keep my painting tools working over time?
One method I swear by is applying a coat of aerosol silicone spray or brush conditioner before storing brushes; this forms a protective barrier against dust and drying, making cleaning easier when reuse is needed. Additionally, inspect tools regularly for signs of wear—cracked handles or frayed bristles—and replace them promptly. For managing large projects, investing in a dedicated tool storage system organized by paint type and project stage can prolong tool life and streamline workflow. Proper maintenance isn’t just about preserving equipment—it directly impacts your project’s finish quality and longevity. Want to dive deeper? Learn how professional painters prepare their tools at this comprehensive guide. Before your next job, try incorporating regular tool maintenance—your future self will thank you with flawless results and less frustration.
Lessons That Reshaped My Approach to House Painting
- Realizing that surface preparation isn’t just a step, but the foundation of lasting beauty was a game-changer for me, saving countless touch-ups and headaches down the line.
- Understanding the power of choosing the right cleaning agents, which transformed my greasy, stubborn walls into perfect canvases, proving that small details make all the difference.
- Learning that patience during drying times isn’t a sign of hesitation but an investment in a flawless, durable finish that I could be proud of for years.
- Discovering that embracing quality tools and maintaining them diligently results in a professional look and an overall smoother experience—something I wish I had known sooner.
- Realizing that the most advanced techniques are only as good as the surface they’re applied to, emphasizing the importance of proper prep over fancy gadgets.
Tools and Resources That Transformed My Skills
- Pro-grade brushes from brands like Purdy have consistently delivered superior finish and ease of use, making my projects look more polished.
- The comprehensive guide on mastering house painting at this link became my go-to resource for refining techniques and understanding nuanced details.
- Eco-friendly primers and paints recommended by this resource not only protect my health but also ensure a sustainable touch for my home.
- Advanced color-matching tools, which made selecting the perfect shades seamless and eliminated guesswork, elevating my interior design game.
- High-quality drop cloths and masking materials that kept my workspace tidy and professional-looking, demonstrating that organization enhances results.
Transform Your Painting Confidence Today
Diving into house painting might seem daunting at first, but with the right knowledge and tools, you’re capable of creating stunning, long-lasting results. Remember, each brushstroke and prep step builds towards transforming your home into a personal masterpiece. Don’t wait for perfection—start with what you’ve learned today and watch your space flourish. If you’ve ever hesitated over surface cleaning or tool selection, now’s the perfect moment to take action. How will you apply these insights in your next project? Share your plans below and let’s grow together in this colorful journey!