

I stood at the bottom of my stairs, clutching a damp microfiber cloth and feeling like I had just lost a fight with my own house. Three months prior, I had finished a DIY project using a stunning, deep charcoal in a flat finish. It looked like velvet. It felt sophisticated. But now? It looked like a chalkboard in a kindergarten classroom. Every single knuckle that had brushed the wall left a burnish mark. Every shoulder that leaned against the corner while chatting left an oily ghost. I had fallen into the classic trap of picking a look without considering the daily physics of my home. If you want to master the art of house painting, you have to realize that the stairway isn’t just a wall; it’s a high-contact combat zone. Today, I am going to save you from my own mistakes and show you exactly how to pick a sheen that looks high-end but cleans up like a dream.
Your Stairway is a High-Contact Combat Zone
If you think about it, the stairs are the most touched surfaces in your entire home. Unlike the living room, where walls are mostly decorative, stairways involve people grabbing handrails, leaning for balance, and kids dragging their sticky palms along the drywall. When I used that flat paint, I didn’t realize that the lack of resin in the finish meant the pigment was literally just sitting there, waiting to be rubbed off. This is often why your office walls are scuffing so quickly too; any area with constant friction needs a different strategy. I learned the hard way that you cannot treat a transition space like a bedroom. You need a finish that can handle a damp sponge and a little elbow grease without leaving a permanent shiny spot where the dirt used to be. Have you ever noticed how a perfectly good paint job seems to disintegrate specifically in the five-foot zone where everyone’s hands go? Drop a comment and tell me if you’ve currently got those annoying mystery smudges on your walls right now.
Is a shiny finish actually a dealbreaker for your aesthetic?
A common fear I hear from neighbors is that choosing a durable sheen means their house will look like a 1990s hospital corridor. I get it. High-gloss can be aggressive. In fact, why high-gloss paint is a nightmare for older walls is simple: it highlights every bump, crack, and bad tape job from forty years ago. However, modern paint technology has given us a middle ground that didn’t exist a decade ago. According to Consumer Reports, the durability and scrubbability of a paint are directly tied to its resin-to-pigment ratio, and today’s high-quality eggshell and satin finishes offer incredible resistance without the plastic-looking glare. When you are getting ready to mask off stairs for your next project, remember that the sheen is your first line of defense against the daily wear and tear of a busy household. We aren’t just painting for today; we are painting so you don’t have to do it again next Easter.
Scrub the Grime Off Before the First Stroke
To master the art of house painting in a stairwell, you have to realize that 90% of the success happens before you open the can. If you paint over oily fingerprints, your new finish won’t bond. I remember a project where I was rushing to finish a client’s hallway; I skipped the TSP wash because the walls looked clean enough. Within a month, the paint was bubbling around the light switches. Now, I scrub every square inch with a degreaser. It is like trying to put a sticker on a greasy pizza box—it just won’t stay. This is particularly true if your new drywall is drinking your paint and you haven’t properly sealed it first. Cleaning ensures that the resin in your eggshell or satin finish can actually bite into the surface rather than sitting on a layer of skin oils and dust.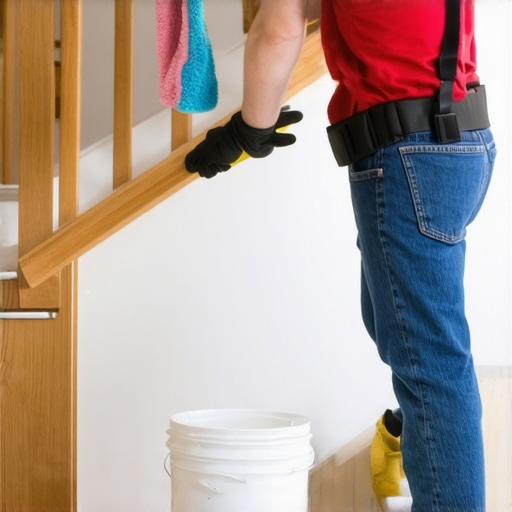
Seal the Surface with High-Quality Primer
Primer is not just watered-down paint; it is the chemical bridge between the old wall and the new color. In a high-traffic zone, skipping primer is a recipe for peeling. I once tried to paint a dark navy over an old off-white stairway without priming. I thought I was saving time, but I ended up with a finish that chipped if a laundry basket even brushed against it. Using a dedicated primer provides a uniform surface that stops the wall from absorbing the moisture out of your topcoat too quickly. It also helps you avoid the common headache where your new home needs a third coat of white paint just to hide the previous owner’s questionable color choices.
The Secret to Sharp Lines on Uneven Drywall
Getting that crisp edge where the wall meets the stairs or the baseboards is often the most frustrating part of the job. You will want to use the blue tape trick for getting clean lines on texture. Lay your tape, then run a tiny bead of the existing wall color or a paintable clear caulk along the edge to seal the microscopic gaps. This prevents the new color from bleeding under the tape. While you are down there, check for any small dings from moving furniture. Use the hammer and cloth trick for fixing dented trim before you even think about applying your final topcoat. It is these tiny mechanical fixes that separate a DIY look from a professional result.
Why Premium Resin Beats the Bargain Bin Every Time
Do not fall for the cheap stuff when you are working in a combat zone like a staircase. The difference between contractor grade and premium paint is almost entirely in the solids content. High-end satin finishes have more resins that cure to a much harder, more washable shell. When I painted my own basement stairs, I used a bargain-bin eggshell that felt like chalk once it dried. Every time the dog brushed against it, it left a mark. I eventually had to repaint with a premium brand. A high-solids satin finish will feel slightly slick when it cures, which is exactly what you need for a surface that sees hundreds of hands every week.
Most people assume that once a paint is labeled as ‘washable,’ it is basically bulletproof. In my experience, that is exactly where the trouble starts. We are taught that more elbow grease equals a cleaner home, but with modern paint, the opposite is often true. If you have ever noticed a weird, shiny patch where you tried to clean a scuff, you have experienced ‘burnishing.’ This happens when you physically polish the paint film by rubbing too hard, essentially destroying the texture of the resin. This is one of those local painting secrets that professionals rarely share because it is much easier to sell you a more expensive gallon than to explain the physics of friction.
The Hidden Trap of Over-Cleaning Your Walls
Everyone tells you to scrub your walls to keep them fresh, but I am going to challenge that common belief. In a high-traffic stairway, ‘scrubbing’ is often the enemy of longevity. According to the ASTM D2486 standard, scrub resistance is measured by how many cycles of a weighted abrasive brush a paint can withstand before the film fails. However, those tests are performed in a lab on a perfectly flat surface. In the real world, especially if your office walls look different depending on the bulb, a single aggressive cleaning session can create a permanent visual defect. Instead of reaching for the abrasive side of the sponge, you should be using a soft microfiber cloth and the gentlest pH-neutral soap possible. If you treat your paint like the delicate finish on a car, it will last ten times longer.

How many days does it actually take for paint to reach full hardness?
This is the question that separates the amateurs from the experts. You might think the wall is ‘dry’ because it is not sticky to the touch, but ‘dry’ and ‘cured’ are two very different things. Most latex paints take up to 30 days to reach their full chemical hardness. During that first month, the paint is still ‘soft’ and extremely vulnerable to damage. If you ignore the 48-hour rule for moving furniture back against new walls, you are asking for trouble, but for a stairway, you should wait even longer before doing any deep cleaning. I have seen clients ruin a four-thousand-dollar paint job because they tried to scrub off a muddy paw print three days after the crew left. If you have fallen into this trap and need to know how to fix a run in your paint or a burnished spot without repainting the whole wall, the secret is a very light sanding followed by a feathered-in touch-up of the original finish.
Magic Erasers Are Not Your Friend
Here is the ‘oops’ factor that ruins more DIY projects than anything else: the melamine sponge, commonly known as a Magic Eraser. These things are essentially ultra-fine sandpaper. While they are great for getting crayon off a desk, they will absolutely strip the sheen right off your eggshell or satin stairway walls. It might look clean for a second, but as soon as the light hits that spot from an angle, you will see a dull, lifeless patch. If you are concerned about chemical sensitivity while the paint cures, make sure you understand the difference between low-voc and zero-voc paint labels, as these formulations often have different curing timelines and hardness levels. Have you ever accidentally ‘polished’ your wall while trying to clean a smudge? Let me know in the comments if you have seen that annoying shiny spot appear.
I eventually realized that the best way to master the art of house painting is to stop thinking about the job as a one-time event. It is a long-term relationship with your walls. To keep my stairway from looking like a high-traffic subway station, I developed what I call my ‘Maintenance Kit.’ I keep a small, airtight four-ounce glass jar of the exact paint used on the walls, labeled with the date and the specific sheen. I also include a high-quality 1-inch synthetic sash brush. Most people use those cheap foam brushes for touch-ups, but they leave a texture that doesn’t match the original roller stipple. When you use the same high-quality brush you used for the initial job, the touch-up disappears into the wall. This is one of those local painting secrets that keeps a home looking pristine without a full weekend of work.
Invest in a high-CRI headlamp for inspections
If you want to truly unlock the power of professional painting, you need to see what the pros see. I never inspect my walls with just the overhead light. I use a high-CRI (Color Rendering Index) LED headlamp. It reveals the scuffs and oils that normal yellow incandescent bulbs hide. By catching a small smudge early and wiping it with a damp microfiber cloth, you prevent the grime from bonding to the paint film. According to the Master Painters Institute (MPI) Standard 141, the integrity of a high-performance architectural coating depends heavily on maintaining the surface pH and avoiding abrasive buildup. If you wait until the wall looks ‘dirty’ to the naked eye, you’ve likely already let the oils penetrate the resin.
How can I keep my stairway looking fresh for years?
The secret is all about proactive intervention. Every six months, I do a ‘walk-through’ with my headlamp and a spray bottle of distilled water—not tap water, which can leave mineral rings. If you want to transform your home with expert house painting tips for 2025, start treating your high-contact zones like the specialty finishes they are. I also recommend keeping a roll of high-quality painter’s tape and a 3M Hand-Masker in your garage. This tool allows you to quickly mask off the floor or trim if you ever need to do a larger ‘feathered’ touch-up on a mid-wall scuff. It’s about having the professional tools ready so that maintenance doesn’t feel like a chore. For those struggling with exterior surfaces as well, knowing how to maintain your newly painted exterior can save you thousands in the long run.
The future of smart coatings is closer than you think
Looking ahead, I predict we are going to see a massive shift toward ‘self-healing’ and ‘photo-catalytic’ paints in residential homes. We are already seeing these technologies in industrial settings, where the paint actually breaks down organic pollutants and oils when exposed to light. Imagine a stairway that literally cleans itself every time you turn on the hall light! Until then, we have to rely on high-resin satins and proper technique. If you are currently staring at a scuffed wall, I challenge you to try the ‘distilled water and microfiber’ trick today before reaching for the chemicals. You’ll be shocked at how much life you can breathe back into a dull finish just by removing the invisible film of dust and oils. If things have gone too far and you need a total refresh, checking out innovative house painting ideas can help you choose a more durable color and sheen for your next attempt.
The Lessons My Scuffed Walls Finally Taught Me
After years of trial and error in my own home and helping neighbors with theirs, I’ve realized that the most expensive paint isn’t always the right paint if you don’t respect the curing process. One major lightbulb moment was discovering that natural lighting in a stairwell can trick you. I now always recommend you color your world with expert house painting advice by testing your sheen samples at high noon and again at 8 PM. If the eggshell looks like a mirror under your LED bulbs, it’s too shiny for a high-contact zone.
Another hard-won lesson: keep a small ‘go-bag’ of your specific paint color. If you wait until the wall is covered in scuffs to act, you’ll likely end up needing a full repaint. Instead, local painting secrets suggest addressing marks within the first week of them appearing using a light touch. And remember, the 30-day cure time is a law, not a suggestion. If you try to ‘test’ the washability on day three, you will leave a permanent burnish mark that even the best painters can’t hide.
Gear I Trust to Keep My Stairs Looking Sharp
If you want to unlock the power of professional painting, you need the right tools on standby. I don’t go anywhere without my 3M Hand-Masker for quick touch-ups, but for the average homeowner, a simple high-CRI headlamp is the real game-changer. It shows you the oils and dust that standard room lights hide. I also swear by distilled water in a spray bottle for cleaning; tap water contains minerals that can leave a ghost-like ring on your beautiful satin finish. Finally, if you do make a mistake, don’t panic—knowing how to fix a run in your paint with a bit of fine-grit sandpaper and a steady hand can save you a world of stress.#IMAGE_PLACE_HOLDER_E#
Go Ahead and Pick Up That Brush
The stairs are the spine of your home, and while they take a beating, they also offer the biggest opportunity for a high-end transformation. Don’t let the fear of fingerprints stop you from choosing a color you love. When you master the art of house painting by picking the right resin-heavy sheen and respecting the cure time, you’re creating a space that looks as good as it performs. Your home is meant to be lived in, and your paint should be tough enough to handle the journey. What’s the most stubborn mark you’ve ever tried to scrub off your stairs? Let me know in the comments below!