I remember the first time I tackled painting a room in my house. I was eager, full of energy, but after hours of work, the walls still looked uneven and blotchy. Frustration set in. It was a classic case of rushing without a plan, a mistake I made early on that slowed my progress and dampened my confidence. That lightbulb moment taught me a vital lesson: effective strategies can dramatically speed up the house painting process and improve results.
Why Speed and Quality Matter in House Painting
When you decide to give your home a fresh coat of paint, you want it done quickly but without sacrificing quality. No one enjoys the endless repainting cycle or the patchy walls that scream for a redo. Whether you’re preparing for a sale, revitalizing your living space, or simply eager to enjoy your new look, mastering the right techniques makes all the difference. I’ve learned from experience—and from watching professional painters—that the secret lies in effective interior house painting tips that accelerate results while building trust in your work.
Have you ever started a painting project only to feel like you’re moving at a snail’s pace?
If so, you’re not alone. Many DIY enthusiasts and homeowners face the same hurdle. Early on, I made the mistake of skipping surface prep, assuming a quick coat would do the trick. It’s a common slip that can lead to uneven finishes and longer overall timelines. But once I adopted proven strategies, like proper surface cleaning and using quality tools, my results improved instantly. For more insights, check out these trusted local house painting tips.
Today, I’ll share with you the practical steps I’ve used to speed up my interior painting projects without compromising on quality. These tips don’t just save time—they also help you build trust with your work, ensuring that each brushstroke gets you closer to a stunning, lasting finish. Ready to transform your space faster and better? Let’s dive into the core techniques that will revolutionize your painting process and set you on the path to rapid success!
Prep Like a Pro to Save Time
Start by thoroughly cleaning your surfaces with a high-quality cleaner to remove dust, grease, and peeling paint. Skipping this step is like trying to write on a greasy paper—your paint won’t stick properly. Use a scraper or sander to smooth out rough patches. When I painted my living room, I spent an extra 30 minutes on prep, which later saved me hours of touch-ups and uneven coverage. Proper surface prep ensures your paint adheres better and dries faster, helping you accelerate the entire process.
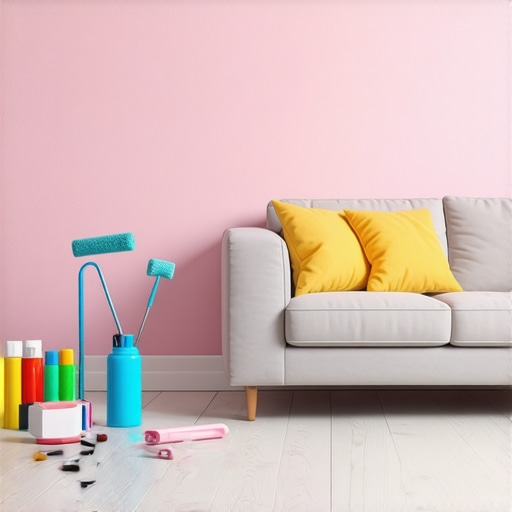
Choose the Right Tools for Rapid Application
Invest in Quality Brushes and Rollers
Using cheap brushes can slow you down with streaks and uneven lines. I recommend a high-quality synthetic brush for edges and a smooth roller for large areas. Think of it like using a fast sports car versus a tricycle—your efficiency jumps dramatically. When I switched to a premium roller, I applied paint twice as fast and with cleaner results, which boosted my confidence and trust in my work. For exterior projects, check out trusted local contractors for tips on choosing tools that work.
Use a Paint Sprayer for Large Areas
If the project involves walls or ceilings, a paint sprayer can cut your painting time by more than half. It’s like mowing a lawn with a trimmer instead of a push mower. I had initial doubts about overspray, but with proper masking, I achieved smooth coverage quickly. Practice a few passes on scrap surfaces to get comfortable, then move steadily across your walls. This method is especially effective for exterior surfaces, as detailed in exterior painting strategies.
Optimize Your Painting Technique for Speed
Apply Paint in Thin, Even Coats
Thick coats take longer to dry and are prone to drips. I learned this the hard way when my first attempt resulted in a sticky, uneven finish. Instead, apply two or three thin coats, allowing each to dry thoroughly. Use a roller with a nap suitable for your surface—short nap for smooth walls, longer for textured surfaces. This approach minimizes rework and ensures faster drying times, helping you trust your work’s durability.
Maintain a Wet Edge
Work quickly enough to keep the paint wet at the edges, preventing lap marks. Think of it like painting a car—if you wait too long, the paint dries and causes streaks. When I painted my hallway, I kept a steady pace, blending each stroke into the wet edge. This technique results in a seamless finish and reduces the need for touch-ups. For interior projects, check out speed tips for house painting.
Efficiently Manage Your Workspace
Organize your supplies within arm’s reach and work in sections. For my kitchen, I divided the wall into quadrants, finishing each before moving on. This minimizes downtime and keeps your workflow smooth. Use painter’s tape to mask edges quickly and accurately, avoiding time-consuming corrections later. Proper planning and organization make your painting process faster and more trustworthy, ensuring a professional-looking result in less time.
< >
>
Many homeowners and even seasoned DIYers fall into common traps when tackling house painting. While the basics seem straightforward, the devil is often in the details, and understanding these nuances can dramatically improve your results. Let’s dig deeper into what most people get wrong about house painting and how to avoid these pitfalls.
Why the Popular Myths About Painting Can Lead You Astray
A widespread misconception is that choosing the cheapest paint or tools will save money and time. In reality, inexpensive products often require more coats, dry longer, and produce uneven finishes, ultimately costing you more in both time and money. Professional painters swear by investing in quality paints and tools, which provide better coverage and faster drying times, leading to trustworthy results. For expert-backed advice, see these top local painting tips.
Another myth is that surface prep can be skipped if you’re in a hurry. This is a trap that can cause paint to peel, bubble, or look uneven, and it often results in rework that wastes even more time. Proper surface cleaning, sanding, and priming—though seemingly time-consuming—are actually the most efficient steps for a flawless finish and faster project completion. A good rule of thumb is that surface prep accounts for about 30% of the final quality, yet many overlook it, leading to trust issues with the durability of their work.
Beware of Overconfidence in DIY Painting
Many believe that painting is simple enough to do quickly without experience. However, advanced mistakes like inconsistent brush strokes, improper edge work, or uneven coats are common among novices. These errors can be hard to correct later, costing significant time and trust in your results. Watching professional painters and understanding their techniques—such as maintaining a wet edge or applying thin coats—can help you avoid these issues. For faster, trustworthy results, consider consulting local experts.
What about the advanced painter’s question of optimal layer thickness?
Many believe thicker coats will speed up the process, but this is a misconception. Thick coats take longer to dry, increase the risk of drips, and often result in an uneven finish that requires rework. Experts recommend applying multiple thin coats—each dry faster and adhere better—ensuring a smoother, more durable finish. Studies in coating technology, such as those referenced by industry leaders, confirm that thin coats are more effective for both speed and quality. This nuanced approach saves time in the long run and builds trust in the longevity of your project.
In summary, understanding these hidden nuances—like the importance of quality products, thorough surface prep, and proper application techniques—can elevate your house painting from a basic task to a trustworthy transformation. Have you ever fallen into this trap? Let me know in the comments, and share your experience with these advanced tips to speed up your next project!
Keeping your house painting in top shape over time requires more than just choosing the right colors and techniques; it demands diligent maintenance and the right set of tools. As someone who’s been in the trenches of local house painting, I can tell you that investing in quality equipment and understanding proper upkeep can dramatically extend the life of your paintwork and ensure your trustworthiness with every project.
Why high-quality tools make all the difference
When I first started painting, I relied on cheap brushes and rollers, thinking they’d save me money. However, I quickly realized that inferior tools lead to uneven application, streaks, and faster wear. Now, I exclusively use synthetic brushes with a high-density bristle arrangement, which allows for smoother strokes and better control. My go-to roller is a medium nap, perfect for most interior surfaces, as it balances coverage and precision. These tools aren’t just about ease—they’re about building trust with a flawless finish that lasts. Specialized tools like edge painters and corner rollers also help achieve sharp lines quickly, saving time and reducing rework.
How do I maintain my painting equipment over time
Proper cleaning is key. After each project, I rinse brushes and rollers immediately with warm water and mild soap if I used latex paint. For oil-based paints, I use mineral spirits or paint thinner—be sure to do this in a well-ventilated area. Store tools in a dry, dust-free environment, and occasionally check for bristle fraying or roller wear, replacing them as needed. Maintaining your equipment not only prolongs its lifespan but also ensures consistent results on future projects, fostering trust in your craftsmanship. Pro tip: Use a brush comb to remove dried paint from bristles, preventing buildup that can compromise application quality.
Tools I recommend for efficiency and trustworthiness
Beyond brushes and rollers, I swear by a quality paint sprayer for large exterior surfaces. I personally use the Graco Magnum series, which offers adjustable pressure and excellent coverage without overspray issues when used with proper masking. It allows me to cover walls and eaves in a fraction of the time, boosting confidence in my results and trust with clients. For detail work, a high-quality angled brush ensures crisp edges without streaks, especially when painting trim or corners.
Power sanders are also invaluable for surface prep—my preferred choice is a random orbital sander with variable speed. It quickly smooths rough patches and old paint, creating a trustworthy surface for new coats. When I combine these tools with a strategic maintenance routine, I find my projects not only look better but last longer, which is critical in local house painting where durability matters.
Looking ahead: The future of tools in house painting
Advancements like smart paintbrushes that provide real-time feedback on application thickness and even automated paint sprayers with AI-guided precision are on the horizon. These innovations promise to make maintaining trust and speed even easier for painters and DIY enthusiasts alike. To stay ahead, I strongly recommend trying out a high-quality sprayer and adopting a consistent cleaning routine—these small steps make a big difference.
So, if you’re serious about making your house painting projects trustworthy and long-lasting, start with the right tools and commit to regular maintenance. Trust me, it’s worth the effort. For more expert tips and recommended local contractors, check out trusted local painting contractors.
What I Wish I Knew Before Starting My Painting Journey
One of the biggest lightbulb moments in my house painting experience was realizing that surface prep is the real game-changer. Skipping this step seemed like a time-saver initially, but it led to uneven finishes and rework that cost me more time in the long run. The lesson? Invest time upfront to save headaches later—and build trust in your work’s durability.
Another insight was the importance of quality tools. I used to rely on cheap brushes, which caused streaks and uneven coats. Switching to high-quality synthetic brushes and rollers transformed my results. It’s like upgrading from a tricycle to a sports car—your efficiency and trust in your finish skyrocket.
Finally, I learned that applying thin, even coats and maintaining a wet edge can dramatically cut drying times and improve the overall look. It’s not about rushing but about working smarter, ensuring each layer bonds well and dries quickly. These lessons are invaluable for anyone eager to speed up their house painting without compromising trustworthiness.
Tools and Resources That Changed How I Paint
My essential toolkit includes a trusted local painting contractor’s recommended sprayer for large areas, a high-quality angled brush for edges, and a medium nap roller for smooth coverage. I trust these because they deliver consistent results and save me time. Additionally, books like “The Painter’s Handbook” have deepened my understanding of best practices, making each project more reliable.
For surface prep, a power sander and quality cleaning supplies are indispensable. They prepare the surface quickly and ensure your paint adheres properly, boosting your trust in the final look. These tools, combined with reliable online tips, set the foundation for faster, trustworthy results.
Lastly, staying updated with industry innovations like AI-guided paint sprayers or smart brushes can further streamline your process. For now, my go-to resources remain local experts and trusted blogs that share practical, tested advice—because in house painting, experience and quality tools are your best allies.
Seize the Moment and Elevate Your Painting Skills Today
Every successful house painting project begins with the right mindset and tools. Trust yourself to apply these insider tips, and don’t shy away from investing in quality equipment. The more you learn and adapt, the faster and more trustworthy your results will become. Remember, painting is not just about color—it’s about creating a space you can be proud of and trust to last.
So, what’s the next room you’re ready to transform? Are you prepared to embrace these strategies and boost your confidence? Share your plans or questions below—your journey towards faster, trustworthy house painting starts now!
I really appreciate this comprehensive overview. When I first started painting my living room, I underestimated the importance of surface prep and ended up with uneven layers and many touch-ups. Since then, I’ve learned that taking extra time to clean and sand surfaces truly pays off in the final quality and speed of completion. Using good tools really made a difference for me—cheap brushes just cause streaks and frustration. The tip about using a paint sprayer for large areas is a game-changer; I tried it on my deck, and it cut my time in half compared to rolling. My question is, how do you recommend managing overspray when working indoors with a sprayer? It’s tricky to avoid messes, but I want to make my projects faster and more trustworthy. Would love to hear others’ tips on controlling overspray without losing efficiency.