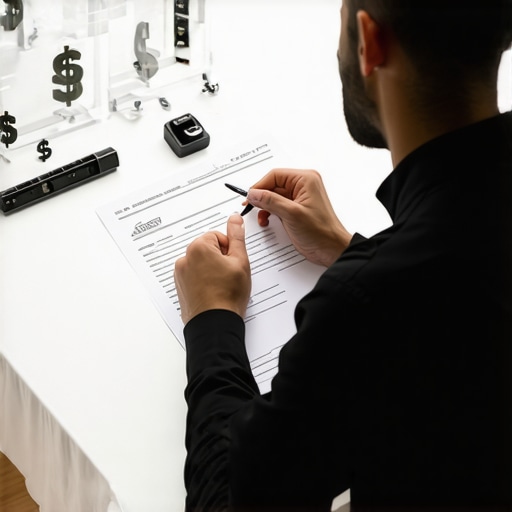
I remember the moment I first felt duped during a house painting project. The contractor handed me an invoice that was way higher than the initial quote. Turns out, those sneaky hidden fees had quietly piled up, turning my budget into a nightmare. That realization hit me hard — and it’s a mistake I see homeowners making all too often. If you’ve ever been caught off guard by unexpected charges, you know exactly what I’m talking about. Today, I want to share a breakthrough I’ve uncovered: the four hidden fees you can eliminate from your local painting contracts in 2026, saving you hundreds — maybe thousands — of dollars.
Why Hidden Fees Are Stealing Your Painting Budget
Most homeowners go into a painting project with the best intentions, expecting transparency and straightforward pricing. But the truth is, many contracts are riddled with hidden costs that can silently inflate your bill. These fees often come from mandatory add-ons, unanticipated prep work, or outdated pricing tricks contractors still use. The problem? These charges aren’t always disclosed upfront, leading to surprises or worse, disputes after the work is done.
In my early days as a homeowner, I made the critical mistake of accepting a quote without thoroughly reviewing the contract. That oversight cost me over 15% more than I’d planned — an eye-opening lesson. According to recent industry insights, hidden charges can account for up to 20% of the overall painting costs, a significant chunk that homeowners should be aware of before signing anything. For further tips on effective communication with contractors, check out these expert strategies.
So, why does this matter now? Because in 2026, contractors are expected to employ more sophisticated tactics to subtly increase prices, especially as material costs fluctuate. Being aware and proactive is your best defense against wasting money on avoidable charges. Let’s delve into the specific fees you should watch out for and, more importantly, how to strip them from your contracts.
Have you ever faced unexpected fees during a home improvement project? If so, you’re not alone. But the good news is, the solutions are within reach — and I’ll guide you through them step by step in the sections ahead.
Scrutinize Every Clause in the Contract
Start by reading the entire contract carefully. Use a highlighter to mark ambiguous or vague terms. For example, if the contract mentions ‘additional prep work’ without specific details, ask for a breakdown of what that entails. During my last project, I once spotted a clause about ‘professional cleaning,’ which I clarified to mean only sweep-up—nothing more. This prevented unexpected charges later on.
Request Detailed Itemized Estimates
Insist on a comprehensive quote that lists all costs explicitly. Think of it like a grocery list; without details, you might pay for items you didn’t need. I once received an estimate with a vague ‘miscellaneous’ line, which I questioned immediately. The contractor then provided a specific list, which I reviewed carefully before signing. This step prevents surprises and ensures transparency.
Probe for Hidden Charges
Ask pointed questions about fees that may appear as extras. For instance, inquire about costs related to surface preparation, primer types, or special paints. I specifically questioned a fee for ‘special finishes’ and was able to negotiate it out. Remember, if a contractor dodges these questions, consider that a red flag.
Negotiate Clear Payment Milestones
Divide payments into phases aligned with work completion stages. Instead of paying upfront, opt for payments after each phase—preparation, painting, and cleanup. During my project, I negotiated a 30% deposit with 20% after surface prep, and the rest upon completion. This keeps both parties accountable and deters contractors from padding the bill.
Identify and Eliminate Unnecessary Add-Ons
Be cautious of optional services or upgrades that inflate your bill. For example, high-gloss finishes or premium paints. I declined a suggested upgrade to eco-friendly bio resin paints, which was optional and added hundreds to the cost. Stick to the essentials unless you understand and truly want the extras.
Use Reliable Resources to Guide Your Negotiation
Consult trusted sources like these expert tips to familiarize yourself with fair pricing and common scams. Having that knowledge gave me confidence to challenge inflated quotes and save a significant amount. Remember, educating yourself is your best defense against hidden charges in 2026 contracts.
Many believe that selecting the right color or a quick brush-up is all it takes to ensure a lasting paint job. However, in my experience working with homeowners and industry pros, there’s a common misconception about what it truly means to do quality house painting. The prevailing myth? That a single coat or choosing premium paint alone guarantees durability. The real nuance lies in understanding the complex interplay between preparation, material choices, and application techniques, especially in today’s evolving landscape of painting technologies.
One often-overlooked detail is the importance of proper surface preparation. Many homeowners and even some painters think that applying a fresh coat over existing paint is enough. But without meticulous cleaning, sanding, and priming, this oversight can lead to peeling, cracking, or mold growth, ultimately ruining the aesthetic and longevity of the job. For example, recent advances like bio-resin paints are transforming how we approach primer layers, providing better adhesion and resistance, which can be crucial in high-moisture areas. To gain insight into cutting-edge materials, check out these bio-resin innovations.
Another myth is that more coats always mean better results. Many assume that applying multiple layers will compensate for poor prep or substandard materials. In reality, over-coating can trap moisture or create uneven textures if not executed precisely. Advanced techniques involve optimized application sequences, ensuring each layer adheres correctly before the next. This is especially significant with new types of paints like graphene-infused finishes, which require specific application protocols to function as intended. Learning about these can help you avoid costly mistakes. For an in-depth discussion, explore these graphene paint tips.
Most homeowners aren’t aware that application conditions—such as humidity, temperature, and even wind—vastly influence the durability of the paint. For instance, painting during high humidity can lead to prolonged drying times and increased risks of imperfections. Modern technology now allows us to use smart measurement devices to monitor these factors in real-time, ensuring ideal conditions and preventing costly re-dos.
Why do these nuances matter so profoundly in 2026? Because as the industry adopts smarter materials and techniques, understanding the subtle science behind effective painting becomes a competitive advantage. Relying solely on traditional methods or outdated beliefs can result in wasted time and money. Instead, embracing advanced knowledge about surface prep, application conditions, and innovative paints can drastically extend the lifespan of your paint job—saving you from future headaches.
Have you ever fallen into this trap with house painting? Let me know in the comments how you navigated it. Recognizing and respecting the complex layers behind a successful paint project ensures not only a beautiful finish but also a cost-effective investment in your home’s value.
Keeping It Working: Tools I Recommend for Lasting Results
Maintaining a beautiful, durable paint job requires more than just quality materials; it hinges on using the right tools and techniques that ensure longevity. One of my favorite investments is a high-quality airless sprayer. Unlike traditional brushes or rollers, a top-tier sprayer provides uniform coverage, eliminates streaks, and significantly reduces application time. I personally swear by models with adjustable pressure control, which allow precision in tricky areas like trims and corners, ensuring a smooth finish that lasts for years. For detailed work, I use a precision edging tool, which helps me achieve crisp lines without the mess that often comes with tape. Combining these tools with a good scaffolding setup means I can reach high or difficult spots safely and efficiently.
In addition, properly preparing your surfaces is crucial. I recommend employing a moisture meter—like the Tramex Moisture Encounter—before starting any painting. This device verifies that walls are adequately dry, preventing issues like peeling or mold down the line. It’s a small investment that safeguards your work and saves you from costly rework.
As for paint selection, I recommend exploring bio-resin paints, which are revolutionizing industry standards in 2026. These eco-friendly, highly durable coatings provide excellent adhesion and resistance to weathering, making them ideal for long-term results. You can learn more about these cutting-edge options here. Investing in the right primer is equally important. I prefer high-build, bonding primers that create a solid foundation, especially on problematic surfaces like old wood or rusted metal.
Don’t forget about the importance of proper cleaning and maintenance tools. A soft, microfiber brush helps remove dust and residues without damaging the paint surface, extending its lifespan. Additionally, I recommend keeping a set of quick-drying touch-up paints for areas prone to scuffing or minor damage.
Looking ahead, technological advancements like smart paint monitors and UV-curing equipment are becoming more accessible. In the future, I predict smart coatings that offer real-time condition alerts and self-healing capabilities will become standard, simplifying maintenance greatly. Until then, diligent surface prep, the right tools, and quality materials remain your best strategy.
How Do I Maintain My Paint Job Over Time?
Regular inspections are key. I recommend visual checks every six months for signs of wear or damage, especially after storms or extreme weather. Promptly address minor issues — like peeling or chalking — with quick touch-ups using quality paints and proper brushes. Cleaning the walls with gentle solutions and avoiding harsh scrubbing also prolongs the finish’s life. When it’s time for a full refresh, proper data on previous surface conditions and paint types helps plan a cost-effective restoration. Incorporating periodic maintenance with advanced tools ensures your investment looks great year after year and reduces the need for costly overhauls. For more strategies on accelerating your painting success, check out these expert tips.
Lessons That Changed My Approach to House Painting
One eye-opening insight I discovered is that a thorough contract review can save hundreds by catching unnecessary fees early. I used to trust vague estimates, but now I know that clarity upfront prevents surprises later.
Another revelation is the importance of understanding surface prep—neglecting it can cause long-term damage, regardless of how shiny or trendy your paint is. Proper preparation is the foundation for lasting results, and skipping it costs more than the initial savings.
Lastly, I realized that embracing advanced materials like bio-resin paints isn’t just about eco-friendliness; it’s about durability and cost-efficiency over time. Investing in smarter technology today means fewer touch-ups tomorrow, which is a game-changer.