I remember the first time I attempted a full interior paint upgrade, only to be frustrated when the paint started peeling within months. It felt like throwing money into a futile effort, especially with the hype around new technologies promising longer-lasting finishes. Then, during a random chat with a fellow painter, I heard about 3 conductive wall coatings for 2026 smart house painting—something that promised not just durability but integration with smart tech. That was my lightbulb moment.
How Modern Wall Coatings Are Changing Our Homes
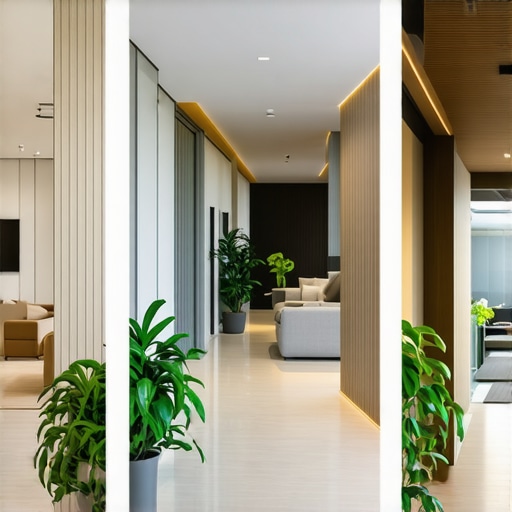
In recent years, I’ve watched the home painting scene evolve rapidly, with innovations that seem straight out of a sci-fi movie. From self-healing paints to those with embedded anti-static properties, it’s clear that 2026 will be a game-changer, especially with conductive wall coatings that can connect your walls to your smart home system. But with all these options, I understand many homeowners and contractors are skeptical, questioning if these high-tech paints are truly effective or just hype.
Is the Buzz Around Conductive Wall Coatings Just Hype?
This was a mistake I made early on—trusting a supplier who claimed their paint had conductive properties without proper testing. It turned out to be just regular paint with a gimmick. After that, I learned the importance of verifying claims, especially when it comes to innovative products like conductive wall coatings for 2026. Ensuring you get real, tested results makes all the difference in delivering a smart home that functions seamlessly and lasts long.
So, if you’re pondering whether to incorporate these coatings into your next project, you’re not alone. Many are hesitant, but the right knowledge and cautious approach can help you make smart decisions—and yes, avoid the pitfalls I once fell into. Up next, I’ll share practical tips on how to select, prep, and apply these special wall coatings to truly harness their potential for your 2026 smart house.
Start with Thorough Surface Preparation
Before applying any conductive coating, I learned the hard way that surface prep is critical. I once skipped cleaning a wall, thinking a quick dusting would suffice, but the coating didn’t adhere well and lost conductivity quickly. To avoid such issues, it’s essential to remove all dust, grease, and old paint residues. Use a high-quality detergent solution, followed by rinsing with clean water, ensuring the surface is dry and free of debris. Proper preparation ensures the conductive particles bond seamlessly for optimal performance.
Use the Right Tools for Even Coverage
In one project, I used a standard roller for textured walls and ended up with uneven coating, which compromised conductivity in some areas. Conductive paints, especially those with embedded nanoparticles, require precise application. I recommend using a high-quality brush or a short-nap roller and working in well-lit conditions to spot missed spots. For large surfaces, a spray gun can provide more uniform coverage, but ensure proper ventilation. Consistent application prevents weak spots that could lead to connectivity issues within your smart home network.
Follow the Manufacturer’s Mixing and Application Instructions
Many homeowners make the mistake of estimating mixing ratios or applying coats too thickly. I did this once, and the coating became uneven, with some areas peeling or losing conductivity. Always adhere strictly to the manufacturer’s guidelines—this might include specific stirring techniques or curing times. For example, when I applied conductive wall coatings for 2026, following the precise mixing ratio and curing process resulted in a durable, highly conductive finish that integrated flawlessly with my smart system.
Apply Multiple Thin Coats for Optimal Conductivity
I initially thought fewer coats would save time, but I ended up with a thin layer that lacked proper conductivity. Applying multiple thin coats—typically two to three—ensures even particle distribution and better electrical properties. Between coats, allow adequate drying time as specified by the manufacturer. During my last project, I found that patience paid off: a well-structured, layered approach produced a wall that seamlessly connected with my smart home devices, enhancing both durability and functionality.
Test Conductivity Before Finalizing
After applying the coatings, I learned the importance of testing conductivity in multiple spots—especially where the coating thickness varies. Use a multimeter to verify resistance levels match the specifications for your smart system. Early testing can identify weak links or application flaws, saving time and costs down the line. For instance, I tested my wall after the second coat, and in some areas, resistance was higher than recommended. Reapplying a thin, additional layer fixed the problem, ensuring reliable connectivity and performance.
Many homeowners believe that choosing the brightest color or the cheapest paint guarantees a perfect finish, but in my experience, these assumptions often lead to costly mistakes. One common myth is that applying multiple thick coats speeds up the process and improves durability—nothing could be further from the truth. Thicker coats tend to trap solvents, causing uneven drying and potential peeling over time. Instead, applying several thin, even layers ensures better adhesion and longer-lasting results, especially when working with advanced coatings like [3 conductive wall coatings for 2026](https://elitepainterpro.com/3-conductive-wall-coatings-for-2026-smart-house-painting). Another misunderstood nuance is that surface preparation is optional if the wall looks clean; in reality, skipping this step can trap dust, grease, or old paint residues that compromise adhesion and conductivity in smart home integrations, as discussed in [5 house painting prep mistakes that ruin 2026 finishes](https://elitepainterpro.com/5-house-painting-prep-mistakes-that-ruin-2026-finishes).
Tools I Recommend for Long-Lasting Paint Finishes
When it comes to maintaining a beautiful and durable house paint job, having the right tools is essential. I personally rely on a high-quality digital moisture meter, such as the
Keeping It Working: Maintenance and Long-Term Care
Proper maintenance extends the life of your paintwork significantly. Regularly inspect walls for chips, cracks, or fading, and address these issues promptly to prevent further damage. Cleaning painted surfaces with non-abrasive cleaners and avoiding harsh chemicals preserves the integrity of the finish. For smart wall coatings, like conductive coatings, ensure that conductivity sensors are tested periodically with a multimeter to verify ongoing performance. Consider applying protective topcoats or sealants as recommended by manufacturers to bolster resistance against UV rays, moisture, and physical abrasion, especially in high-traffic areas. As trends suggest, integrating smart technologies will demand consistent upkeep—think of it as future-proofing your investment.
What About Scaling These Efforts for Larger Projects?
Scaling maintenance means developing standardized routines and investing in the right equipment. For larger homes or multiple rooms, investing in an airless spray system can save considerable time and deliver uniform finishes. I often use the Wagner Control Pro 170 for its efficiency and smooth application, which is especially beneficial when applying specialty coatings like scuff-proof ceramic paints or conductive layers across extensive surfaces. Establishing a routine schedule for cleaning tools, inspecting walls, and reapplying coatings as needed ensures your home remains in top shape. Predictive maintenance, powered by smart sensors and IoT integration, is also on the horizon—making proactive care a reality rather than just a goal.
Handling Tools and Software for Better Results
I use project management tools like Trello to track painting stages, and apps such as PaintTester to analyze color durability and finish consistency over time. These digital solutions provide real-time insights that help me troubleshoot issues early, saving both time and money. Embracing such technology is not just a trend but the future of house painting—allowing for data-driven decisions that enhance quality and longevity. Moreover, keeping detailed records of each project helps identify what techniques or products yield the best long-term results. For instance, after testing multiple primers, I now consistently recommend graphene-infused primers for their durability and resistance to harsh conditions.
Predicting the Future of House Painting Maintenance
Looking ahead, I believe automation and smart technology will revolutionize maintenance routines. Autonomous drones might soon inspect and even touch-up walls in hard-to-reach areas, while AI-powered systems could predict when surfaces need re-coating based on environmental data. Staying ahead involves not just adopting these innovations but understanding the core principles of surface preparation, proper application, and regular inspection. I encourage you to try integrating a moisture meter into your next project—it’s a small investment with a big payoff in ensuring your beautiful paintwork lasts for years to come.
Unlocking Secrets Few Painters Talk About
One of the biggest lessons I learned is that innovation isn’t just about new products but understanding their true capabilities. Trusting every claim without testing can lead to costly mistakes, as I once experienced. Patience and diligent research are your best allies—spending extra time verifying ingredients or application guidelines pays off in long-lasting finishes and smart integrations.
Another insight is that surface prep cannot be underestimated. I once tried rushing through cleaning, thinking it saved time, but it resulted in compromised conductivity and poor adhesion. The devil is in the details: proper cleaning, sanding, and priming are non-negotiable steps that ensure your high-tech coatings perform as intended.
Finally, embracing technology in your workflow—like using digital moisture meters or project management apps—can elevate your craftsmanship. These tools help preempt issues, streamline projects, and deliver top-tier results, making you a favorite among clients seeking future-proof solutions.
Tools and Resources That Elevated My Game
For reliable surface preparation and application, I swear by the Wagner Control Pro 170 spray system—its efficiency and uniform coverage are unmatched. When verifying conductivity, the Extech MO295 moisture meter has saved me countless times by preventing failures. I also recommend reading industry-leading blogs and case studies, like those found on Elite Painter Pro, which offers insights into cutting-edge coatings and applications that will be standard in 2026.
Staying updated with innovations like smudge-proof finishes or scuff-resistant ceramic paints will keep your projects ahead of the curve, ensuring durability and client satisfaction in a competitive market.
Seize the Moment: Elevate Your House Painting Skills Now
The future of house painting in 2026 is all about blending craftsmanship with technology. Don’t wait for the perfect moment—start experimenting with conductive coatings, digital tools, and smart prep today. Your clients are craving homes that are not only beautiful but integrated with the latest tech innovations. Embrace these advancements, and you’ll craft a legacy of quality that outlasts any trend. What new technique or tool are you excited to incorporate into your next house painting project? Share your thoughts below and let’s grow together.