

I will never forget the sinking feeling I had three days after finishing my first ‘professional’ cabinet DIY. I had spent my entire long weekend hunched over those doors, sipping lukewarm coffee and dreaming of a Pinterest-perfect kitchen. Then, my toddler bumped a plastic dinosaur into the pantry door, and a flake of navy blue paint the size of a postage stamp just… fell off. I wanted to cry. It felt like I had thrown three days of my life into a wood chipper. If you have ever stared at a fresh chip on a brand-new project and felt that hollow pit in your stomach, you are exactly why I am writing this today. We are going to fix this. I am going to share the exact ‘neighborly’ secret that took me three failures to finally master, ensuring your hard work stays on the wood and off the floor.
Stop Blaming the Kids for Your Peeling Paint
The hard truth is that most cabinets chip because we treat them like vertical walls, but they aren’t walls; they are furniture that gets handled fifty times a day. Years ago, I made the classic mistake of thinking a ‘one-coat wonder’ would save me from the drudgery of prep work. I was wrong. I quickly learned that picking the wrong primer is the most common reason a beautiful finish fails within a month. Kitchen cabinets live in a war zone of bacon grease, steam, and sticky fingers. According to the National Kitchen & Bath Association, the kitchen is the most chemically volatile environment in your home, which means standard house paint simply cannot bond to the surface without a specific bridge. I used to skip the heavy-duty degreaser because it smelled strong and felt like overkill, but that leftover grease is a microscopic ‘slip-and-slide’ for your new color. If you want a result that lasts, you have to stop looking for shortcuts and start looking at surface tension. I have found that local painting secrets usually come down to the boring stuff: the cleaning and the cure time. Have you ever had a project look amazing on Sunday only to start peeling by Wednesday? Tell me your ‘horror story’ in the comments so we can troubleshoot it together.
Is a Professional Finish Actually Possible for a DIYer?
Many people told me I was crazy to try this without a spray booth and a $5,000 budget. They claimed that unless you hire expert house painting services, you are destined for brush marks and chips. I am here to tell you that’s a myth, provided you respect the chemistry of the paint. One of my biggest early blunders was painting my kitchen cabinets during a rainy week; the humidity trapped moisture under the film, and the paint never truly ‘locked’ to the wood. You don’t need a degree in chemistry, but you do need to understand that cabinets don’t just ‘dry’—they ‘cure,’ and that takes much longer than you think. In the next section, I am going to walk you through the ‘Goldilocks’ method of sanding that provides enough ‘tooth’ for the paint without ruining the wood.
Scrub Like Your Project Depends on It
Cleaning isn’t just about removing visible dirt; it’s about stripping away years of microscopic oils that act like a shield against your paint. Think of your cabinet door like a greasy dinner plate. If you try to write on that plate with a marker, the ink beads up. Paint does the same thing on cabinets. I recommend using a heavy-duty degreaser or TSP-substitute with a green abrasive pad. I’ve seen homeowners try to save time by using mild dish soap, but it’s rarely enough to tackle the chemical residue found in most kitchens. You need to master the art of house painting with these pro tips by realizing that the ‘squeaky’ in ‘squeaky clean’ is actually the sound of a successful bond. I remember my first set of uppers; I thought a quick wipe with a damp rag was enough. Three weeks later, I could literally peel the paint off in long, rubbery strips because I’d left a thin film of cooking oil behind. Don’t just wipe; scrub until the water stops beading on the surface.
Finding the Sanding Sweet Spot
We call this the ‘Goldilocks’ method: not too smooth, not too rough. If you sand too much, you’ll burn through the veneer; if you sand too little, the paint has nothing to ‘bite’ into. You aren’t trying to remove the old finish entirely; you’re just scuffing it. Use 120-grit sandpaper for the initial pass, followed by a light 220-grit touch. It should feel like the texture of a cat’s tongue—rough but not damaging. This ‘tooth’ is what creates the mechanical bond. Even if you are looking for local painting solutions for every budget, skipping the scuff-sand is the fastest way to a failure. I once got over-zealous with an orbital sander on a corner and went straight through the oak veneer into the particle board. It looked like a bald spot on a dog. Now, I always sand by hand on the edges to maintain control. 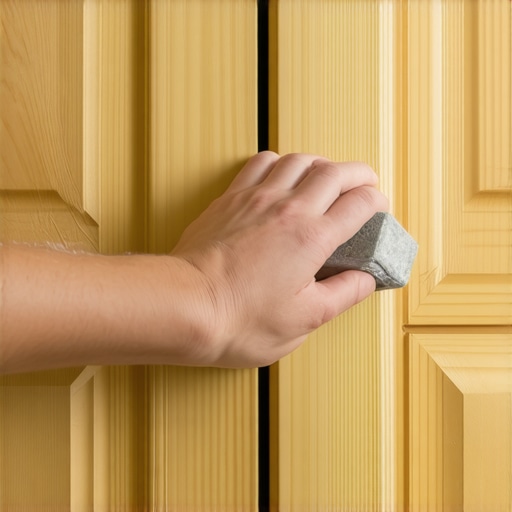
The Primer is Your Only Real Insurance Policy
Never, ever use a ‘Paint and Primer in One’ on cabinets. Those products are designed for porous drywall, not sealed wood or laminate. For cabinets, you need a high-adhesion, oil-based or specialty water-borne alkyd primer. This acts as the bridge between the old wood and the new color. If you are worried about the finish being too fragile, reading about how to choose a paint sheen for high traffic stairways offers great insight into why durability starts with the base layer. I once tried to use a cheap latex primer on a set of bathroom vanities, and every time the shower got steamy, the paint bubbled up like it was gasping for air. It was a mess that required a full strip and sand. When you apply the primer, aim for thin, even coats rather than trying to hide the old wood color in one go.
Wait Twice as Long as You Think You Should
Dry to the touch does NOT mean ready to use. This is where most DIYers fail. Paint ‘dries’ when the solvents evaporate, but it ‘cures’ when the molecules cross-link and harden into a plastic-like shell. This can take up to 14 days depending on the climate. If you put your hardware back on too soon, the hinges will stick and pull the paint right off the frame the first time you open the door. Learn how to fix a run in your paint without starting over just in case you got a bit heavy-handed with the brush, but the best advice is patience. If you’ve ever dealt with the reason your front door stays tacky for days after painting, you know that environmental factors like humidity are your biggest enemy here. Give it time to breathe.
I have found that the biggest myth in the industry is that ‘more paint equals more protection.’ In fact, slathering on a heavy layer is the fastest way to invite failure. When you apply paint too thickly, the top layer ‘skins over,’ trapping liquid solvents underneath. This prevents the bottom layer from ever fully bonding to your primer. This is often the reason your exterior paint is bubbling, but it happens on kitchen cabinets just as frequently. Have you ever fallen into the trap of trying to finish a job in one heavy coat? Let me know in the comments because we have all been there at least once.
The Expensive Paint Trap No One Tells You About
Most DIYers believe that buying the most expensive ‘Lifetime Warranty’ gallon at the big-box store guarantees a bulletproof finish. But here is the contrarian truth: paint chemistry is highly specialized, and a ‘one size fits all’ approach is a recipe for disaster. I used to think the price tag was the only metric of quality, but I have since learned that the difference between contractor-grade and premium paint is often about the ratio of solids to solvents, not just the marketing fluff on the label. Many ‘premium’ residential paints are actually designed to be thick and forgiving for the average homeowner to apply to drywall, which is the exact opposite of what you want for furniture. For cabinets, you need a coating that levels out thin and dries to a rock-hard enamel. According to a study by the Paint Quality Institute, the long-term durability of a coating is more dependent on the integrity of the resin-to-pigment ratio during the curing phase than the sheer thickness of the film. If your paint stays soft enough to leave a fingernail mark days later, you’ve used the wrong chemistry for the job.
Is Your Paint Brand Actually Hiding the Truth About Durability?
When you are looking at why your local painting estimates vary so wildly, it usually comes down to the specific resins being used. An advanced mistake is ignoring ‘blocking resistance.’ This is the technical term for the ability of two painted surfaces to touch without sticking together. If you use a standard latex paint on your cabinet frames, they might feel dry, but they will stick to the doors forever. You need to master the art of house painting by selecting products specifically rated for ‘high blocking resistance’ or water-borne alkyds that behave like old-school oil paints without the yellowing or the smell.
Why Your High-End Finish Might Look Like Plastic
The ‘oops’ factor I see most often with advanced DIYers is over-working the product. Professionals obsess over ‘open time’—the brief window you have to move the paint around before it begins to set. If you keep brushing a spot for more than thirty seconds, you are breaking the leveling agents that make the paint look smooth. This is how you end up with a finish that looks like orange peel or textured plastic. If you want to unlock the power of professional painting, you must learn the ‘lay it and leave it’ technique. Once the paint is on the wood, stop touching it. It will look like it has brush marks for the first five minutes, but as the solvents evaporate, the paint will pull itself flat—if you haven’t mangled the chemistry by over-brushing. If you have already made this mistake, don’t panic; you can learn how to fix a bad patch or a textured run after it dries, but the best medicine is always prevention.
After you have mastered the ‘lay it and leave it’ technique, the next hurdle is the hardware you hold in your hand. I have seen so many homeowners do the prep work perfectly only to grab a cheap polyester brush and ruin the whole texture. Personally, I swear by a 2-inch angled Wooster Alpha brush. Why? Because the synthetic filaments are designed to hold a high volume of paint and release it smoothly, which is critical when you are trying to master the art of house painting with these pro tips. If you use a bargain-bin brush, the bristles splay out, creating those dreaded ‘tiger stripes’ that no amount of sanding can truly fix. If you are feeling brave and want to unlock the power of professional painting, consider a small HVLP (High Volume Low Pressure) sprayer. I bought my first one for a kitchen remodel three years ago, and while the learning curve is real, the glass-like finish is unbeatable. Just remember the secret to using a paint sprayer without overspray everywhere: it is all about the masking and the air pressure settings. 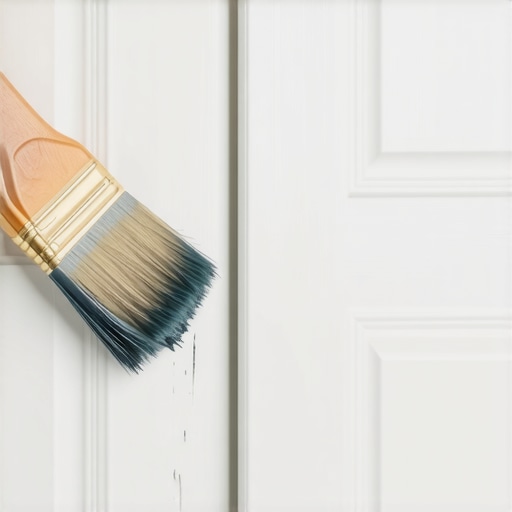
How can I make sure my new finish doesn’t fail in six months?
The biggest threat to your new paint isn’t the kids—it is the cleaning supplies you use. Most people grab a spray with ammonia or harsh degreasers the moment they see a smudge. Stop. Ammonia will eat through the resin of your paint faster than you can say ‘re-coat.’ According to the Painting Contractors Association (PCA) in their A101-23 standard, the chemical resistance of a finish is a key performance metric, but even the best enamels can be compromised by acidic cleaners. I only use a damp microfiber cloth or a very diluted drop of pH-neutral dish soap. This is essential if you want to learn how to maintain your newly painted exterior for ten years or more or keep those cabinets pristine. Also, keep a small 2-ounce jar of your original paint and a tiny artist’s brush hidden in the back of a drawer. When that inevitable first chip happens, you can dab it immediately. If you leave a chip exposed, moisture from the dishwasher or stove can get under the paint film and start the peeling process all over again. Looking ahead, I suspect we are going to see a massive shift toward antimicrobial and self-healing coatings in residential expert house painting for 2025. We are already seeing innovative house painting ideas involving ‘smart’ pigments that change hue based on lighting, but for now, the ‘smartest’ thing you can do is stick to the basics of cleaning and maintenance. When you are cleaning up, why you should avoid using cheap white spirit for cleaning brushes is a lesson I learned the hard way—it leaves a residue that ruins the brush’s spring. Investing in high-quality cleaning solvents keeps your tools ready for the next project. I challenge you to go out and buy one truly high-end brush today—even for a small trim project—and feel the difference in how the paint flows. It will change your perspective on DIY forever.
What My Most Expensive Mistakes Taught Me About Cabinetry
One of the most painful lessons I learned was that patience is not just a virtue; it is a chemical requirement. I used to think that if the paint felt dry, it was safe to hang the doors. I quickly realized that ignoring the 48-hour rule for moving furniture back against new walls or cabinetry leads to permanent surface damage. Another ‘lightbulb moment’ happened when I tried to use a pressure washer to clean old wooden doors—never do this. I learned the hard way that the danger of pressure washing wood siding before house painting applies just as much to your delicate kitchen cabinets, as it forces moisture deep into the grain that will eventually cause your new finish to bubble and flake.
I also discovered that the lighting in your kitchen will lie to you. I once painted a set of cabinets in a cool-toned gray that looked stunning in my garage, only to realize why natural sunlight changes the way your gray paint looks once they were installed. Always test your color in the actual room where it will live. Lastly, the ‘fingernail test’ is your best friend: if you can press your nail into the paint and leave a mark, it is not cured. Don’t touch it.
The Gear That Separates Amateurs from Pro Painters
If you want a finish that looks like it came from a factory, you have to stop using bargain-bin supplies. I personally trust a 2-inch angled synthetic brush for the stiles and rails, but for the flat panels, I always reach for a high-quality microfiber roller. To get those razor-sharp edges where the cabinet meets the wall, I rely on the blue tape trick for getting clean lines on texture. It’s a simple extra step that prevents bleed-through and makes the whole project look professional. Additionally, selecting the best roller nap for your specific wood grain—usually a very thin 1/4 inch nap for cabinets—is the difference between a smooth surface and one that looks like an orange peel.
#IMAGE_PLACEHOLDER_E#
Take Your Time and Transform Your Space
Don’t be intimidated by the scale of the project. Every stunning kitchen renovation started with a single sanded door. When you decide to unlock the power of professional painting, you aren’t just changing a color; you are increasing the value and the feel of your entire home. By following these steps—scrubbing, sanding, priming, and waiting—you are doing something most people are too impatient to finish. This is how you get a result that doesn’t just look good today, but stays beautiful for the next decade. As you move into your next project, remember that the most important tool you have isn’t in your toolbox—it’s your willingness to do the job right the first time. For more inspiration, check out the latest expert house painting advice for 2025 to see where trends are heading. Have you ever rushed the drying time only to have your cabinet doors stick to the frames? Let me know your recovery strategies in the comments below!