

I stood there, frozen, as a literal cloud of ‘Desert Sand’ drifted lazily over my neighbor’s fence. It wasn’t just on the siding; it was on the rosebushes, the grill, and—most tragically—my dog’s wagging tail. That’s the moment I realized that owning a paint sprayer doesn’t make you a painter any more than owning a piano makes you Mozart. It’s a beast that needs taming. If you’ve been terrified to pull that trigger because you don’t want to spend three days scrubbing overspray off your windows, I hear you. But here’s the good news: you can get that factory-smooth finish without the collateral damage. Today, I am going to show you the exact steps to keep that paint on the wall and out of the air.
Control the Cloud Before It Controls You
The biggest lie in DIY is that you can just ‘aim and shoot.’ When I first started, I thought high pressure meant a better finish. I was so wrong. I was basically creating a localized weather system of latex paint in my own backyard. Now, I always tell people that mastering the art of house painting starts with understanding your equipment’s limits. One major mistake I made early on was using a worn-out tip that was way too big for the job. It’s like trying to water a single flower with a firehose. According to the Painting and Decorating Contractors of America, nearly 50% of paint waste in spraying comes from improper pressure and tip sizing—that’s money and material literally vanishing into thin air. Have you ever had a project turn into a cleanup disaster because of a ‘quick’ spray?
Is the extra prep work actually worth the hassle?
I get it. You bought the sprayer to save time. The idea of spending two hours taping off plastic seems to defeat the purpose. But trust me, properly masking your space is the difference between a professional result and a ‘why did I do this’ nightmare. I once tried to skip the drop cloths on a fence job and ended up with splotchy and uneven grass that looked like a bad camouflage experiment. When you learn to control the fan and the distance, you stop fighting the machine and start making it work for you. Using a sprayer should be a joy, not a source of anxiety for your neighbors. It requires a bit of a shift in mindset, focusing on the prep so the actual painting is a breeze. Let’s dive into how you can actually set up for success without losing your mind or your security deposit.
Dialing in Your Machine Before You Touch the Wall
The biggest mistake most people make is turning their sprayer pressure up to max right out of the gate. You want to use the lowest pressure possible that still produces a solid, consistent fan of paint. If you see two heavy lines at the top and bottom of your spray (these are called ‘tails’), you need to bump the pressure up slightly. However, if your yard looks like a London fog of latex, you’ve gone too far. When I was tackling my first big exterior project, I wasted three gallons of paint just because I had the PSI set for a firehose instead of a finish tool. It’s also vital to understand the difference between contractor-grade and premium paint, as thicker, high-quality paints often require a slightly higher pressure or a larger tip to atomize correctly.
Lower Your Pressure to Save Your Sanity
I always keep a large scrap of cardboard nearby to test my pattern. I start with the dial at zero and slowly turn it up while making quick passes on the cardboard. Once those ‘tails’ disappear and the paint looks like a soft, even mist across the entire fan, I stop. Over-pressurizing doesn’t just create overspray; it actually wears out your sprayer components twice as fast. I learned this the hard way when I blew a seal on a cheap rental unit because I thought more power meant more speed. Now, I aim for efficiency over brute force, much like how you would learn how to stop your roller from skating across the wall by using the right technique rather than just pushing harder. 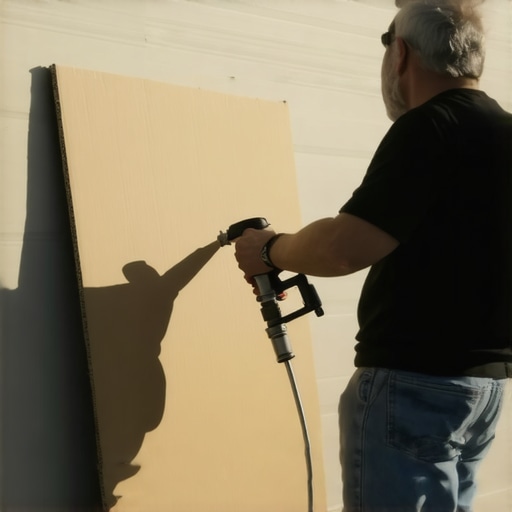
Choose the Right Tip or Expect a Mess
Think of your spray tip like the nozzle on a garden hose. A ‘515’ tip is the standard for most house painting jobs, but it’s not a one-size-fits-all solution. The first number (5) tells you the width of the fan (5 times 2, so a 10-inch fan), while the last two numbers (15) tell you the size of the hole. If you’re doing fine trim or furniture, that 515 is going to drown your project in paint. I once tried to spray a set of delicate kitchen chairs with a wide-fan exterior tip. Within five minutes, the chairs looked like they’d been dipped in a vat of pudding, and I spent the next hour researching how to fix a run in your paint without starting over. For those smaller, detailed jobs, switch to a ‘311’ or a dedicated ‘Fine Finish’ tip to keep things tight and controlled.
Keep the Gun Moving to Avoid Those Ugly Drips
The ‘trigger finger’ is where the magic happens. You must start your arm moving before you pull the trigger and keep it moving until after you release it. If you pull the trigger while your hand is stationary, you’ll get a concentrated blast of paint that will sag almost instantly. I call this the ‘statue syndrome,’ and it’s the number one cause of ruined finishes. Aim to overlap each pass by about 50%, aiming the center of your spray at the edge of the previous pass. This ensures even coverage and prevents thin spots. When you’re working on something like a deck or a fence, this rhythm becomes almost meditative, helping you avoid the frustration of seeing why your new fence stain looks splotchy and uneven later on. It’s about consistency and pace, ensuring the paint lays down flat and dries according to the 48-hour rule for moving furniture back against new walls for a durable, professional-grade result.Most DIYers—and even some pros who should know better—will tell you that you absolutely have to thin your paint to get it through a sprayer. In my experience, that is a shortcut to a failed job. If you’re using a modern airless pump, thinning is usually unnecessary and often detrimental. When you add water to a high-quality acrylic, you’re diluting the resins that hold the color to your siding. You might think you’re saving money, but you’re actually learning how to tell if your painter is diluting the paint with water the hard way when the finish starts to chalk or peel in just a few years. According to technical bulletins from Sherwin-Williams, exceeding a 10% reduction in volume solids can significantly compromise a coating’s ability to resist UV damage and moisture penetration. If your sprayer can’t pull the paint, the solution isn’t adding water; it’s cleaning your filters or upgrading your machine’s horsepower. 
The Heat Trap That Ruins Your Finish
Then there’s the ‘dry spray’ trap that catches people off guard during the summer months. It’s a sunny day, you’re making great time, but the paint feels like sandpaper once it hits the wall. This happens when the atomized droplets dry in mid-air before they can level out on the surface. It is a massive reason why your local painting crew prefers early morning starts in summer. They aren’t just trying to beat the heat for their own comfort; they’re protecting the paint’s chemical integrity. If the surface is too hot, the paint can’t ‘wet’ the substrate properly, leading to a finish that looks matte and splotchy instead of the rich, uniform sheen you expect when buying the difference between contractor-grade and premium paint.
Can your sprayer handle heavy-bodied acrylics without a blowout?
It really comes down to the machine’s duty cycle. Just because a retail-grade unit says it can spray ‘all paints’ doesn’t mean it should be pushed to handle high-build elastomeric coatings for eight hours straight. Forcing a smaller pump to move thick material puts massive strain on the packings and the motor, which often leads to a mid-project blowout. This is also where proper prep becomes your best friend. Many homeowners ignore the primer, but why using the wrong primer causes your trim paint to chip is usually the real culprit when a sprayer job fails. The sprayer is merely the delivery vehicle; the chemistry of the paint is the engine. Before you even pull the trigger, make sure you know how to estimate how much paint you actually need for a room so you aren’t tempted to stretch a final bucket by over-thinning it at the end of the day. Have you ever fallen into this trap? Let me know in the comments.
The Five-Minute Ritual That Saves Your Pump
Most people treat their sprayer like a lawnmower—they use it, shove it in the garage, and wonder why it won’t start next season. If you want your equipment to last, you need to treat the throat seal like the heart of the machine. I never start a job without adding a few drops of Throat Seal Liquid (TSL) to the wet cup. This prevents paint from drying on the piston rod and shredding the packings. It is a tiny step, but according to Graco’s technical maintenance documentation, failing to lubricate the throat seal is the number one cause of premature pump failure in airless systems. When you are investing in high-end gear to boost your home’s value, the last thing you want is a $400 repair bill because of a $10 bottle of oil. Once the job is done, I don’t just run water through the hose; I use a dedicated pump armor fluid to prevent internal corrosion. It keeps the valves from sticking, which is why my current rig has survived five seasons without a single hiccup. 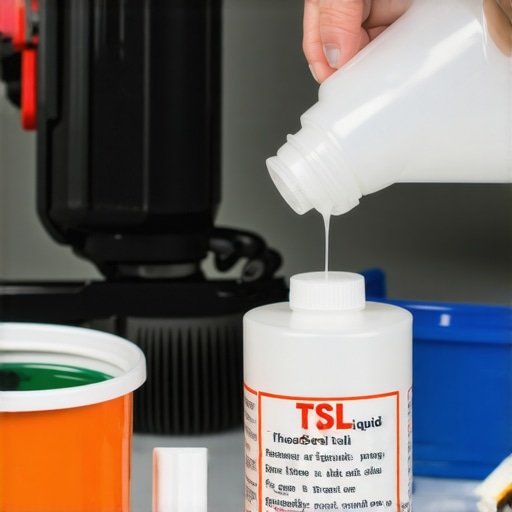
How do I keep my paint job looking fresh for a decade?
Maintenance isn’t just for the tools; it’s for the walls too. If you want to know how to maintain your newly painted exterior for ten years or more, you have to be proactive about cleaning. I tell my clients to gently power wash their siding every two years—not with high pressure, but with a wide fan to knock off the salt and dirt. If you spot a small chip, fix it immediately. I’ve seen tiny nicks turn into massive sheets of failure because water got behind the film. Remember the reason you should never paint over peeling paint; once that bond is broken, no amount of ‘top-coating’ will save it. For interior hardware, if you accidentally got some overspray on the metal, don’t reach for the sandpaper. Try the vinegar trick for removing paint from old door hinges to restore the original look without scratching the finish.
Why I Only Use Mesh 60 Filters for Standard Latex
Tool choice is where the pros separate themselves from the weekend warriors. I see people trying to spray heavy exterior latex through a fine 100-mesh filter, and they spend the whole day fighting clogs. For standard house paint, a 60-mesh manifold filter and gun filter is the ‘sweet spot.’ It’s coarse enough to let the pigments flow but fine enough to catch the ‘skins’ and debris that inevitably fall into your bucket. I also swear by the ‘CleanShot’ shut-off valve. It sits right at the tip and prevents that annoying ‘spit’ of paint that happens when you release the trigger. These small technical upgrades are often why your local painting estimates vary so wildly in price; a pro is bringing thousands of dollars in specialized tech to ensure a perfect result. Looking ahead, I suspect we’ll see air-assisted airless technology become much more affordable for the average DIYer, which will offer even better control with significantly less overspray. For now, grab a bottle of TSL and a fresh 60-mesh filter before your next project—your sprayer will thank you.
The Hard Truth About My First Ten Sprayer Fiascos
Looking back, most of my early spray-painting disasters happened because I was in too much of a hurry to see the ‘transformation’ and ignored the physics of the machine. First, never underestimate the power of a light breeze. If you can feel the wind on your neck, it is strong enough to carry your house painting project onto your neighbor’s driveway. I have also learned that cleaning the unit is not just a suggestion; it is the most critical part of the maintenance cycle. A partially clogged tip won’t just frustrate you; it will leave ‘tails’ and uneven textures that ruin the surface. Finally, remember that the most expensive paint in the world won’t look good if the prep is sloppy. Taking the time to read the ultimate guide to house painting can save you hours of rework later on. It is always better to spend three hours masking and twenty minutes spraying than the other way around.
Gear That Saved My Sanity
If you are serious about getting a factory-grade finish, you need more than just the pump. I swear by the 3M Hand-Masker for fast prep; it makes laying down tape and plastic a one-handed job. I also never go without a CleanShot shut-off valve at the end of my wand, which eliminates those annoying paint spits when you release the trigger. For those looking for expert house painting advice for 2025, investing in a high-quality 60-mesh manifold filter is the simplest way to prevent mid-project clogs. These tools are the bridge that helps a DIYer achieve professional precision and speed.
#IMAGE_PLACEHOLDER_E#
Stop Planning and Pull the Trigger
The learning curve for a sprayer can feel steep, but once you find your rhythm, you will never want to pick up a brush for a large project again. You now have the knowledge to control the pressure, choose the right tips, and maintain your equipment like a veteran. It is finally time to unlock the power of professional painting and give your home the update it deserves. Don’t let the fear of a little overspray keep you from a stunning result. Trust your prep, keep your arm moving, and enjoy the process of turning your vision into reality. Have you ever had a ‘near miss’ with overspray on a windy day? Let me know your best cleanup stories in the comments below!