

I stood there, brush in hand, staring at what used to be a charming hearth but now looked like a giant stack of white-out blocks. It was my first big mistake in house painting. I thought a thick coat of semi-gloss would modernize the room, but instead, I made it look like a cheap plastic prop from a high school play. That’s the thing about brick; if you treat it like a flat wall, it fights back. My living room felt cold, sterile, and—honestly—a little embarrassing. But that failure led me to a discovery. You don’t want a ‘painted’ look; you want a ‘transformed’ look. Today, I am going to show you exactly how to avoid the marshmallow effect and get a finish that mimics expensive natural stone.
Your Fireplace Doesn’t Have to Look Like a Marshmallow
The secret isn’t actually in the paint itself, but in the layers. Most people grab a roller and go to town. I learned the hard way that the trick for getting paint out of rough brick crevices is only half the battle. To get that limestone or slate vibe, you need to think like an artist, not just a contractor. We’re going to talk about color washing and why expert house painting advice for 2025 points toward breathable finishes. According to the Masonry Institute of America, brick is a highly porous material that needs to breathe to maintain structural integrity. This is precisely why mineral-based paints are better for brick than standard latex because they don’t trap moisture that eventually causes ugly peeling. I’ll show you how to mimic the natural variegation of stone using a three-tone blending technique. It’s easier than it sounds, and it’s significantly cheaper than a $5,000 stone veneer job.
Does Painted Brick Always Look This Cheap?
I get it. You’ve seen the Pinterest fails and you’re worried your cozy den will end up looking like a DIY project gone wrong. But let’s be real: why specialized masonry paint is worth the extra cost comes down to how the light hits the finished surface. When you use the right materials, the light doesn’t bounce off a plastic film; it sinks into the texture. It creates depth. Have you ever started a project only to realize halfway through that the color is completely wrong for the room’s lighting? It happens to the best of us. Let me know—have you ever regretted a DIY paint choice the moment it dried? Before we grab the brushes, we need to talk about the prep work that actually makes the ‘stone’ look stick.
Get the Surface Ready Before You Open a Can
You wouldn’t build a house on sand, and you shouldn’t put expensive mineral paint on a dirty, crumbling hearth. The first thing I do is scrub every inch with a stiff wire brush to remove soot and loose mortar. If you skip this, your paint won’t bond; it’ll just sit on top like a temporary sticker. Once it’s scrubbed, perform the damp rag test for checking if your wall is too chalky. If the rag comes away white or dusty, you need a specialized masonry primer before proceeding. I once ignored a small chalky patch near the flue, and three months later, the paint literally bubbled and flaked off like a bad sunburn. Cleaning is the least glamorous part of house painting, but it’s what separates a pro job from a weekend regret.
Choose Your Weapon Wisely
Most people grab whatever roller is on sale, but brick is an abrasive beast. It will shred a thin, cheap roller in minutes. You need a heavy nap—at least 3/4 inch—to actually push the pigment into the pits and valleys of the masonry. Learning how to choose the right roller nap for your specific wall is a game changer. For a stone-look fireplace, you’ll also need a natural sea sponge and a couple of 2-inch sash brushes for the deep grout lines. 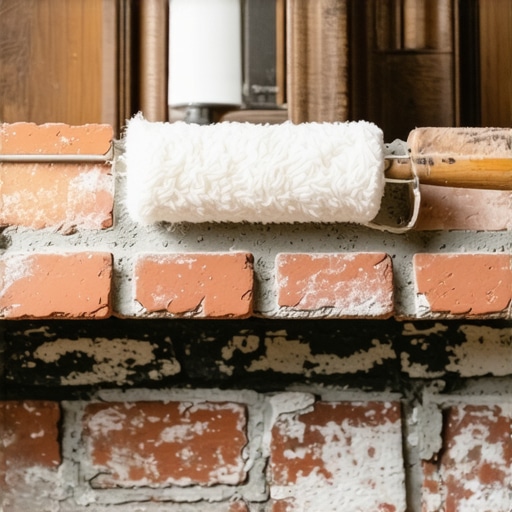
Master the Three-Tone Layering Technique
This is where the magic happens. To mimic stone, you need three shades of the same color family: a light base, a medium mid-tone, and a dark accent. Think of this like a contouring kit for your home. You want to master the art of house painting with these pro tips by applying your darkest color into the recessed grout lines first. This creates an artificial shadow that gives the fireplace massive depth. When I first tried this, I used a color that was way too dark—almost black—and it looked like a cartoon. The trick is to stay within two shades of your middle color.
The Secret of the Color Wash
Once your base and shadows are set, it’s time for the wash. I mix one part paint with three parts water. This creates a translucent glaze that lets the texture of the brick peek through while softening the overall color. When you apply this, don’t be afraid to let it be imperfect. Real stone isn’t uniform. I remember working on a client’s hearth where I accidentally let the wash run too thin, and it started dripping down the face of the brick. Instead of panicked wiping, I used a dry sea sponge to dab the drips, and it created the most realistic mineral-vein effect I’ve ever seen. It’s important to remember why natural sunlight changes the way your gray paint looks throughout the day; your wash might look warm at noon but turn a cool slate blue by 6 PM. Always test your three-tone mix on a small, hidden corner of the brick first. Finally, give the project space. Even if it looks dry, stick to the 48-hour rule for moving furniture back against new walls to ensure the finish has fully cured and won’t chip when you put your decor back in place.
I’ve seen it a thousand times: a homeowner spends a fortune on the perfect shade of ‘Greige’ only to have it flake off in six months. Everyone tells you that prep is just about cleaning, but in my experience, the real secret to house painting longevity lies in understanding the vapor drive of your home. You see, most DIY guides suggest using a high-bond universal primer for every surface. But here is the contrarian truth: using a standard sealer on old, porous brick is often the fastest way to ruin your masonry. By sealing those pores, you’re essentially trapping groundwater or interior humidity inside the brick. When that moisture tries to escape, it pushes the paint right off the surface in big, ugly bubbles.
Stop Treating Your Brick Like a Kitchen Wall
The biggest trap I see local DIYers fall into is ignoring the ‘white powder’—technically known as efflorescence. If you see those salty streaks on your hearth, do not just paint over them. That salt is a sign of active moisture movement. If you don’t neutralize it with a mild acid wash first, your expensive finish is doomed. I once watched a neighbor try to hide water damage with three coats of thick latex, and by the next season, the brick was literally crumbling behind the paint. This is why why mineral-based paints are better for brick than standard latex; they allow the brick to ‘perspire’ while maintaining a rock-solid bond. It’s about working with the physics of your home, not against them.
What Happens if My Brick Starts Sweating After I Paint?
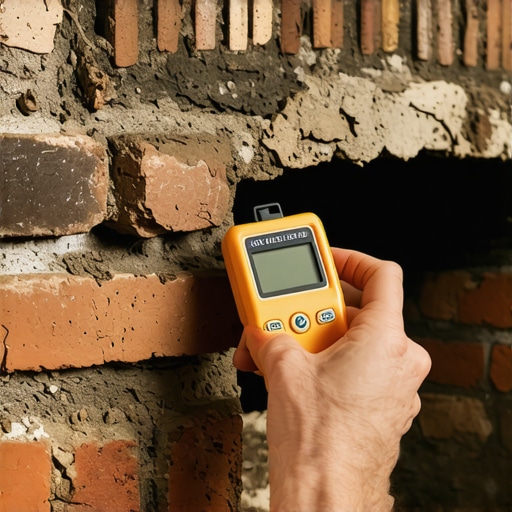
If you notice moisture beads on the surface or a damp smell, you’ve likely created a vapor barrier where there shouldn’t be one. According to the National Park Service Preservation Briefs on masonry, applying impermeable coatings to historic brick can lead to spalling, where the face of the brick actually pops off due to freeze-thaw cycles. This is an advanced mistake that even some ‘pros’ make. You should always ensure your expert house painting tips for 2025 include a moisture meter test before you ever crack open a can. If the internal moisture content is above 12%, you need to address the source of the dampness—perhaps by checking your chimney cap—before proceeding.
Why That One-Coat Promise Is Actually a Lie
We’ve all seen the marketing for ‘Paint and Primer in One’ products. While those are fine for a bedroom wall, they are a disaster for house painting projects involving masonry or high-tack areas like trim. In fact, why using the wrong primer causes your trim paint to chip is usually because these ‘all-in-one’ products don’t have the resin density to bite into the substrate. You want a dedicated masonry primer that is specifically formulated to handle high pH levels. Have you ever fallen into this trap of believing the one-coat marketing? Let me know in the comments—it’s a mistake I see even the most seasoned DIYers make when they’re in a rush.
Finally, if you decide the technicality of vapor barriers and pH levels is a bit too much for a Saturday afternoon, make sure you know how to spot fake reviews for local painting contractors. You want someone who talks about ‘permeability’ and ‘microns,’ not just someone who promises a fast job. A real expert knows that the most beautiful finish in the world is worthless if it detaches from the wall in two years. Take the time to do the ‘damp rag test’ and the ‘tape test’ on your old finish before you commit to a new look.
Once the final glaze of your stone-look fireplace dries, the real work of preservation begins. I’ve seen beautiful finishes ruined because someone used a harsh chemical cleaner on a mineral-based surface just a week after the project was finished. Keeping your results pristine involves more than just a quick dusting. To really master the art of house painting with these pro tips, you need to treat the maintenance phase with the same reverence as the prep. If you want to know how to maintain your newly painted exterior for ten years or more, the secret is a soft-touch approach—never use abrasive sponges on masonry.
How do I maintain my painted masonry over time?
Maintenance starts with an annual inspection. According to the Painting and Decorating Contractors of America (PDCA) Standard P1, a finished surface should be inspected under normal lighting conditions from a distance of at least 39 inches. If you spot tiny hairline cracks in the grout lines, don’t ignore them. Use a tiny artist’s brush to dab in a bit of your leftover wash to reseal the area. This prevents moisture from getting behind the paint film. I also suggest using local painting secrets elevate your space effortlessly by incorporating a yearly gentle vacuuming of the brick with a soft-brush attachment to prevent soot from embedding in the texture.
The Tool That Saved My Sanity on Large Jobs
I used to spend half my day wrestling with rolls of blue tape and newspaper, but then I discovered the 3M Hand-Masker M3000. It’s not just for pros; it’s for anyone who values their time. This tool applies tape and masking film simultaneously, allowing you to protect your floors and mantel in seconds rather than hours. I personally use it because I once spent an entire Saturday morning scraping dried overspray off a client’s mahogany floor—a mistake that cost me more in labor than the tool itself. If you are transforming spaces local painting solutions for every budget, investing in a few high-quality tools like this will save you a fortune in cleanup costs. 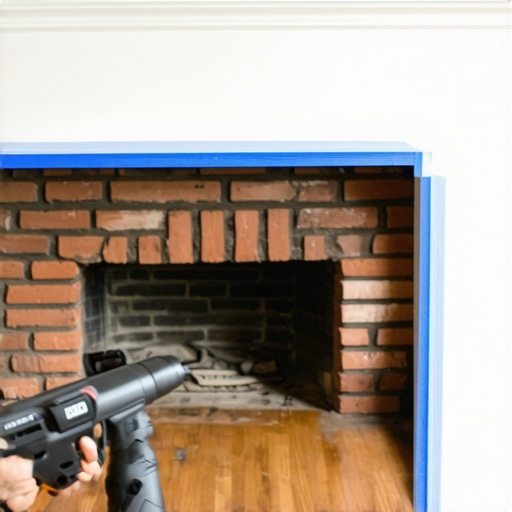
Where Home Painting Is Headed in 2026
Looking ahead, I predict we are going to see ‘smart primers’ hit the shelves. Imagine a primer that changes color slightly if it detects an internal moisture level above 15% before you even apply the topcoat. This would eliminate the guesswork that leads to peeling. Until then, you have to be your own sensor. If you’re nervous about the technical side, how to spot an uninsured painter before they step on your ladder is a vital skill if you decide to hire out. You want a crew that uses things like the Hand-Masker and understands vapor permeability. I challenge you to try the ‘three-tone’ method on a small sample board this weekend—it’s the only way to truly understand how light and depth work together. Always remember the only way to get a sharp line between your wall and woodwork is through patience and the right equipment, not just a steady hand.
Why Most DIY Fireplace Projects Fail by Month Six
Looking back at my first dozen hearth restorations, I realized that house painting on masonry isn’t about the color—it’s about the chemistry. The hardest lesson I learned was that ‘clean’ isn’t just about dust; it’s about neutralizing the pH. Even if you have already mastered local painting secrets elevate your space effortlessly, masonry remains a unique challenge because the alkalinity of the mortar can literally eat standard paint from the inside out. I also learned that how to fix a run in your paint without starting over is a skill you hope you don’t need, but on vertical brick surfaces, you’ll be glad you know it. Most homeowners stop too early; they see the flat base coat and panic. The real magic is in that final, messy color wash that ties everything together.
The Gear That Separates Amateurs From Pros
If you’re serious about this transformation, don’t walk into a big-box store and grab the cheapest kit. For a truly professional finish, I swear by mineral-based silicate paints rather than standard acrylics. I also keep a stash of real sea sponges—not the synthetic ones—because they create a random, organic pattern that mimics natural stone perfectly. If you are dealing with new construction elsewhere in the house, you might notice why your new drywall is drinking your paint so fast, but on old brick, the absorption is even more aggressive. #IMAGE_PLACEHOLDER_E# Finally, I always suggest keeping the contact us page of a local expert handy if the scope of the project starts to feel overwhelming.
Stop Staring at Your Hearth and Start Creating
The transition from a dated, soot-stained fireplace to a modern stone centerpiece is one of the most rewarding house painting projects you can undertake. It changes the light, the smell, and the entire energy of your living room. Don’t be paralyzed by the fear of making a mistake; brick is forgiving if you use the right breathable materials and follow the layering process. By implementing these top local painting strategies revealed in this guide, you’re not just changing a color—you’re preserving a piece of your home’s character. Have you ever started a project only to realize you were in over your head? Let me know your biggest DIY surprise in the comments below!