

I stood there, sweat dripping off my nose, staring at the one square foot of wall that was mocking me. I had just finished painting the rest of the bathroom in a beautiful ‘Sea Salt’ blue, but that narrow, two-inch gap behind the toilet tank looked like a portal to a dingy, unpainted dimension. My first instinct? I tried to shove a standard 2.5-inch sash brush back there. *Clang.* The metal ferrule hit the porcelain. A thick, gooey streak of blue paint smeared right across the white ceramic. It was a disaster. I spent the next twenty minutes scrubbing the tank instead of finishing the wall, realizing that my ‘quick weekend project’ had just hit a massive, porcelain-shaped wall.
Stop Thinking You Need a Plumber to Get a Professional Finish
Most of us look at that tight space and think our only options are either living with a half-painted wall or risking a flood by disconnecting the plumbing. I’m here to tell you that neither is true. You don’t need to wrestle with a heavy tank or worry about why your local painting estimates vary so wildly in price just to get a clean look in your powder room. I’ve been through the ‘sock on a stick’ phase—which, let me tell you, is a great way to leave lint all over your walls—and I’ve finally dialed in the one method that actually works. Whether you are tackling this as part of a larger house painting project or just refreshing a small en-suite, getting this right is the difference between a DIY job that looks ‘fine’ and one that looks like you mastered the art of house painting. Have you ever tried to paint back there and just ended up with a mess on your tank? It’s the ultimate test of patience, isn’t it?
Is a special tool really better than just winging it with a brush?
It’s a fair question. We’ve all seen those ‘as seen on TV’ gadgets that end up in the trash. But when it comes to the local painting secrets that professionals use, the right tool isn’t a gimmick; it’s a necessity. Early in my DIY journey, I thought I could outsmart the gap by just taping a sponge to a coat hanger. It was a total failure. The sponge flopped around, the paint was uneven, and I eventually had to learn how to remove dried paint drips without sanding the whole wall. The reality is that according to data from the National Kitchen & Bath Association, moving a toilet tank is the leading cause of accidental bathroom leaks during renovations because old gaskets often fail once disturbed. Attempting to remove the tank for a simple paint job can lead to a massive headache if a seal fails. That’s why mastering the behind-the-tank glide is the only sane way to go. You want the color to look seamless, much like successfully painting a brick fireplace, where depth and coverage are everything. By the time we’re done today, you’re going to have the confidence to slide behind that tank like a ninja. We’re going to talk about the mini-roller method and the one household item that makes a better paint shield than any professional masking tape. Trust me, your bathroom—and your sanity—will thank you.
Gather Your Stealth Tools Before You Start
You can’t approach that gap with a standard nine-inch roller; it’s like trying to perform surgery with a sledgehammer. Instead, you need a four-inch mini-roller with a long, thin frame. I remember the time I thought I could MacGyver it by taping a foam brush to a wooden yardstick. I was three swipes in when the tape gave way, sending the paint-soaked sponge plummeting behind the tank. I had to fish it out with a pair of BBQ tongs, leaving a permanent gray smear on the drywall that took hours to fix. Save yourself the grief and pick up a dedicated ‘whizz’ roller or a specialized behind-the-tank tool. Choosing the right gear is one of those local painting secrets that separates the frustrated amateurs from the calm experts. Before you even pour the paint, make sure you choose the right roller nap for your specific wall texture to ensure the finish behind the toilet matches the rest of the room perfectly.
The Trash Bag Shield Trick
This is the secret weapon that professional painters use to keep the porcelain pristine. Instead of struggling with tiny strips of blue tape that won’t stick to a damp tank, take a large plastic trash bag and cut a slit down one side. Slide it over the entire toilet tank like a poncho. Use a little bit of the blue tape trick for getting clean lines to secure the plastic at the bottom, just above the floor. This creates a slick, protective barrier that allows your roller to slide against the tank without transferring a single drop of paint to the ceramic. It’s a game-changer for maintaining a clean workspace.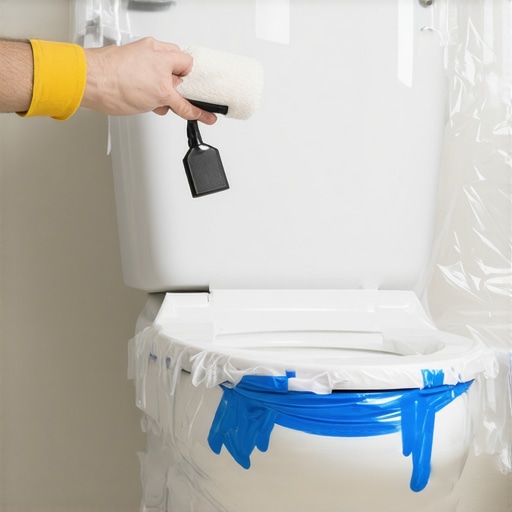
The Side-to-Side Glide Technique
Once your shield is in place, load your mini-roller with a modest amount of paint. You don’t want it dripping, or you’ll end up needing to know how to remove dried paint drips from your baseboards later. Reach in from the side of the tank, keeping the roller vertical. Instead of trying to roll up and down—which is often impossible due to the tank’s curve—use a side-to-side sweeping motion. This ensures even coverage and helps you stop your roller from skating across the wall, which happens when there isn’t enough friction in tight spaces.
Don’t Rush the Second Coat
Because the space is so cramped, it’s tempting to lay the paint on thick to finish in one go. Resist that urge. Thick paint in unventilated gaps behind plumbing leads to sagging and peeling. Apply two thin coats instead. If you’re working on multiple bathrooms, you can save a paint roller from drying out overnight by wrapping it in plastic while the first coat sets. Remember, even though it’s a small area, the 48-hour rule for moving furniture back still applies to the environment around your fixtures; don’t go scrubbing the tank or leaning against that wall until the cure is complete.Now that we’ve covered the mechanics, let’s talk about the biggest lie in the paint aisle: the ‘one-coat miracle’ in high-humidity areas. We’ve all seen the cans promising one-coat coverage, but in my experience, relying on that behind a toilet is a recipe for disaster. Because these gaps often have poor airflow, a single thick coat stays wet far too long. This leads to surfactant leaching—those sticky, brown streaks that look like tea stains. Instead of a ‘one-and-done’ approach, thin layers are your best friend to ensure you don’t end up wondering how to tell if your painter is diluting the paint with water just to get it to spread. Thin coats dry faster and more evenly in the stagnant air of a bathroom.
Does that ‘moisture-resistant’ label actually stop mold from growing behind the tank?
Many DIYers believe that buying the most expensive antimicrobial paint is a magic shield. However, the experts at the Paint Quality Institute emphasize that no paint is a substitute for proper ventilation and surface preparation. If you paint over a damp or dusty surface behind that tank, the mold will eventually thrive underneath the film, regardless of the paint quality. This is often why your bathroom ceiling is growing mold above the shower; it’s about the environmental conditions and the prep work, not just the antimicrobial additives in the can. Before you start, scrub that hidden wall with a 50/50 water-vinegar mix to kill any dormant spores. 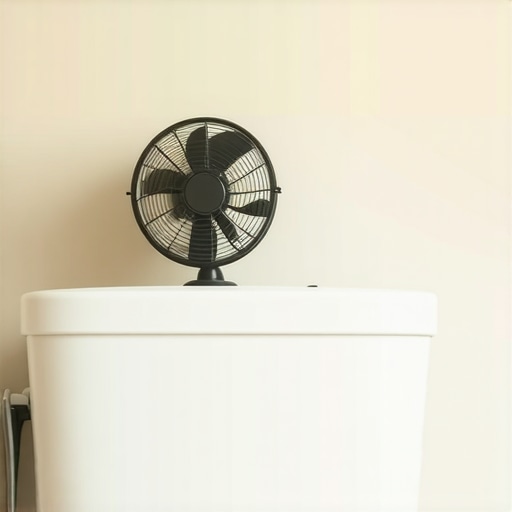
Avoid the Skinning Trap Before It Ruins Your Finish
The ‘Oops’ factor usually happens 24 hours later. You see a tiny missed spot and try to dab it with a brush. Stop right there. In a tight, humid space, the paint skins over but remains soft and ‘liquid’ underneath for much longer than on an open wall. If you touch it too soon, you’ll tear that delicate skin and create a texture nightmare that requires sanding. I once tried to fix a smudge behind a tank only six hours after painting, and the whole layer peeled off like a sunburn. It was a brutal lesson in why the 48-hour rule for moving furniture back—or in this case, touching up—is so vital for a durable finish.
Keep the Air Moving Even with Low-VOC Options
Also, watch out for the ‘Low-VOC’ trap. Just because the paint doesn’t smell like a chemical factory doesn’t mean it’s safe to breathe in a four-by-four powder room with the door shut. I’ve had many DIYers ask why that expensive low-odor paint still makes you dizzy. The answer is almost always a lack of cross-ventilation. Always keep a small oscillating fan running in the doorway, even if you’re only painting that one small square foot behind the tank. Before you finish and unlock the power of professional painting for a stunning home, take a step back and check the texture with a flashlight. If you didn’t choose the right roller nap for your specific wall, that smooth patch behind the tank will stand out every time the light hits it. Have you ever fallen into this trap of rushing the second coat or skipping the fan? Let me know in the comments below.
Use a Specialized Radiator Brush for that Final Inch
I’ve learned the hard way that a standard brush, no matter how expensive, is the wrong tool for the job when you have less than two inches of clearance. After you’ve done the heavy lifting with the mini-roller, you’ll notice tiny voids near the plumbing intakes. This is where I reach for a specialized radiator brush—the kind with the long, bent metal ferrule. It’s a tool designed for reaching behind heavy heating units, but it works like magic in a bathroom. When you master the secret to painting behind a heavy radiator, you realize those same physics apply to your toilet tank. The angle of the brush allows you to apply pressure against the wall without your hand ever touching the wet paint or the porcelain. It gives you the control of a surgeon, ensuring you master the art of house painting in even the most claustrophobic corners of your home.
Don’t Let Your Tools Become Disposable Garbage
Once the job is done, don’t just toss that mini-roller in the bin. If you’ve invested in a high-quality microfiber nap, it’s worth the five minutes of cleanup. I see so many DIYers ruin their equipment because they think small tools are ‘single-use.’ In my shop, I use a dedicated brush comb and warm, soapy water. Whatever you do, why you should avoid using cheap white spirit for cleaning brushes is a lesson in chemistry; those harsh solvents can actually break down the adhesives in the roller core, leaving you with a fuzzy mess the next time you try to unlock the power of professional painting for a stunning home. Taking care of your gear ensures that your next local painting secrets session starts with a clean slate, not a crusty brush.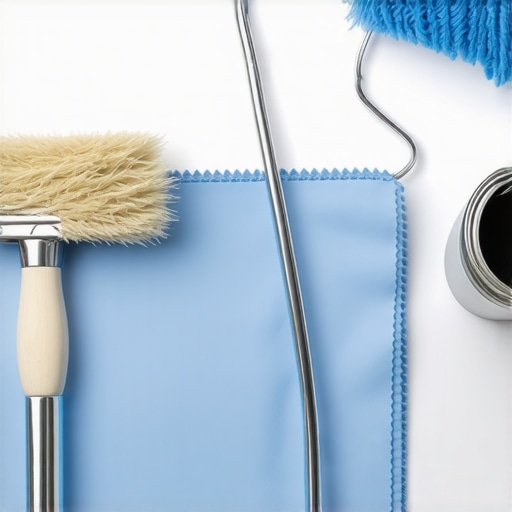
How do I keep my bathroom paint from peeling over time?
Long-term maintenance is where most people drop the ball. Because the area behind the tank is a high-humidity microclimate, you need to ensure the paint has fully cured before you start taking those long, steamy showers. The Master Painters Institute (MPI) technical standards suggest that for high-moisture interior environments, you should wait at least 72 hours for the polymer chains in the paint to fully cross-link. If you don’t, you might find the reason your exterior paint is bubbling—a lack of adhesion due to moisture—is the same reason your bathroom walls are failing. To maintain the finish, I recommend a quick wipe-down with a microfiber cloth once a month to prevent dust and hair from sticking to the wall, which can trap moisture and lead to mold. Looking forward, I predict we will see more ‘smart’ paints hitting the market by 2025 that change color slightly if the humidity levels behind fixtures are high enough to cause structural damage. This kind of expert house painting tips for 2025 will change how we manage bathroom maintenance forever. I challenge you to go check the gap behind your toilet right now with a flashlight; if you see any peeling or bare drywall, grab a radiator brush and fix it before the moisture wins.#IMAGE_PLACEHOLDER_E#
Hard Lessons from the Tightest Corners of the House
Over the years, I’ve realized that the quality of your bathroom transformation isn’t measured by the easy, wide-open walls, but by the two inches of drywall you think nobody will see. Here are the core insights I’ve gathered from years of trial and error:
- Avoid the ‘Good Enough’ Trap: If you skip the primer in that gap, the moisture will find it. I’ve seen paint flake off in sheets because the wall behind the porcelain was too thirsty for the finish coat to adhere properly.
- Light Reveals the Truth: You can’t paint what you can’t see. Using the flashlight trick for spotting missed spots on your walls is non-negotiable here. Without it, you will likely find a gray patch weeks later when the morning sun hits the floor at just the right angle.
- Small Projects Build Elite Skills: Mastering this tiny space gives you the steady hand and patience needed when you eventually tackle painting your home with more complex techniques and larger square footage.
My Go-To Kit for Difficult Spaces
I never walk into a bathroom project without these specific tools. They turn a potentially frustrating afternoon into a quick, professional win:
- The Angled Radiator Brush: This is the undisputed MVP. It reaches where your hands simply cannot fit and is a staple in my master the art of house painting toolkit.
- A High-Output Headlamp: Keeping both hands free to maneuver the roller and the trash bag shield is much safer and more efficient than juggling a phone light or a heavy shop lamp.
- Microfiber Mini-Roller Sleeves: Cheap foam rollers tend to leave micro-bubbles in tight quarters; microfiber leaves a factory-smooth finish that matches your main walls perfectly.
- The Paint Quality Institute Recommendations: I always consult their data for high-humidity primers to ensure the foundation can handle a steamy shower environment.
Take Your Bathroom from DIY to Designer
There is a unique sense of pride that comes from knowing every single inch of your home is finished to perfection. When you stop cutting corners in the places that are hard to reach, you truly unlock the power of professional painting for a stunning home. As you plan your next move, keep an eye on expert house painting advice for 2025 to see how textures and moisture-resistant finishes are evolving. You now have the tools, the technique, and the trash bag trick—it’s time to make that bathroom shine. Have you ever discovered a hidden, unpainted spot in a house you just moved into? Let me know in the comments below!