

I still remember the smell of that first “industrial-strength” sealer I slapped onto my cedar garden beds back in 2018. It was thick, pungent, and made my eyes water. A week later, my heirloom tomatoes looked… depressed. That was the moment I realized I’d made a massive rookie mistake: prioritizing the wood’s life over the soil’s health. If you’ve spent any time researching house painting or exterior wood care, you know how hard it is to find that perfect balance between durability and safety.
Your Garden Deserves Better Than Toxic Chemicals
It’s a classic dilemma. You want your beautiful garden boxes to last more than two seasons, but you’re rightfully terrified of heavy metals or petroleum-based solvents leaching into your organic carrots. I’ve been there, staring at a splotchy mess because my new stain didn’t soak into the wood properly. The truth is, most traditional exterior products are designed for decks and fences, not for environments where they’re constantly in contact with damp soil and edible roots. Today, we’re going to fix that. I’m going to show you which eco-friendly stains actually hold up against the elements without turning your garden into a chemical runoff site.
Are these green stains actually strong enough to last?
This is the question I get asked most often at the local nursery. People assume “eco-friendly” means “will wash off in the first rainstorm.” I used to think the same thing until I started experimenting with mineral-based and plant-oil finishes. You have to be careful with labels, though. There is a massive difference between low-VOC and zero-VOC labels, and some “natural” products still contain drying agents that I wouldn’t want near my salad greens. According to the Environmental Protection Agency, VOCs can contribute to ozone depletion, but for gardeners, the bigger concern is the soil microbiome. Research suggests that certain traditional wood preservatives can migrate into the soil, though the rate varies wildly based on the carrier agent used. We are looking for stains that penetrate deep into the fibers rather than just sitting on top. This prevents the peeling and flaking that leads to the wood rotting from the inside out. I once tried to save money by using a leftover interior stain on a raised bed—don’t do that. It was gone in a month. Trust me, you need something specifically formulated for the high-moisture environment of a garden. Have you ever noticed your garden wood turning gray and wondered if it’s too late to save it without poisoning your plants?To get that deep, lasting protection, you have to treat your garden wood like a thirsty athlete rather than a kitchen counter. If the wood can’t ‘drink’ the stain, the finish will just sit on the surface, eventually leading to a scenario where the wood rots from the inside out.
Get the Wood Ready to Drink
Preparation is where most gardeners fail. New cedar or pressure-treated lumber often has ‘mill glaze,’ a shiny, compressed surface from the sawmill rollers that acts like a plastic shield. If you don’t break that seal, your eco-stain will slide right off. I learned this the hard way in 2019 when I rushed a set of beds for my spring peas. I skipped the sanding, and within a month, the oil had dried into sticky, dark patches that looked like a Dalmatian. I had to scrape off the gummy mess and start over. Take a 60 or 80-grit sandpaper and give the wood a quick once-over. You aren’t looking for a furniture-grade finish; you just want to open the pores so the oil can migrate deep into the fibers. For those using larger equipment, choosing the best roller nap for rough exterior cedar siding can make this prep-cleaning phase much faster. 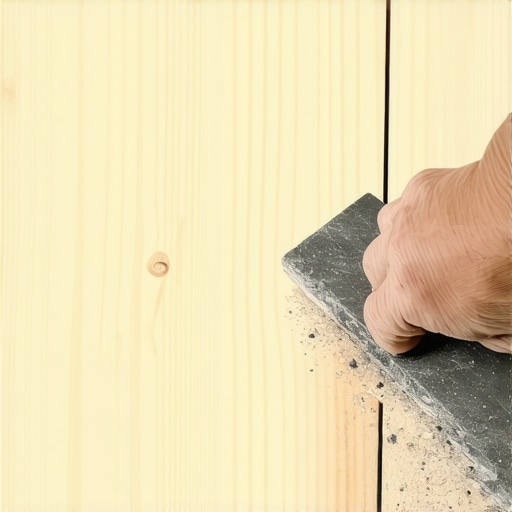
Pick Your Plant-Based Shield
Not all eco-stains are created equal. You generally have two paths: plant oils or mineral-based silicates. Raw linseed oil is the classic choice, but be warned—it takes forever to dry. If you want something that cures faster, look for ‘polymerized’ linseed or tung oil. These have been pre-heated to speed up the drying process without adding heavy metal driers. If you are worried about the chemistry, remember that safely painting a nursery using milk-based paints follows a similar philosophy of choosing ingredients you can actually pronounce. Alternatively, mineral stains work by petrifying the wood fibers. Much like mineral-based paints are better for brick, these garden-safe silicate stains create a breathable bond that won’t flake or peel, even when buried under six inches of wet compost.
Saturate Every Fiber
When you finally start applying the finish, don’t just ‘paint’ it on. You want to flood the surface. Think of it as hydrating the wood. Use a brush to work the liquid into the end grain—the ‘top’ and ‘bottom’ of your boards—because that is where water loves to travel. If you leave these areas exposed, moisture will wick up into the center of the board, causing it to swell and crack. While you work, keep a close eye on your surrounding plants. I always keep a tarp or cardboard handy because even a ‘natural’ oil can smother a delicate leaf. Knowing how to protect your perennials during exterior house painting is a skill that translates perfectly to the vegetable garden.
Stop the Splotch with Proper Saturation
If you notice the wood is drinking the stain unevenly, don’t keep piling it on in one spot. This is the primary reason why your new fence stain looks splotchy. Instead, apply a thin, even coat, wait twenty minutes, and then come back for a second pass while the first is still slightly tacky. This ‘wet-on-wet’ technique ensures the fibers are fully saturated without creating a thick film on top that could eventually crack. Once finished, give the beds at least 48 hours of dry weather before filling them with soil. This gives the oils time to move from the surface into the heartwood, creating a waterproof barrier that keeps your soil in and the rot out.
Most people assume that the more coats of sealer they slap onto their garden beds, the longer the wood will last. It sounds logical, right? But here’s where the pros differ from the weekend warriors. In my experience, the biggest mistake you can make is trying to ‘mummify’ your wood in a thick, plastic-like film. While you might think you are locking moisture out, you are actually locking it in. If any water manages to sneak into the wood through a tiny crack or from the soil underneath, a heavy film-forming sealer prevents that moisture from evaporating. This creates a literal sauna for wood-decay fungi.
Stop Over-Sealing Your Garden Beds
The USDA Forest Products Laboratory has extensively researched wood finishes and found that film-forming coatings often fail prematurely on wood in high-moisture environments because they can’t ‘breathe.’ When the wood can’t dry out, you end up with a situation where the wood rots from the inside out, even though the surface looks pristine. This is why I always lean toward penetrating oils rather than topical sealers. You want the protection to live inside the cells of the wood, not as a shell on top of it. If you’ve ever wondered why your new deck stain didn’t soak into the wood, it’s usually because the previous layer was too thick or the wood was already saturated with moisture. To get a professional result, you have to understand that mastering the art of house painting and wood care involves working with the material’s natural porosity.
Can a breathable finish actually outperform a plastic-like seal?
The answer is a resounding yes, especially in organic gardening. A breathable, plant-based oil allows the wood to expand and contract with the seasons. When you use a rigid sealer, that movement eventually causes micro-cracks. Water enters those cracks, gets trapped behind the film, and begins the decay process. It’s the same reason mineral-based paints are better for brick; they allow the substrate to release vapor.  I once saw a client who had spent a fortune on high-gloss ‘marine-grade’ varnish for her raised beds, only to have the wood turn into mush within three years. She fell into the ‘more is better’ trap. If you want to know how to maintain your newly painted exterior for ten years or more, the secret is choosing products that erode gracefully rather than peeling. Peeling is a nightmare to fix; eroding just needs a light cleaning and a fresh wipe of oil.
Watch Out for the Bottom-Seal Trap
Here is the ‘oops’ factor that kills most DIY projects: forgetting the bottom edge. Gardeners focus on the sides and the top rim because those are the parts they see. However, the bottom edge of the board is in direct contact with the wet ground. It acts like a straw, sucking up moisture through capillary action. If you don’t seal that bottom edge before you assemble the bed, you’ve left the front door wide open for rot. It’s a nuance that many skip because it’s extra work, but it’s the difference between a five-year bed and a fifteen-year bed. This level of detail is often why your local painting estimates vary so wildly in price—the pros are quoting for the work you can’t see, like sealing those hidden end-grains. Have you ever fallen into this trap where you missed a hidden spot and it cost you the project? Let me know in the comments. To ensure your project doesn’t fail early, remember the reason you should never paint over peeling exterior paint: if the foundation of the finish is compromised, everything on top will eventually fall apart.
To really level up your gardening game, you need to stop relying on the ‘it looks dry’ test. If you want to master the art of house painting or any form of exterior wood finishing, you need a moisture meter. I personally swear by the Wagner Orion 910 because it’s pinless and won’t leave unsightly holes in my premium cedar. The American Wood Council (AWC) specifies in their ‘Design for Code Acceptance’ technical guides that wood should be at or below 19% moisture content before applying any finish to prevent the entrapment of decay-causing fungi. I personally aim for 12% for garden beds. If you apply oil when the wood is still ‘green’ or even slightly damp from a morning dew, you’re just trapping water inside, and your eco-friendly stain will eventually turn into a milky, peeling mess.
Stop Guessing and Start Measuring Your Wood
Using a moisture meter changed everything for me. It transformed wood care from a guessing game into a science. I’ve seen so many homeowners get frustrated because their new deck stain didn’t soak into the wood, and nine times out of ten, it’s because the moisture content was sitting at 22%. The oil simply has nowhere to go. By waiting for that perfect 12% reading, you ensure the plant-based oils can travel as deep as possible into the heartwood. This deep penetration is what keeps the boards from warping under the weight of wet soil.
How do I maintain my garden finish over time?
Maintenance doesn’t mean you have to sand everything down to bare wood every single spring. If you chose a high-quality penetrating oil like I suggested earlier, you just need to do a ‘refresh’ coat every 18 to 24 months. First, you must avoid the danger of pressure washing wood; the high pressure tears the delicate wood fibers apart and creates ‘fuzz’ that traps dirt. Instead, use a soft-bristle brush and a mild oxygen bleach solution to kill any surface spores, let it dry for two days, and wipe on a new thin layer of oil. This prevents the wood from silvering and keeps the water-repellent properties high. If you want to maintain your newly painted exterior for ten years or more, this cycle of gentle cleaning followed by light re-oiling is the absolute gold standard for longevity.

I’ve noticed a major shift in where these products are heading for the future. By the time we hit the 2025 season, I predict we will see a move away from petroleum-based solvents entirely in favor of graphene-infused bio-oils. These microscopic carbon sheets create a literal shield against UV rays, which is usually the primary force that breaks down the oil molecules. For more on these upcoming shifts, check out expert house painting advice for 2025. Also, be incredibly patient with the curing process. Just as you’d follow the 48-hour rule for moving furniture, do not go shoving wet compost against your freshly oiled boards. If you do, the oil might float to the surface and attract every gnat in the county. Trust me, nobody wants a garden bed that looks like it’s covered in black pepper because your new exterior paint job is full of gnats. My challenge to you today: before you buy your next gallon of sealer, perform the ‘Water Drop Test.’ Splash a few drops on your wood; if they soak in within 10 seconds, you’re ready to oil. If they bead up, you still have work to do.
Hard Lessons from My Years in the Garden Trenches
I used to think that as long as I bought cedar, the wood would take care of itself. I was wrong. The biggest lightbulb moment for me was realizing that garden wood isn’t static; it’s a living part of your ecosystem. When I started treating it with the same respect I’d give a professional house painting project, the results shifted overnight. Another hard truth? Price doesn’t always equal safety. You have to read the technical data sheets, not just the marketing on the front of the can. If you are hiring someone to help with larger garden structures or pergolas, remember how to tell if your painter is actually licensed and insured because the wrong chemicals can linger in your soil for a decade. Finally, always trust your nose; if a product smells like a refinery, it probably doesn’t belong near your kale.
The Toolkit Every Garden Woodworker Should Own
To get professional-level results, you need the right gear. I never start a project without my Wagner Orion 910 Moisture Meter. It prevents the heartbreak of applying stain to wood that’s still too wet to accept it. I also recommend keeping a stash of 60-grit sanding blocks; they are the unsung heroes of wood preparation. For learning the finer points of application, I often revisit the resources on how to master the art of house painting, as the techniques for even coating and brush control are identical. Finally, always have a high-quality natural bristle brush—it holds the thin plant-based oils much better than a cheap synthetic one ever could. Knowing why your local painting estimates vary so wildly in price can also help you understand the value of using these premium tools versus cut-rate alternatives.
Give Your Garden the Protection it Deserves
Taking the time to properly seal your garden beds isn’t just about aesthetics; it’s about honoring the hard work you put into your plants. Whether you are tackling a small herb box or a massive raised-bed system, the principles of quality house painting and wood care will serve you well. Don’t let the fear of doing it wrong stop you from starting. Your garden is a place of growth, and every coat of oil you apply is an investment in the many harvests to come. By choosing eco-friendly options, you’re protecting your family, your soil, and your future. Have you ever had a garden bed rot out much faster than you expected, or did you find a stain that actually lived up to the hype? Let me know in the comments below!