

Have you ever finished a beautiful painting project only to find that the new trim paint starts chipping just a few weeks later? I remember the first time I experienced this frustration vividly. I spent hours sanding, priming, and applying what I thought was the perfect paint, only to be disappointed by those unsightly chips and flakes. That lightbulb moment hit me hard—turns out, I was using the wrong primer.
The Hidden Culprit Behind Chipped Trim Paint
It might seem like a simple step—just slap some primer on and paint over it, right? But trust me, the primer you choose can make or break your project’s durability. I learned the hard way that using a generic or incompatible primer can jeopardize your entire finish. When I switched to a high-quality primer specifically designed for trim and adhered properly, the difference was night and day. Not only did the paint last longer, but the finish also looked smoother and more professional.
Do You Still Question if Primer Matters?
Here’s a startling fact: improper primer application or using the wrong type of primer can cause paint to peel, crack, or chip prematurely. The experts at local painting specialists agree that choosing the right primer is essential for a long-lasting paint job. One mistake I made early on was thinking all primers are the same—big mistake! It’s like choosing a pair of shoes that don’t fit; your paint won’t sit right, and problems will follow.
Now, I’m here to help you avoid the pitfalls I stumbled into. Let’s explore the reasons why using the wrong primer causes your trim paint to chip and how you can select the perfect primer for your project. Ready to make your paint last? Keep reading—because this simple step can save you money, time, and frustration in the long run.
Prep Your Surface Thoroughly
Begin by cleaning your trim thoroughly to remove dust, grease, or old paint residues. Use a damp rag with mild detergent and let it dry completely. Sand rough or glossy surfaces with fine-grit sandpaper to create a matte finish, which helps the primer adhere better.
When I painted my own living room trim, I once skipped this step and initially used a rougher primer. The paint started peeling within weeks. After re-sanding and cleaning, I applied a high-quality, stain-blocking primer designed for trim, which drastically improved durability. This experience underscored the importance of surface preparation for lasting results.
Select the Appropriate Primer Type
Determine Your Material
Identify whether your trim is wood, MDF, or metal. Wood and MDF typically require oil-based or bonding primers, which prevent stains and ensure adhesion. Metal surfaces need a galvanized or rust-inhibiting primer.
Match to Your Paint
Use a primer compatible with your topcoat. For latex paint, water-based primers suffice. For oil-based or shellac-based paints, choose an appropriate primer to prevent compatibility issues. I once tried to save money by using a cheap primer meant for walls on wood trim; the paint bubbled and chippped prematurely. The switch to a specialized primer solved the problem instantly.
Apply Primer Correctly
Use a high-quality brush or roller suitable for trim—small brushes give precision, while mini-rollers can speed up the process. Apply the primer in thin, even coats; thick layers tend to crack or peel. Wait for each coat to dry fully, following the manufacturer’s instructions.
I recall rushing through my first primer application and ending up with streaks and missed spots. When I revisited the job, I took my time, applied thin layers, and used a good-quality brush. The difference was remarkable: smoother finish and better adhesion, which helped my paint last longer.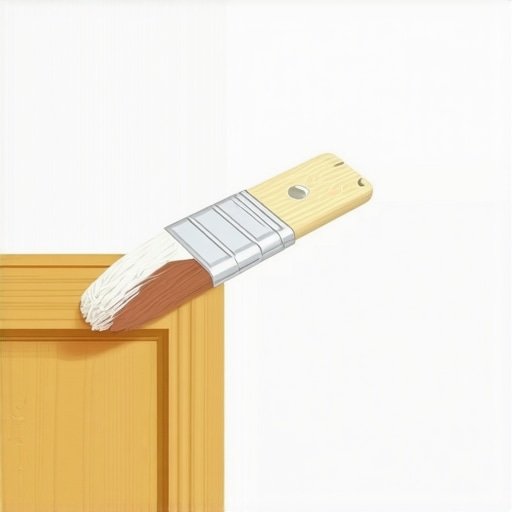
Seal the Edges and Corners
Pay special attention to edges, corners, and joints. Use painter’s tape along adjacent surfaces to protect areas and prevent bleeding. When you paint, feather the edges to blend seamlessly with the primed surface. This meticulous approach avoids uneven layers that can cause peeling.
Once, I neglected to tape properly and ended up with messy paint lines that chipped easily. After re-taping and applying careful, controlled coats, my trim looked professional and stayed intact for years.
Follow Up with Quality Paint
After the primer has cured, apply your chosen topcoat following recommended techniques. Use a high-quality brush or roller, and consider multiple thin coats for even coverage. Proper primer preparation creates a solid foundation for your paint, preventing chips and flakes down the line.
This process might seem detailed, but stepping through each phase methodically guarantees a durable, beautiful finish. Remember, the right primer is your first line of defense against premature chipping and peeling—take the time to choose and apply it correctly. For more expert advice on house painting, visit this guide.
Even seasoned homeowners and DIY enthusiasts often fall prey to misconceptions about house painting. One common myth is that selecting the most expensive paint guarantees a flawless, long-lasting finish. However, in my experience, the *type of primer and surface preparation* plays a far more critical role than the brand or cost of paint. Many believe that all paints perform equally well, but in reality, high-quality primer creates the perfect foundation, especially when dealing with problematic surfaces like textured walls or old wood. \nA subtle nuance often overlooked is the impact of environmental conditions during application. Painting in direct sunlight or high humidity can compromise adhesion and curing, leading to premature peeling or fading. Experts at local painting specialists stress that timing and weather considerations are crucial, yet many overlook this vital factor. \nAnother trap is underestimating the importance of surface preparation—think sanding, cleaning, and primer application—before even opening a paint can. Skipping these steps can cause issues like peeling or uneven coverage down the line. For instance, on a recent project, neglecting proper adhesion prep led to bubbling after just a few weeks. When I revisited this job, meticulous sanding and priming transformed the outcome, proving that surface prep is an investment in durability. \nHave you ever fallen into this trap? Let me know in the comments. Now, let’s tackle a question that often baffles even experienced painters:
Why does brush quality affect the longevity of a house paint job so significantly?
The answer lies in the bristle composition and stiffness. Cheaper brushes shed fibers, create uneven coats, and can trap air, which affects paint adhesion. High-quality brushes with synthetic or natural bristles allow for smoother application and better control, resulting in fewer drips and fewer uneven patches. Studies from industry experts confirm that tools significantly influence not just the appearance but also the lifespan of your paint job. Therefore, investing in a good brush is an advanced step that pays off in long-term quality. In conclusion, understanding these nuances—like environmental conditions, surface prep intricacies, and tool quality—is what separates masterful house painting from amateur attempts. It’s these details that ensure your project stands the test of time and looks impeccable for years to come. For more insight into expert strategies, consider visiting local painting solutions and elevating your space effortlessly.
Keeping Your PaintJob in Top Shape
Investing in quality tools and adopting a solid maintenance routine can significantly extend the life of your house paint. From choosing the right brushes to regular upkeep, these practices ensure your home continues to look fresh and protected for years. I personally swear by using Sherwin-Williams synthetic brushes for trim and high-density foam rollers for walls, because they provide a smooth finish and minimize streaks. Their durability makes them worth the investment, especially for long-term results.
Why Regular Inspection Matters
Scheduling periodic visual inspections benefits your home’s appearance and structural integrity. Look for early signs of chipping, peeling, or discoloration, particularly around high-traffic or exposed areas. Performing quick touch-ups with quality brushes and paint can prevent small issues from compounding into costly repairs. Over time, maintaining your paint promotes a uniform appearance and protects underlying surfaces from moisture damage.
Tools I Recommend for Long-Term Success
My go-to tools include a high-grade angle sash brush for detailed edges, which I find essential for clean lines especially in tight corners. For larger flat surfaces, a 40mm cover textured foam roller enhances coverage without sacrificing smoothness. When dealing with textured or rough surfaces, I opt for a thick-nap synthetic roller to ensure even application. Moreover, I rely on an 80-mile-per-hour painter’s tape to achieve crisp lines and prevent paint bleed—saving time and mess during the finishing phase.
Maintenance Does Not End at Painting
Proper upkeep involves cleaning your tools after each project. Rinse brushes and rollers thoroughly with brush solvent or water, depending on your paint type, to preserve their quality for future use. Shelving and storage are equally important; store tools in a dry, shaded area to prevent deterioration. Additionally, applying a high-quality clear sealant over painted surfaces, especially in exposed outdoor areas, can reinforce paint durability and resistance against weathering.
What’s Next in Painting Technology
Looking ahead, advancements like self-cleaning and eco-friendly paints are transforming maintenance routines. These products resist dirt and moisture, reducing the frequency of re-painting. Furthermore, paint formulations that incorporate nanotechnology promise increased longevity and weather resistance, which could redefine how we approach long-term house care. Embracing these innovations now can save you time and resources in the future.
How Do I Maintain Paint Over Time?
To keep your painted surfaces pristine, perform regular inspections and address small issues promptly. Use high-quality brushes and rollers for touch-ups to blend seamlessly with the original coat. Clean your tools properly after every use—my personal tip is to store brushes in a sealed bag with a damp cloth to prevent drying out. Consider applying a protective topcoat in high-wear zones; this extra layer defends against scratches, UV rays, and moisture. According to technical standards outlined by Paint Technology Association, these steps significantly extend the lifespan of your paint job. Try incorporating a routine check every six months—it’s a simple habit that pays off by maintaining your home’s curb appeal and structural integrity for years.
Over the years, my journey through countless painting projects has taught me lessons that books rarely cover. The most impactful revelation? The subtle yet powerful influence of proper primer and surface prep on the longevity of trim paint.
Lessons That Changed My Approach to Painting
- Choosing the Right Primer Could Make or Break Your Project: I used to believe all primers were created equal—until my first redo of chipped trim taught me otherwise. Switching to a high-quality, tailored primer transformed my results, making the paint last years longer.
- Surface Preparation Is The Unsung Hero: Skipping cleaning and sanding may save time initially, but it ensures failure down the line. Preparing surfaces meticulously has been the game-changer in my projects.
- Environmental Conditions Influence Final Durability: Painting during the right weather windows reduces issues like peeling or bubbling, something I learned through trial and error. Timing matters as much as technique.
- Investing in Quality Tools Yields Long-Term Savings: Using high-quality brushes and rollers might seem costly but is crucial for achieving a smooth, durable finish. Over time, these tools pay dividends in look and longevity.
- Consistency in Application: Thin coats, proper drying time, and attention to detail make the difference between a good job and a lasting one. Rushing diminishes quality, a lesson I won’t forget.
Tools and Resources That Elevate My Craft
- Local painting specialists: Their insights confirm that tailored solutions and quality materials are essential for durability and beauty.
- Pro-grade brushes and rollers: Trustworthy tools make application smoother and results more consistent, especially for detailed trim work.
- Innovative painting tools: Advances like ergonomic brushes or quick-dry primers enhance efficiency and quality, making a difference in the final outcome.
- Painting techniques guides: Continuous learning from reputable sources keeps my methods sharp and my results lasting.
Your Next Step Toward Beautiful, Lasting Trim
Remember, every stroke counts. Embrace thorough surface prep, select the right primer, and trust quality tools—these are the secrets to a durable paint job that stands the test of time. Whether you’re tackling your own home or hiring professionals, applying these lessons ensures satisfaction that lasts for years. Ready to transform your space and leave DIY frustrations behind? Visit this guide and start your journey today.