

It was a bright Saturday morning when I looked out my front window and noticed it—big, ugly bubbles forming on my freshly painted house. My stomach sank. I’d just spent a whole weekend prepping, priming, and carefully applying that beautiful new coat of paint, only to see it start peeling and bubbling so soon afterward. It was a frustrating moment, but one that taught me a lot about what goes wrong with exterior painting projects. If you’ve ever experienced that sinking feeling when your new paint begins to peel or bubble just weeks after application, you’re not alone. Today, I’m here to share the honest truth behind why this happens and, more importantly, how to prevent it in your own home.
Understanding Why Paint Bubbles and Peels After Just a Few Weeks
Is Your Painting Approach Doing More Harm Than Good?
In my early days of painting houses, I made a rookie mistake that I’ll never forget: I brushed on new paint over existing peeling paint, thinking I could quickly cover it up. Big mistake. That one error set the stage for bubbling and peeling down the line. As I later learned, improper prep work is often the culprit. If old paint isn’t properly removed or if the surface isn’t well cleaned, moisture or contaminants can get trapped underneath, causing the new layer to bubble and eventually peel away. According to the *House Painting Tips* guide by industry experts, surface preparation is the foundation of any durable paint job. Skipping this step can be costly and disheartening.
Have you faced this issue in your recent projects? If so, you’re in good company. But don’t worry—I’ll also share exactly how to fix it and avoid it happening again. The key lies in understanding the common causes and addressing them head-on. Let’s dig into the real reasons your exterior paint bubbles and what you can do about it.
For a deep dive into transformation strategies and professional solutions tailored for every budget, check out [local painting solutions](https://elitepainterpro.com/transforming-spaces-local-painting-solutions-for-every-budget). Ready to turn your home into a stunning masterpiece? Keep reading, because the fixes are simpler than you might think—and the results are totally worth it.
Start with Proper Surface Preparation
My first step was to remove all loose or peeling paint with a sturdy scraper—think of it like peeling off an old, dead skin to reveal fresh, healthy surface underneath. Use a wire brush or power washer for stubborn spots, and ensure the surface is clean, dry, and free of dust or grease.
Clean Thoroughly to Remove Contaminants
Next, I cleaned the area with a de-greasing solution or warm water mixed with mild detergent. This helps eliminate dirt, oil, or mildew that could trap moisture beneath the new paint—similar to wiping a window until it’s crystal clear before applying a fresh coat.
Choose the Right Primer and Paint
Picking the proper primer is essential; I opted for a high-quality, bonding primer suited for the material. It acts like a foundation, ensuring the paint adheres properly. For the topcoat, I selected a durable, breathable exterior paint designed for weather resistance. Matching the paint to the manufacturer’s recommendations can make or break your project.
Apply Paint Correctly and at the Right Time
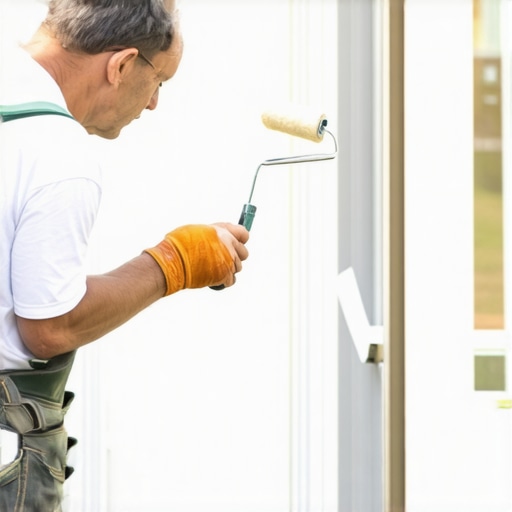
Timing matters: I painted on a day with overcast skies and low humidity—avoiding the heat of midday sun, which can cause rapid drying and bubbling similar to how a marshmallow melts quickly in hot chocolate. I used a high-density roller, applying paint in thin, even coats, avoiding thick layers that trap moisture. Let each coat dry completely before applying the next, following the manufacturer’s specified drying times.
During my last project, I learned that rushing the process leads to imperfections. Patience ensures that the paint bonds properly, reducing the risk of bubbles forming later.
Follow the 48-Hour Rule and Protect Your Work
Once the final coat was on, I refrained from touching or placing furniture against the walls for at least 48 hours. This prevents accidental smudges or dents that can cause issues down the line. Additionally, I made sure to clean my tools immediately, using the technique described at the 48-hour rule.
Address Moisture and External Factors
To prevent bubbling caused by moisture, I checked the weather forecast and waited for several dry days. If your home is prone to moisture buildup, consider installing vents or dehumidifiers before painting, similar to how I used a damp rag test to ensure wall dryness before starting. Remember, painting over damp surfaces is a fast track to bubbles and peelings.
Implementing these steps was transformative. The next time I tackled exterior painting, I adhered strictly to this process, and my finish was smooth, durable, and bubble-free—standing the test of time and weather. For comprehensive strategies tailored to your specific needs, visit local painting solutions.
Many homeowners assume that choosing the brightest, most vibrant paint will make their house stand out and last longer, but in my experience, this is a common misconception. Overly saturated colors can fade faster under direct sunlight, and they often show imperfections more prominently, making the final result less durable and pleasing. Industry experts like Sherwin-Williams emphasize that selecting the right finish and color based on environmental factors and surface type is crucial for longevity and aesthetic appeal. Mistaking visibility for quality is a trap that many fall into, leading to dissatisfaction and increased repainting costs. Another nuanced point often overlooked is the importance of surface preparation: skipping this step can cause paint to peel or bubble prematurely. Properly cleaning, sanding, and priming surfaces ensures better adhesion and durability. A particularly sneaky mistake is underestimating the impact of external factors such as moisture or temperature fluctuations during application. Painting on a damp surface or during extreme weather can trap moisture or cause uneven drying, resulting in bubbling or cracking. Advanced homeowners and professionals alike should beware of rushing through these stages, as evidence shows that meticulous prep greatly extends paint life. Consider the myth that cheaper paints are a budget-friendly option; studies from the *Journal of Coatings Technology* reveal that while initial costs may be lower, inferior paints tend to require repaints sooner, leading to higher long-term expenses. Therefore, investing in quality materials and mastering proper techniques is a smarter long-term strategy. Lastly, many mistake the application method—believing that brushing is always adequate—when in fact using rollers or sprayers can provide a more uniform finish and reduce application errors. However, each method has nuances; for example, sprayers demand proper masking and thin coats to prevent runs and uneven layers. To deepen your understanding of these advanced nuances and avoid common pitfalls, explore detailed strategies at local painting strategies. Remember, the devil is in the details, and mastering these can elevate your project from amateurish to professional. Have you ever fallen into this trap? Let me know in the comments.Maintaining the quality of your house painting over time requires the right tools and proactive upkeep. I rely on high-quality equipment to ensure each project stands the test of time. For instance, I swear by using a professional-grade extension pole paired with a precision brush for detail work. This combo allows me to reach tricky corners without overextending or risking uneven application. Additionally, I use a paint-mandering tool—a specialized attachment designed to eliminate air bubbles in the paint while rolling—which significantly improves finish smoothness. Choosing the correct brushes and rollers isn’t just about comfort; it’s about longevity and ease of maintenance. I opt for synthetic bristle brushes for latex paints, as they’re durable and easy to clean, preventing costly replacements.
Regular equipment maintenance is just as crucial. After each project, I clean brushes and rollers with warm water and mild detergent, avoiding harsh chemicals that can degrade the bristles. For sprayers, I follow manufacturer-specific cleaning routines, including flushing with appropriate solvents to prevent clogging. Investing in a quality paint strainer can also extend your equipment’s lifespan by filtering out debris that might cause uneven coats.
To keep your tools in tip-top shape, I recommend a dedicated storage system—using labeled, airtight containers that prevent dust and moisture buildup. This approach minimizes wear and tear and simplifies your workflow for subsequent projects. Looking ahead, advancements like battery-powered airless sprayers with brushless motors are poised to transform DIY painting by offering cleaner application with less maintenance. Embracing these innovations can save time and improve results.
How do I maintain my painting tools over time?
Proper cleaning after each use is key. Use warm water for latex paints and appropriate solvents for oil-based products, ensuring all paint residues are thoroughly removed. Regularly inspecting brushes and rollers for frayed bristles or signs of wear helps prevent imperfections in your finish. Additionally, store tools in a dry, climate-controlled environment—they’re an investment that pays off with improved performance and durability.
Want to elevate your tool game? Consider trying a high-end, self-cleaning sprayer, which minimizes cleanup time and maintains consistent spray patterns—an innovation I predict will become standard in professional and DIY circles alike. For in-depth guidance on tool maintenance, check out the comprehensive strategies at master the art of house painting. Remember, the secret to lasting paint jobs isn’t just in the prep but also in caring for your tools.
Using quality tools and maintaining them meticulously ensures your paint’s longevity and a professional finish every time. Don’t forget—regular upkeep, like cleaning brushes immediately after your session, is essential. Try incorporating a dedicated tool storage solution and exploring advanced equipment like self-cleaning sprayers—that’s how you keep your work lasting and your satisfaction high. Want more insights? Reach out through contact us for personalized advice and support.Painting my house was a rewarding challenge, but the real learning came from the unexpected bumps along the way. One of the most valuable lessons I discovered is that patience and meticulous prep are your best friends in achieving a flawless exterior finish. Skipping steps like proper surface cleaning, sanding, and priming can lead to bubbles, peelings, and months of regret. Investing in high-quality tools and maintaining them properly also makes a significant difference, ensuring durability and a professional look that lasts. Lastly, understanding external factors such as weather conditions and moisture levels can save you from costly mistakes. Remember, each house presents unique challenges; embracing the process with care and attention ensures your paint job transforms your home beautifully and lasts for years to come.