

I’ll never forget the first time I tried to paint a living room wall, only to watch my roller glide uncontrollably across the surface like it was possessed. That frustrating moment made me realize I was making some common mistakes—and that my project was quickly turning into a paint-splattered disaster. If you’ve ever experienced your roller skating across the wall, leaving uneven lines or misshapen patches, you’re not alone. It’s a universal challenge that can turn a simple refresh into a nerve-wracking ordeal.
Why Your Roller Keeps Sliding and How to Fix It
Understanding the root cause of this issue is key. More often than not, it boils down to a mix of improper technique, roller quality, or surface preparation. But here’s the good news: with a few simple adjustments, you can regain control and achieve a smooth, professional-looking finish. Today, I’ll share tried-and-true tips from my own experience—and I promise, these are straightforward steps that really work. After all, as expert painter tips suggest, mastering technique is half the battle in painting a beautiful wall.
Is Your Project Worth the Hassle or Worth Doing Right?
Early on, I made the mistake of rushing into painting without checking my tools or surface prep. That cost me time, money, and a lot of frustration. Trust me, skipping proper preparation is a quick way to end up with roller marks or uneven coverage that looks amateurish. If you’re skeptical about investing a little extra effort now, consider this: A quality roller, the right technique, and clean surfaces can make the difference between a wall that looks like a pro did it and one you’d rather hide behind a piece of furniture. Want to see how local painting experts do it? Check out why local painting matters.
In the next sections, I’ll walk you through the practical steps to prevent your roller from skating across the wall, turning your painting project into a satisfying success instead of a messy ordeal. Ready to dive in? Let’s get started!
.
Prepare Your Tools and Surface for Success
Start with a high-quality roller and fresh paint to ensure smooth application. I learned this the hard way when I used an old roller that shed fibers, causing uneven coverage. Before diving into the wall, rinse your roller and test it on a scrap piece or an inconspicuous area to check its performance. Proper surface prep, like cleaning and patching holes, creates a smooth canvas that prevents the roller from slipping or bouncing.
Pick the Right Roller Nap and Load It Properly
The roller’s nap length affects how much paint it holds and how it contacts the wall. For smooth surfaces, opt for a ⅜-inch nap; for textured walls, a thicker nap works better. When loading paint, dip the roller into the tray and roll it back and forth to evenly distribute the paint, removing excess to avoid drips. During my last project, I overloaded my roller, which caused it to slip and leave streaks until I learned to shake off the excess properly.
Master Your Painting Technique
Hold the roller with a firm but relaxed grip and use light, consistent pressure. Think of it like steering a bicycle: too tight grip or too much pressure can make it harder to control. I recall a time when I pressed too hard, and the roller skated over the wall, leaving uneven patches. Instead, I applied gentle pressure and used a ‘W’ or ‘M’ pattern to spread the paint, then rolled over it lightly to smooth out lines. This technique ensures even distribution and prevents the roller from bouncing.
Use Proper Rolling Motion to Maintain Control
Always roll in overlapping strokes, moving vertically or horizontally, and avoid pressing down hard. When I painted my living room, I found that moving slow and steady kept the roller from slipping. Plus, periodically reloading the roller prevents it from dragging or skipping. If you notice the roller starting to skate or skip, stop and reload paint; this keeps the load consistent and the control steady.
Practice Surface and Lighting Checks
Good lighting highlights areas where the roller might be slipping or missing spots. During one project, I used a flashlight at an angle to reveal uneven patches, catching a few missed spots early. Ensuring the surface is dry and free of dust or oils also minimizes slipping. Remember, a prepared surface is your best ally in preventing unwieldy rollers and achieving smooth, professional results.
Avoid Common Pitfalls with Simple Hacks
Don’t rush when switching directions—slow, deliberate movements help maintain control. If your roller starts to slide, lift it slightly and reposition carefully rather than forcing it through stubborn spots. Keeping your tools in top shape and practicing on scrap areas boosts confidence and control, turning painting from a challenge into a straightforward task. For more tips on perfecting your technique, check out this guide.
Many homeowners believe that choosing the cheapest paint or rushing through preparation guarantees a quick, flawless finish. However, as a seasoned painting professional, I’ve learned that the real secrets lie in nuanced techniques and understanding the often overlooked details. One widespread myth is that all paints are created equal; in reality, high-quality paints with improved adhesion and durability can save you time and money in the long run, especially when tackling challenging surfaces. Skipping surface prep might seem like a shortcut, but neglecting to clean, prime, and patch imperfections often leads to peeling, bubbling, or uneven coverage, pitfalls that DIY enthusiasts frequently encounter. An advanced aspect many overlook is the significance of temperature and humidity control during painting; environmental conditions can dramatically affect paint drying times and finish quality, something even experienced painters sometimes underestimate. According to a study by the Paint Quality Institute, proper environmental management can extend the lifespan of your paint job by preventing early wear and cracking. Curiously, many assume that a single coat suffices, but professional techniques often involve multiple thin coats and proper drying times for optimal results. When doing extensive projects, understanding the subtle differences between finishes—matte, satin, semi-gloss—can influence not just appearance but also maintenance and longevity, especially in high-traffic areas. Thinking beyond the surface, expert painters pay close attention to edgework, caulking, and seamless transitions, skills that can make the difference between amateurish uneven patches and a truly polished look. Don’t fall into the trap of believing that painting is purely about color—techniques and nuanced choices are what elevate your work from average to exceptional. Have you ever fallen into this trap? Let me know in the comments. To dive deeper into mastering your painting projects, explore how professional guidance can transform your space and ensure lasting beauty, and for advanced tips, check out our ultimate guide to house painting.
Keep Your Tools Working Like New
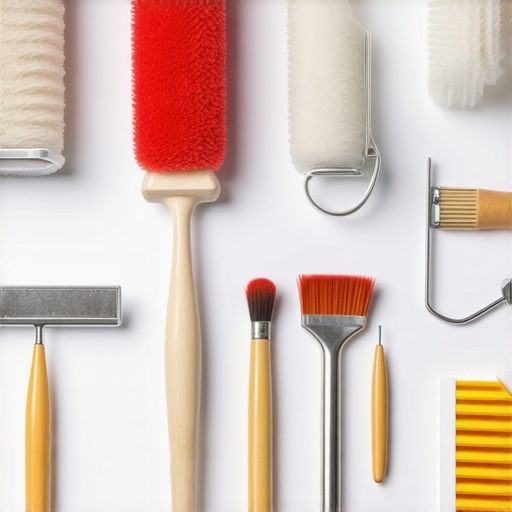
Investing in high-quality tools isn’t just about making the job easier; it’s about ensuring longevity and maintaining those professional finishes over time. Personally, I swear by using full-synthetic brush cleaners like Zep Citrus Degreaser, which effectively remove paint residues without damaging bristles, extending their lifespan. Regular cleaning of brushes with warm water and mild detergent after each project prevents dried paint buildup, which can cause bristle splaying and uneven application. For rollers, I prefer using microfiber nap rollers because they shed less and distribute paint more smoothly, especially when paired with a sturdy quality primer. Keeping your equipment in top shape minimizes surprises like shedding fibers or uneven coverage, saving you money and time in the long run.
Proper Storage Prevents Future Hassles
After finishing your project, clean your tools thoroughly—dip brushes and rollers in cleaning solution, rinse, and let them dry completely before storing. I find that wrapping brushes in plastic wrap or sealing rollers in airtight bags prevents paint from drying mid-shift, which can be a headache to fix later. Storing tools upright in a dry, cool place also protects against rust and bristle deformation. Remember, a well-maintained tool today means fewer headaches tomorrow. Want to keep your tools in pristine condition? Reach out via contact us for personalized advice.
Long-Term Results and Care
Applying proper maintenance routines ensures your paint job looks fantastic for years. Using a clear coat or sealant on high-traffic or moisture-prone areas, like kitchens or bathrooms, can significantly extend the lifespan. I also recommend periodically cleaning painted surfaces with a soft cloth and mild soap to remove dirt and prevent discoloration. According to the Paint & Coatings Industry Association, regular inspection for peeling or cracking allows for timely touch-ups, which are often easier and more cost-effective than full repainting. Staying vigilant about environmental factors—like humidity and sun exposure—also preserves your paint’s integrity. In the future, I see advances in nanotechnology-based coatings offering self-healing properties that could make touch-ups even less frequent.
How do I maintain a perfect finish over time?
One of my favorite ongoing maintenance tricks involves applying a thin layer of polyurethane varnish on exterior surfaces. It provides an additional barrier against weathering, UV rays, and moisture. Also, establishing a routine of gentle cleaning and timely touch-ups ensures your walls keep their vibrant color and smooth texture. This is especially crucial in local painting projects, where environmental conditions can vary greatly. Remember, consistent upkeep costs less over time and gives your home that always-fresh look.
Embrace these tools and maintenance strategies to safeguard your artistic investment. For specific advice tailored to your project, don’t hesitate to contact our team anytime. And why not try incorporating a high-grade sealant into your next paint job? It’s a game-changer for durability and appearance.
< >
>
Lessons I Wish I Learned Sooner
One of the biggest surprises in my painting journey was realizing how much surface prep affects the final look. Skipping this step often led to uneven coverage and frustration—and I learned my lesson the hard way.
Another insight was understanding that not all paints are created equal. Investing in quality paint and tools made a noticeable difference in durability and finish, saving me time and money over time.
Lastly, I discovered that patience is key. Rushing through coats or neglecting dry times resulted in bubbling or peeling soon after. Taking my time truly paid off, transforming my walls into works of art rather than a patchwork of mistakes.
The Tools and Resources That Changed My Approach
My go-to tools include a high-quality roller with the perfect nap length for each surface—trust me, it makes a world of difference. I also rely on my favorite premium eco-friendly paints for their smooth application and longevity. For technique refinement, I often revisit professional painting guides that offer step-by-step advice. And, of course, connecting with local experts through local painting insights helped me refine my approach, ensuring my project results are as close to professional as possible.
Bring Your Painting Dreams to Life Today
Every brushstroke and each carefully prepared surface brings you closer to transforming your home into a space you love. With the right techniques, quality tools, and a little patience, you can achieve that professional finish you’ve always admired. Don’t wait for perfection—start today, experiment boldly, and watch your walls come alive. Your dream space is just a few steps away; all it takes is that first confident brush. What part of your house painting project are you most excited to tackle? Share your thoughts below and let’s inspire each other to create beautiful, lasting spaces together!