

It was a sunny Saturday afternoon when I fired up my paint sprayer, optimistic about giving my fence a sleek, even finish. But as I stepped back to admire my work, my stomach sank. The stain looked nothing like the smooth, professional job I’d envisioned. Instead, it was a patchwork of splotches and streaks. Frustrated and a bit embarrassed, I wondered: what went wrong?
Struggling with Splotchy Fence Stains? You’re Not Alone
Many homeowners face this exact problem—applying a new stain or paint only to end up with an uneven, blotchy finish. It’s disheartening, especially after putting in the effort to improve your home’s curb appeal. The truth is, this isn’t just about aesthetic disappointment; it’s about wasting time and money on a project that should’ve transformed your space, not complicated it.
What I learned from my mistake is that understanding the causes behind uneven staining can save you a ton of frustration. Today, I’ll share the practical steps that turned my project around. If your recent fence staining attempt looks more sunrise than sunset, don’t worry. I’ll guide you through the causes of splotchiness and show you how to achieve a flawless, lasting finish.
Will Fixing My Fence Be a Waste of Time? My Early Mistake
When I first started, I assumed that applying a second coat quickly would magically even things out. Turns out, that’s a common misconception. Early in my project, I neglected to prepare the surface properly and didn’t consider the stain type. This oversight resulted in more streaks and uneven patches. Trust me—knowledge about proper preparation and product selection is key. If you want to avoid my mistakes, check out detailed professional tips on [mastering house painting](https://elitepainterpro.com/master-the-art-of-house-painting-with-these-pro-tips). It’s a game-changer.
Now that I’ve set the stage, let’s dig into the real reasons behind splotchy staining and how you can tackle each one efficiently. Ready to transform your fence from patchy to pristine? Let’s go.
*Did you face a similar problem with your project? Share your experience in the comments—I’d love to hear what went wrong and how you fixed it.*
Prep Your Surface Like a Pro
Start by thoroughly cleaning your fence with a mixture of mild detergent and water to remove dirt, mold, and old loose paint. Use a stiff-bristled brush or pressure washer for stubborn grime, ensuring the surface is impeccably clean and dry before proceeding. A well-prepared surface allows the stain to absorb evenly, much like priming a canvas ensures smooth painting results. I once neglected this step and ended up with uneven patches despite multiple coats, turning my project into a frustrating patchwork.
Pick the Right Stain and Equipment
Select a high-quality, water or oil-based stain appropriate for your fence material. Consider the weather – avoid staining if rain is forecasted or if temperatures are too low or high, which can hinder absorption and drying. Use a sprayer or a brush, depending on the fence’s texture; a sprayer provides even coverage but requires careful technique. I learned that switching from a roller to a sprayer with a wider fan pattern significantly improved my finish, reducing streaks and blotches.
Apply in Consistent, Thin Coats
Rather than applying thick, heavy coats that drip or pool, opt for multiple light layers. Think of this like layering thin sheets of paper — each adds to the final look without creating uneven buildup. Start at one end and work your way across steadily, maintaining a wet edge to prevent overlaps from drying too quickly and causing streaks. During my attempt, rushing to finish led to pooling and uneven color — patience truly pays off.
Follow Proper Timing and Technique
Allow each coat to dry thoroughly as per manufacturer instructions before applying the next. This could range from a few hours to a day. Use a high-quality sprayer with a consistent pressure setting, and keep it parallel to the surface to avoid streaks. I used a slow, sweeping motion, overlapping slightly each pass, which kept the stain even and prevented runs. Watching a tutorial on house painting pro tips helped me refine my technique.
Finish with Quality Sealant or Topcoat
Once the stain is fully dry, applying a clear sealant or topcoat can lock in the color and add protection against weathering. This extra layer smooths out minor imperfections and prolongs the finish’s lifespan. Think of it as a clear skin that shields your work from elements, keeping it looking fresh longer. In my case, a good sealant made all the difference in maintaining the even appearance I was aiming for.
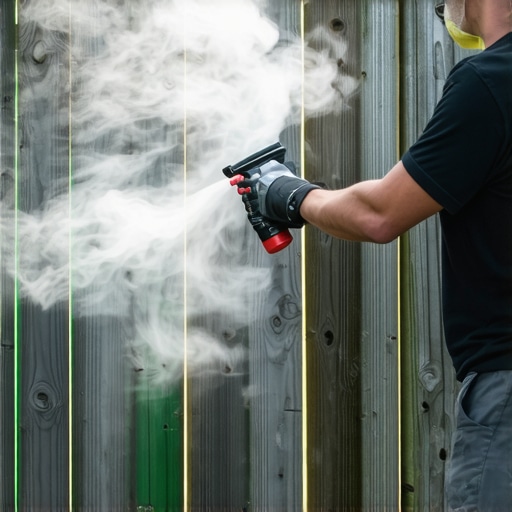
Implementing these steps transforms a risky DIY attempt into a professional-looking finish. Remember, meticulous preparation and patience are your best allies. For more tips on expert home improvement techniques, visit transform your home with expert house painting tips.
When it comes to painting, many assume that a few basic steps—like choosing the right color or using quality brushes—are enough to guarantee a perfect finish. However, as any seasoned painter knows, the devil is in the details. One common misconception is that more paint equals better coverage, but in reality, layering thin coats with proper drying times produces a smoother, more durable result. Overapplication can lead to drips, uneven texture, and long-term peeling, which undermines even the most vibrant hues. Additionally, many underestimate the importance of surface preparation; skipping this step can trap moisture, cause adhesion failures, and lead to blisters or bubbling down the line. An advanced mistake often overlooked is rushing the process—waiting too little between coats or painting in unsuitable weather conditions can jeopardize the entire project. According to professional painters and verified industry studies, patience and meticulous prep work drastically improve outcomes.
Why do DIY painters often overlook the importance of ambient temperature and humidity?
These environmental factors impact paint drying and curing, influencing the final appearance and longevity. High humidity can cause paints to dry too slowly, leading to insufficient bonding and spotting, while low temperatures may result in incomplete curing, making surfaces vulnerable to damage. Experts recommend monitoring weather forecasts and choosing optimal times for painting. For those serious about achieving professional results, exploring advanced t techniques like proper ventilation, using accelerators or retarders, and learning how to identify the ideal painting conditions can make all the difference. Don’t fall into the trap of assuming that haste saves time—proper scheduling and surface prep are your best allies. To deepen your understanding, check out transform your home with expert tips and master the art of painting with confidence. Have you ever fallen into this trap? Let me know in the comments.When it comes to professional-looking results and maintaining the integrity of your paintwork over time, investing in the right tools and understanding proper maintenance routines is crucial. Quality equipment not only streamlines your workflow but also extends the lifespan of your finished projects. One of my personal favorites is the Wagner Control Spray Max HVLP sprayer. Its adjustable nozzle and high volume low pressure system provide a fine, even spray that minimizes overspray — perfect for residential exteriors. Additionally, I always keep a set of high-grade, synthetic-bristle brushes for touch-ups; they last longer and retain their shape better than cheaper options, which is vital for maintaining crisp edges and detailed areas over the years.
How do I maintain my painting tools to ensure they last?
Cleaning your tools immediately after use is the best way to preserve their condition. For brushes and rollers, I use warm water with a splash of gentle detergent for latex paints, while oil-based paints require mineral spirits or paint thinner. Rinse thoroughly and reshape brushes before storing them flat or hanging upside down. For spray equipment, I carefully detach the nozzle and clean all parts with the appropriate solvent, ensuring no residual paint causes clogging or inconsistent spray patterns later. Regular maintenance of your tools reduces the need for replacements and ensures consistent quality in your work, especially for ongoing projects or long-term painting endeavors.
Long-term results depend on correct upkeep of tools and surfaces
In my experience, neglecting maintenance can lead to premature tool failure and uneven finishes that diminish your project’s appeal. Using high-quality sealants, like those recommended in professional house painting tips, also helps protect your work from weathering, cracking, or peeling. Applying a good topcoat after a proper curing period can lock in your paint and make future touch-ups easier. For external surfaces, inspecting and reapplying sealants every few years ensures longevity. As drywall and wood expand and contract with temperature changes, maintaining the integrity of your finishes is an ongoing process that prevents costly repairs down the road. Stay proactive by scheduling regular surface checks—think of it as preventive healthcare for your home’s appearance.
Scaling your painting efforts without sacrificing quality
If you plan to scale your projects, consider investing in a commercial-grade sprayer like the Graco Magnum X7. It offers higher durability and faster coverage, ideal for larger homes or multi-unit developments. Pair this with a systematic maintenance routine—clean after each use, store in a dry place, and replace worn-out parts. Consistency in your process ensures you uphold a professional standard regardless of project size. Also, leveraging digital project management tools can help keep track of maintenance schedules, product inventories, and customer feedback, streamlining your workflow and boosting long-term profitability. As trends point toward eco-friendly materials and smarter equipment, staying updated with the latest innovations can give you a competitive edge—explore options that suit your current scale and future growth plans.
What about tools for local painting projects?
For local painting efforts, I recommend using versatile tools like the Titan ControlMax 1700 PRO. Its durable construction and precise control make it ideal for fences, decks, and interior walls. Regularly inspecting your tools—checking hoses for cracks, nozzles for clogging, and filters for buildup—can address issues before they become costly problems. Maintaining your equipment isn’t just about prolonging tool life; it directly impacts your results and customer satisfaction. Also, keep a set of microfibre cloths handy for quick cleanup and touch-ups, ensuring your work remains sharp and clean. As local projects often involve varying environments, adjusting your tools and routines accordingly will help you achieve consistent quality.
What I Wish I Knew Before My First Fence Stain
One of the most valuable lessons I learned was that patience and thorough surface prep can turn a messy stain job into a true masterpiece. Rushing through steps like cleaning or choosing the right weather conditions often led me to uneven results, a mistake I won’t repeat. It’s easy to assume that applying more stain quickly will fix everything, but layered, thin coats with proper drying time really make the difference. Remember, the devil is in the details—skipping surface preparation or ignoring environmental factors can undermine your hard work and lead to frustration.
Tools and Techniques That Elevated My Results
Investing in quality tools, such as a high-grade sprayer and good brushes, and using them correctly really elevated my fence staining game. Regular maintenance of these tools—cleaning brushes immediately, checking sprayer nozzles, and storing equipment properly—ensured consistent, professional-looking results. Utilizing tutorials and expert advice, like those found at master the art of house painting with these pro tips, helped me refine my technique and avoid common pitfalls.
Why Rushing Can Ruin Your Beautiful Finish
One thing I realized is that impatience is the enemy of a perfect stain job. Waiting for each coat to dry thoroughly, considering weather conditions, and applying thin layers may take extra time, but it guarantees a smooth and durable finish. Rushing through these steps results in streaks, pools, and blotches. Think of each coat as a building block—skipping the necessary curing time weakens the entire structure. Investing time in proper process not only enhances your results but also saves you from rework and disappointment later.
The Unseen Power of Environmental Awareness
Weather conditions like humidity and temperature can make or break your staining project. I discovered that staining in the right conditions—warm, dry days—ensures even absorption and drying. Ignoring this can cause spotting, peeling, and an uneven appearance. Monitoring weather forecasts and scheduling projects during optimal times save you headaches and improve your overall results. For a deeper dive into climate-friendly painting techniques, visit transform your home with expert house painting tips.
Embrace the Process and Celebrate Your Progress
Ultimately, mastering fence staining requires embracing the journey: meticulous prep, correct tools, patience, and environmental awareness. Each successful project boosts your confidence and sharpens your skills. Remember, every painter—professional or DIYer—starts somewhere. The key is to learn from every stroke, celebrate small wins, and keep improving. For ongoing inspiration and advice, explore local painting solutions for every budget and continue refining your craft.