

I vividly recall the moment I decided to paint my baby’s nursery with milk-based paint. The room, once peaceful and ready for a fresh coat, suddenly felt like a battleground. I plunged into the project, armed with enthusiasm, but soon realized I overlooked a crucial detail: the safety and proper application of these eco-friendly paints. The lightbulb moment hit hard when I noticed a chalky residue on the walls and a lingering smell that wouldn’t go away. It made me wonder—am I doing this the right way? Since then, I’ve dedicated myself to mastering the art of safe, effective painting with milk-based paints, especially for spaces like nurseries where health comes first.
Why Choosing Safe Paints for Your Nursery Matters More Than Ever
When it comes to your child’s sanctuary, only the safest materials will do. Traditional paints often contain volatile organic compounds (VOCs) that can off-gas for weeks, posing health risks. Milk-based paints, celebrated for their natural ingredients, are becoming a popular choice for eco-conscious parents. But their popularity isn’t just hype; they require a different approach to application to truly reap their benefits. I learned this the hard way, making a mistake early on that could have compromised my baby’s health had I not corrected my method. If you’re considering this green alternative, understanding how to use these paints safely is essential. Let’s explore how to do it right, ensuring your nursery is not only beautiful but also safe.
Worried About Effectiveness? You’re Not Alone—Here’s What You Need to Know
Admittedly, I was skeptical at first. Could milk-based paints truly deliver the vibrant colors and durability I expected? My concern was only amplified after an initial misstep: I applied the paint without proper surface preparation, resulting in uneven coverage and a chalky finish. That mistake taught me a vital lesson—preparing the surface is just as important with eco-friendly paints as it is with traditional ones. For a deep dive into the benefits and proper techniques, you might want to visit this comprehensive guide. Now, with the right knowledge, I enjoy peace of mind knowing my child’s space is safe and beautifully painted. Are you facing similar doubts or challenges? Don’t worry—I’ve got you covered with practical, neighborly advice to help you navigate this painting journey successfully.
Prepare Your Surface for a Smooth Finish
Start by cleaning the walls thoroughly with a damp cloth to remove dust and grease, much like preparing a canvas before painting a masterpiece. For stubborn stains or residues, use a gentle mixture of warm water and mild detergent, ensuring the surface is clean and dry before applying any paint. During a project I did last spring, I used a vinegar and water solution to de-grease my son’s room walls. The result was a surface that allowed the milk-based paint to adhere perfectly, preventing chalky finishes and uneven coverage.
Prime with Eco-Friendly Primer
Apply a high-quality, low-VOC primer to ensure better adhesion and durability of the milk-based paint. Think of the primer as the foundation of a house—without it, everything else might crumble. When I painted my nursery, I chose an eco-friendly primer that sealed the wall’s surface, especially over previously painted areas that had glossy finishes. This step minimized chalkiness and created a uniform surface for the subsequent layers.
Mix and Thin the Milk-Based Paint Correctly
Milk paints can sometimes be too thick, leading to uneven application or brush marks. Thin the paint with a little water—about 10-15%—to achieve a creamy consistency similar to whole milk. I remember trying to paint with the paint straight from the jar, which resulted in patchy coverage and a chalky finish. Diluting it properly made the application smoother and extended the paint’s drying time, giving me more control and a finer finish.
Use Proper Tools for Application
Opt for natural bristle brushes or high-density rollers designed for absorbent paints. Avoid cheap synthetic brushes, which can leave streaks or shed bristles, especially when working with eco-friendly, natural paints. During my project, I used a 3-inch angled brush for corners and edges and a synthetic roller for larger wall areas. This combination allowed me to achieve clean, sharp edges and even coverage, reducing the need for touch-ups later.
Apply Multiple Thin Coats for Rich Color
Just like cooking a perfect omelet—it’s better to add several thin layers than one thick one. Milk-based paints often require two or three coats to reach the desired opacity and vibrancy. I once attempted a single thick coat, which resulted in uneven color and a chalky residue. Patience with thin coats paid off, giving my nursery walls a deep, consistent hue and a smooth finish.
Allow Adequate Drying Time Between Coats
Drying times can vary depending on humidity and temperature, but generally, wait at least 4-6 hours between coats. Rushing this step can trap moisture and cause peeling or chalkiness. During one of my painting sessions, I was eager to finish quicker and applied the second coat too soon. The result was visible streaks and a rough texture. Trusting the recommended drying time ensured a durable, professional-looking finish that lasts for years.
Finish with a Clear, Eco-Friendly Sealer
Seal the painted surface with a non-toxic, eco-friendly clear coat to protect against stains, scratches, and moisture. It’s comparable to layering a varnish over artwork—the final touch that preserves your work. I used a water-based, low-VOC sealant on my nursery walls, which enhanced the durability without compromising indoor air quality. This extra step keeps the paint looking fresh and vibrant over time, especially in a child’s room where cleanliness is paramount.
Keep Your Tools Clean to Extend Their Life
Wash brushes and rollers promptly with warm water and mild soap to prevent paint from hardening on the bristles. Proper cleaning is like maintaining your tools, ensuring they perform well for future projects. After my project, I cleaned my brushes thoroughly—the bristles remained soft and shape-retained, ready for my next eco-friendly painting adventure. This simple step saves money and keeps your tools in top condition.
Implementing these precise steps transforms a messy, unsure process into a confident, efficient painting experience. For more tips on maximizing your results and choosing the best paints, visit this expert guide. Remember, patience and proper technique are your best allies in creating a safe, beautiful nursery that your child will love for years to come.
Many homeowners and even some professionals overlook critical details when embarking on local or house painting projects, often leading to subpar results or unexpected complications. One common misconception is the assumption that applying multiple coats quickly guarantees a flawless finish, but in reality, the nuances of paint chemistry and surface preparation can make or break your project. Overlooking these factors can result in premature peeling, uneven color, or lingering odors—issues that could be avoided with a deeper understanding of the process.
Are You Falling for the Myth of One-Coat Wonder?
It’s a widespread belief that high-quality paints can deliver perfect coverage in just one coat, especially with advertised ‘one-coat’ formulas. However, research from the Paint Quality Institute shows that true one-coat coverage is a myth for most surfaces, particularly when you’re switching from dark to light colors or painting over uneven backgrounds. Applying multiple thin layers ensures better adhesion, reduced brush or roller marks, and a richer finish, ultimately saving you time and money in the long run. Rushing this process often leads to patchy results and the need for rework, which could have been prevented with proper planning.
The Trap of Ignoring Surface Condition
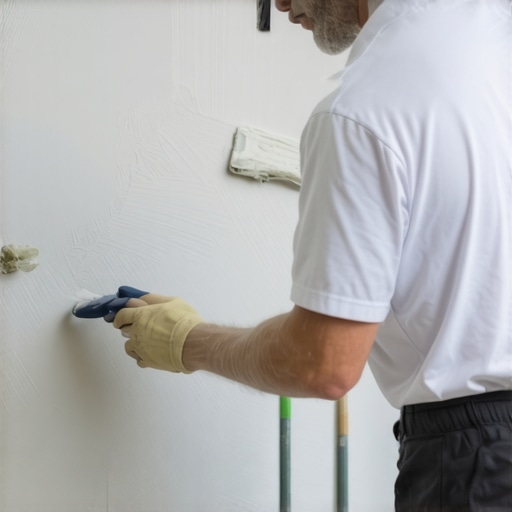
Many amateurs neglect the importance of meticulous surface prep, assuming that paint’s self-priming qualities will compensate for imperfections. This oversight is a costly mistake. For instance, a glossy or greasy wall surface can prevent paint adhesion, causing peeling or chalky textures over time. The secret lies in surface cleanliness and proper priming. Cleaning with a degreaser or mild detergent, and applying an appropriate primer, creates a solid foundation, enhancing durability and appearance. Skipping this step is an advanced mistake that can compromise the entire project, especially with eco-friendly paints that often require precise conditions to perform optimally.
How Do Eco-Friendly Paints Truly Differ?
Many assume that eco-friendly or natural paints are universally easier to work with and lower maintenance. But this isn’t always the case. Milk-based or clay paints, for example, have specific properties: they are more absorbent, thinner, and can be more susceptible to chalkiness if not applied correctly. This is where understanding their unique drying times and surface requirements becomes essential. The expert advice suggests that eco-paints often benefit from controlled humidity environments and proper surface sealing to prevent issues like chalking or mold growth—nuances that many overlook in a rush to go green.
Have you ever fallen into this trap? Let me know in the comments. Remember, mastering these subtle details transforms a good paint job into a professional-looking finish that enhances your home’s value, curb appeal, and safety. For comprehensive insights into selecting and applying the right paints, check out this guide and elevate your project to the next level.
Tools I Recommend for Lasting Results
Having the right tools can make or break your painting project, especially when aiming for durability and a professional finish. I personally swear by a high-quality oscillating multi-tool, like the Fein MultiMaster, for precise cutting and sanding in tight corners. Its versatility saves me time and ensures clean edges, which is crucial for a seamless look. When it comes to brushes, I prefer natural bristle brushes for milk-based paints because they absorb less paint and leave fewer streaks, leading to smoother coats. For rollers, a high-density microfiber roller minimizes texture and provides even coverage, which I’ve found essential when applying multiple thin coats for depth and vibrancy.
For surface preparation, a variable speed orbital sander allows me to create smooth, even surfaces, reducing the risk of chalky finishes or uneven textures down the line. I always keep a multi-bit screwdriver to remove fixtures before painting, simplifying the process and preventing damage. Additionally, a digital moisture meter helps me assess wall dryness accurately, a step I consider vital since excess moisture can compromise eco-friendly paints like milk-based formulas, leading to peeling or chalkiness. By investing in tools that enhance precision and consistency, I ensure long-lasting results that uphold both aesthetics and safety standards.
Maintenance Practices to Keep Your Work Impressive
Long-term results depend heavily on regular maintenance and upkeep. I recommend periodically cleaning painted surfaces with a gentle, pH-neutral cleaner to prevent dirt buildup that can degrade paint over time. For instance, dust and grease can be easily removed with a damp microfiber cloth, preserving the integrity of the finish. Inspect your walls annually for signs of moisture intrusion or discoloration—addressing issues early prevents costly repairs and repainting. Sealing high-traffic areas with a durable, eco-friendly topcoat enhances resilience against everyday wear and tear, maintaining the beauty of your paint job for years.
Moreover, avoid using abrasive scrubbers or harsh chemicals on painted surfaces, as they can weaken the finish and lead to peeling. Implementing a proactive maintenance routine—such as reapplying a clear, eco-friendly sealer every 3-5 years—can immensely extend the lifespan of your work. For larger projects or issues like mold, consulting experts to evaluate and treat the surfaces ensures you’re not just patching but truly protecting your investment.
Scaling Your Painting Efforts Effectively
If you plan to undertake multiple rooms or entire-home projects, consider employing a systematic approach. Break down projects into manageable sections, prepping and painting one at a time with dedicated teams or tools. Using standardized methods and high-quality equipment across spaces guarantees uniformity, which is especially important for maintaining aesthetic consistency in long-term institutional or commercial settings. As your experience grows, investing in commercial-grade sprayers or extending your ladder reach with lightweight, sturdy extensions can speed up large-scale efforts without sacrificing quality.
Looking ahead, automation and smart tools may transform the way we maintain painted surfaces. For instance, sensor-based moisture meters tied to mobile apps could alert homeowners about underlying issues before visible damage occurs. Staying informed about these innovations ensures your work remains at the forefront of durability and efficiency.
How do I maintain my painted walls over time?
Consistent cleaning, early repairs of damage, re-sealing high-traffic areas, and using the right tools are essential. Regular inspections with a moisture meter or visual checks help catch issues early, prolonging the life of your paint and saving costs. For detailed guidance on maintaining different surfaces, visit this comprehensive resource. To start, try applying a fresh coat of eco-friendly sealer as a simple but effective way to boost longevity and keep your walls looking their best for years to come.
What the Small Details Taught Me About Big Results
My most surprising insight came when I realized that surface preparation is the secret ingredient most amateurs overlook. A tiny grease spot or glossy finish can sabotage even the best eco-friendly paint, causing chalkiness or peeling down the line. This taught me that patience before painting, like cleaning and priming meticulously, creates a foundation for lasting beauty. Additionally, I learned that diluting milk-based paints correctly isn’t just a tip—it’s a game-changer for achieving smooth, even coverage, saving time and frustration. The biggest lightbulb moment? Recognizing that eco-paints require controlled humidity and precise application steps to truly shine—once I mastered these, my projects became both safer and more durable, proving that the details make all the difference.
Tools & Resources That Elevated My Eco-Painting Game
Over the years, I’ve found these tools invaluable for ensuring lasting results. First, a high-quality natural bristle brush helps minimize streaks and enhances smoothness—trust me, cheap brushes are false economy. A microfiber roller for walls ensures even layers, essential for vibrant, consistent colors. For surface prep, a good orbital sander speeds up smoothing, making the entire process less tedious. I also rely on a digital moisture meter—an underrated device that prevents the common mistake of painting over damp surfaces, which can cause chalkiness or peeling with eco-paints. For comprehensive guidance and professional techniques, I always revisit this expert resource. These investments in quality tools and trustworthy information have paid off in beautiful, durable nurseries and living rooms alike.
Paint Your Future with Purpose and Confidence
Embarking on a painting project with eco-friendly paints like milk-based formulation is more than just a DIY task—it’s a commitment to healthier living and a more sustainable world. I encourage you to approach each step with patience and care, knowing that your attention to detail will reward you with a space that’s both safe and stunning. Whether you’re repainting a nursery or revitalizing your entire home, remember that mastering surface prep, correct application, and proper finishing techniques elevate your work from good to truly professional. Your home isn’t just walls and colors—it’s a reflection of your care for the environment and loved ones. So, go ahead, turn those paint cans into a canvas for your best work yet. Need personalized advice or want to share your progress? Don’t hesitate to reach out through this contact form. Let’s create spaces that inspire and endure together.