

It was a warm Saturday afternoon when I finally decided to tackle repainting my living room walls. Brushes in hand, I was all set for a transformative project. But as I approached my freshly painted wall, I hesitated for a moment. Was it truly ready for the next coat? I had heard of a simple test—something called the “Chalk Test”—but I was skeptical. That small hesitation almost cost me the perfect finish I was aiming for. Does this sound familiar? That nervous moment before you paint over a surface, wondering if it’s truly dry and safe to proceed, can make or break your whole project.
Why Skipping the Right Test Can Ruin Your Paint Job
In my early days of DIY painting, I often rushed through the drying process, convinced that a few extra hours didn’t matter. I didn’t realize that this mistake could lead to peeling, bubbling, or uneven textures down the line. It wasn’t until I experienced a flaking wall that I discovered the importance of verifying surface readiness. The good news? There’s a straightforward way to prevent this embarrassment and save yourself a lot of headache. That method is the “Chalk Test,” a simple, reliable check that tells you if your surface is ready for another coat or if it needs more drying time.
Is the Chalk Test Really Worth All the Hype?
I remember thinking, “This seems too easy. Can a piece of chalk really tell me if my wall is dry?” Well, it does. The principle is pretty simple: draw a line on the wall with chalk; if it comes off easily and leaves a mark, the surface isn’t dry enough. If it stays intact, you’re good to go. Here’s a tip I wish I knew earlier: don’t just rely on touch alone—moisture can hide beneath the surface, especially in humid climates. Early on, I made the costly mistake of trusting my fingers, which led to more work fixing blistered patches later. For a detailed, step-by-step guide on mastering this trick, check out [this comprehensive article](https://elitepainterpro.com/painting-your-home-top-local-painting-strategies-revealed). It’s a game-changer for any homeowner or painter aiming for that flawless finish.
So, if you’ve ever had that nagging feeling—”Is it really dry yet?”—you’re not alone. The good news is that mastering this simple test can elevate your painting game and ensure your walls look professionally finished. Next, let’s dive into how to perform the Chalk Test correctly and interpret its results, so you never second-guess your paint’s readiness again.
Performing the Chalk Test Step by Step
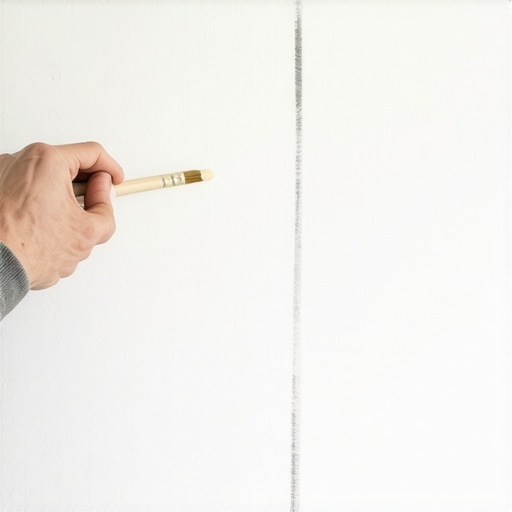
Start by selecting a small, inconspicuous area on your wall—preferably near a corner or behind furniture—to avoid visual disruptions. Take a piece of regular white chalk, preferably new or well-remaining, and draw a firm, continuous line across the painted surface, applying consistent pressure to ensure the chalk marks solidly. Remember, this is like testing a sponge for moisture: if it feels damp or leaves a smudgy, dark line, your wall isn’t ready for the next coat. If the line remains crisp and intact after a few minutes, congratulations—your surface has dried sufficiently.
Applying the Test in Humid Conditions
In humid climates or during humid seasons, drying takes longer. I once waited too short a time and impatiently did the chalk test only to find the line blurred minutes later, leading me to repaint sections prematurely. To avoid this, perform the test multiple times over several hours, especially after rain or high humidity days. It’s akin to checking if bread is baked through by tapping—the sound, or in this case, the chalk’s mark, reveals the truth about moisture content.
Interpreting Your Chalk Test Results Accurately
If the chalk line smudges or comes off easily, it’s a sign that moisture is still present beneath the paint. Wait longer—ideally 24 hours or more—before re-testing. When I first learned this, I used a damp cloth to feel the surface’s dryness, which often misled me because moisture can hide beneath thin paint layers. The chalk test provides a visual and tangible method, acting as a moisture barometer. Incorporate this into your routine, especially when painting in cooler or more humid environments, for consistent results.
Common Mistakes to Avoid During the Chalk Test
One mistake is pressing too hard, which damages the wall surface or creates a false indication. Another is testing in shaded areas and assuming the entire wall dries uniformly—lighting and airflow influence drying times differently across sections. I once skipped re-testing after initially passing, only to notice peeling a week later because I painted over partially moist paint. To prevent such mishaps, perform multiple tests at different wall points, especially on surfaces exposed to varying conditions, similar to how a doctor takes multiple readings for accurate diagnosis.
Integrating the Chalk Test into Your Painting Routine
Make it a habit by scheduling the test during your prep process—like checking the oil level in an engine before a road trip. When you follow this simple yet effective step, you significantly reduce the risk of peeling, bubbling, or uneven textures in your finished job. For more expert tips on local painting techniques that amplify your results, visit this resource.
 Many DIY enthusiasts believe that choosing the right color or using high-quality paint is enough to guarantee a successful house painting project. However, even experienced painters often overlook subtle nuances that can dramatically affect the final result. One common misconception is that all paints perform similarly across different surfaces and conditions. In reality, the choice between low-VOC, oil-based, or latex paints, for example, can influence drying times, durability, and finish quality. For instance, applying a standard latex paint over a greasy or moldy wall without proper prep can lead to peeling or mold growth, which many overlook until it’s too late. As highlighted by industry experts, understanding the specific properties of each paint type can save time and money in the long run—learn more about local painting techniques that maximize results at this link.
A particularly hidden nuance is the importance of surface preparation—something that is often underestimated. Many assume a quick cleaning or light sanding suffices, but in truth, proper priming and thorough cleaning are the backbone of a flawless paint job. Skipping these steps may seem trivial but can cause uneven textures, premature paint failure, or color mismatches. Moreover, temperature and humidity conditions during painting are frequently ignored, yet they critically impact adhesion and curing times. For example, painting in high humidity can trap moisture beneath the paint, causing bubbles or peeling down the line—something seasoned painters are well aware of, but many novices dismiss.
Let’s talk about advanced mistakes: over-reliance on one-coat coverage promises. Many marketing campaigns boast that a single coat is enough for perfect coverage, but seasoned professionals know this is rarely true in practice. Thin coats, especially on dark or layered colors, require multiple applications for an even, durable finish. Trusting one coat can result in uneven color, blotchiness, or weak adhesion, leading to costly touch-ups later. For a comprehensive guide on how to master quality house painting, visit this resource.
Now, a question for the detail-oriented reader: How do environmental conditions and surface treatments interact to influence paint longevity? The answer involves understanding moisture barriers, surface porosity, and the paint’s chemical composition, as these factors are deeply interconnected. According to a study published in the *Journal of Coatings Technology*, selecting the appropriate painting method considering environmental factors can extend the lifespan of your paint job exponentially. To avoid common pitfalls and achieve a professional finish, always tailor your approach based on detailed surface analysis and environmental assessment.
Have you ever fallen into this trap? Let me know in the comments. Mastering these nuances and avoiding basic mistakes can truly elevate your DIY or professional projects, ensuring long-lasting beauty and protection for your home.Proper upkeep of your painting tools is essential to preserving their effectiveness and ensuring professional-looking results over the years. I personally swear by a few key methods and equipment that have helped me extend the life of my brushes, rollers, and other supplies. First, using a high-quality brush cleaner, like solvent-based or biodegradable options depending on your paint type, allows me to thoroughly remove paint residues after each project—preventing stiff brushes and clogged bristles. I also invest in a dedicated brush comb to shape the bristles back into perfect condition, which is especially helpful when dealing with flat or angled brushes used for local painting projects. When it comes to rollers, I clean them immediately with warm water and mild detergent, then utilize a silicone roller sleeve to prevent fabric deterioration; this simple step has saved me money on replacements. For sprayers, I keep the nozzles clear by running solvent through after use, avoiding clogs that compromise spray patterns. To keep my tools in top shape, I store them properly—bristles in a vertical position in a ventilated container, rollers in sealed bags, and sprayers in dry, dust-free spaces—thus avoiding damage from dust and humidity. As the trend in eco-friendly and sustainable painting grows, maintaining your tools extends their lifespan, reducing waste and costs. I predict that advancements in self-cleaning brush technology, such as nanocoatings that repel paint residues, are on the horizon, promising even easier maintenance for local painters and DIY enthusiasts alike. To truly keep your tools working at their best, I recommend adopting these detailed cleaning routines and investing in quality equipment. Interested in learning more about expert techniques that can elevate your house painting projects? Visit this resource for in-depth insights.
Biggest Surprises That Changed How I Approach House Painting
One lesson I learned that reshaped my entire painting routine was realizing the importance of patience and thorough preparation. Rushing the drying process almost always resulted in defects, but embracing the wait—like performing the chalk test—ensured flawless results. Another revelation was how environmental factors like humidity and temperature could subtly sabotage even the best plans, teaching me to plan painting projects around weather forecasts. Lastly, I discovered that surface prep isn’t just a preliminary step—it’s the foundation of a long-lasting, beautiful finish. These insights came from my own trial, error, and ongoing quest for excellence, and I hope they inspire you to refine your skills.
Tools and Resources That Keep My Painting Projects On Point
Over the years, I’ve come to depend on some trusted tools and resources that elevate my house painting endeavors. First, a high-quality primer like [this recommended product](https://elitepainterpro.com/low-voc-primers) ensures better adhesion and durability, especially on tricky surfaces. A reliable paint mixer helps achieve consistent color and finish, while [expert articles](https://elitepainterpro.com/local-painting-secrets-elevate-your-space-effortlessly) provide ongoing tips to refine technique and adapt to different environments. Additionally, joining online forums and local painting groups has connected me with experienced professionals who share invaluable advice and real-world solutions. These resources have transformed my approach from guesswork to confidence, turning each project into a learning experience.
Your Turn to Bring Color to Life
Now that you’ve gathered insights from my journey and trusted tools, it’s time to take action. Remember, mastering house painting isn’t about perfection from the start—it’s about learning, adapting, and enjoying the process. Don’t be afraid to experiment with new techniques or colors; every stroke is a step toward transforming your space into something truly yours. So, why not pick a wall, grab your brushes, and see what magic you can create? If you’re wondering about specific challenges or want personalized advice, feel free to ask below. Your next masterpiece awaits—happy painting!