

I still remember the exact moment I realized my ceiling was a nightmare zone for water stains. I was lying on my couch, binge-watching my favorite series, when a sudden splash of sunlight revealed those stubborn, discoloring spots overhead. It was like an uninvited guest who refuses to leave. Frustration blossomed—I knew I wasn’t alone in this. Water stains are one of those homeowner headaches that seem trivial but can quickly spiral into eyesores that ruin your entire room’s vibe.
If you’ve ever looked up at your ceiling and thought, “How in the world do I hide these without turning my ceiling into a Pinterest project?” then you’re in the right place. Today, I’m going to share how I finally stopped those pesky stains from stealing the spotlight in my home, with tips that are simple, cost-effective, and, most importantly, proven to work.
Why Water Stains Keep Coming Back and What You Need to Know
Will Your Efforts Actually Make a Difference or Waste Time?
Early on, I made the mistake of thinking a quick repaint would solve everything. Turns out, water stains aren’t just surface issues; they hide beneath the paint, waiting to resurface if not properly treated. If you don’t address the root cause or use the right techniques, those stains will keep returning, no matter how many coats of paint you slap on. An article from the elitepainterpro.com underscores this, revealing that improper sealing allows moisture to seep through and spoil your fresh paint job.
Another common mistake I made was assuming all water stains are the same. Some are recent, some are years old; each requires a different approach. If you skip proper prep, you’ll just be throwing money and effort out the window. Trust me, understanding the cause—be it a leaking roof, faulty plumbing, or condensation—is crucial. It’s always worth addressing those issues first before hiding stains with paint or other fixes.
Have you faced the challenge of water stains ruining your ceiling’s appearance? If so, stick around. I’ll walk you through the effective, step-by-step process that finally kept my ceiling spotless for good. Once you learn a few homeowner-approved tricks, you can bid farewell to those stubborn marks and restore your ceiling’s beauty without unnecessary stress or expense.
Prepare Properly Before Painting
Identify the Source of Moisture
Before tackling the stains, locate and fix the leak causing the water damage. This might involve inspecting your roof, plumbing, or condensation issues. Ignoring the root cause means stains will return regardless of your painting efforts. I once skipped this step and painted over fresh stains, only to regret it when the marks reappeared after a few weeks. Addressing the leak first saves time and money in the long run.
Allow the Ceiling to Dry Completely
Ensure the area is thoroughly dry. Use a fan or dehumidifier to accelerate the drying process if necessary. Painting on damp surfaces traps moisture, leading to mold growth and peeling paint. I learned this the hard way when I painted before the ceiling was completely dry, resulting in uneven finish and long-term issues.
Clean and Prime the Surface
Remove Dust and Cracks
Wipe the ceiling with a damp cloth to remove dust and cobwebs. Fill any cracks or holes with joint compound, then sand smooth once dry. Clean the surface to ensure good adhesion. Think of it as preparing a canvas before painting — the cleaner and smoother, the better the final look.
Apply a Stain-Blocking Primer
This step is crucial. Use a high-quality stain-blocking primer designed for ceilings, such as oil-based or shellac primer. I used a shellac primer and was amazed at how it sealed the stain effectively. The primer acts like a barrier, preventing the water stain from bleeding through your new paint. Check out this guide for more on choosing the right primer.
Paint with Care and Precision
Use the Right Paint and Tools
Select a durable, matte or eggshell ceiling paint for hideability. Use a roller with an extension pole for even coverage, and brushes for edges. Avoid cheap brushes that shed hairs or rollers that leave lint, as imperfections will be more noticeable.
Apply Multiple Thin Coats
Instead of one thick layer, apply two to three thin coats of paint, allowing each to dry fully. This ensures better coverage and durability. When I painted my ceiling, I used this approach and was pleased with the even finish. It’s much better than rushing through with a single coat, especially over stained areas.
Additional Tips for Long-Lasting Results
Avoid Humid Environments During Painting
Paint in a well-ventilated and dry room. High humidity can cause the paint to bubble or take longer to cure. I always turn on exhaust fans and open windows when painting ceilings, which helps the paint dry faster and adheres better.
Regular Maintenance Prevents Future Stains
Inspect your roof and plumbing annually. Fix minor leaks promptly, and keep gutters clean. Consider applying a waterproof coating for added protection if water intrusion is a recurring problem. This proactive approach saves headaches and maintains your ceiling’s pristine look for years.
When it comes to house painting, many homeowners operate under assumptions that’s simply not true. One widespread myth is that choosing a darker paint color automatically creates a modern, stunning look. In reality, darker shades can highlight imperfections and require more precise surface prep, often leading to repaint cycles if not done correctly. Experts at this resource emphasize that color choice must align with your room’s lighting and existing decor for optimal results.
Another misconception surrounds the use of cheap brushes and rollers to save money. While it might seem economical upfront, inferior tools tend to shed bristles or leave lint, creating an uneven finish and extra work correcting mistakes. Skilled painters advocate investing in high-quality tools that ensure smooth application and professional-looking results. According to a pro painter’s guide, this small investment translates into less time spent redoing areas and a longer-lasting finish.
Now, let’s tackle a common trap even seasoned DIYers fall into: assuming that a single coat of paint is enough. Many believe one coat will suffice, especially over lighter colors or when using premium paints. However, thin or uneven coats often lead to visible brush strokes, patchiness, and reduced durability. Applying multiple thin coats, with proper drying in between, results in a more uniform, resilient finish. This is backed by research from the paint industry standards.
Thinking about local painting projects? They’re more than just a matter of aesthetics; improper techniques or overlooking small details can significantly impact your home’s value and curb appeal. For instance, neglecting the importance of priming or the right surface preparation can lead to peeling, bubbling, and rapid deterioration. If you want to make a lasting impression, it’s wise to delve into local painting secrets that elevate your space effortlessly.
Ever fallen into a painting trap that cost you time or money? Share your experiences below—I’d love to hear your stories. Remember, mastering these nuances transforms a simple paint job into a lasting home upgrade.Achieving professional-quality house painting isn’t just about the first coat; it requires a strategic approach to tools and ongoing maintenance to ensure long-term beauty and durability. Selecting the right equipment can streamline your workflow and produce a flawless finish, while proper upkeep extends the lifespan of your paint job. Let’s explore the essential tools I rely on and how to keep your painted surfaces in top shape over time.
The Must-Have Tools for Precision and Efficiency
Investing in high-quality equipment makes a tangible difference. I swear by a Wagner Precision Terminal HVLP sprayer for exterior walls—its fine finish and ease of adjustment allow for quick coverage with minimal overspray. For interior detail work, a Purdy angled brush provides exceptional control, helping me achieve sharp edges without drips. When rolling ceilings, I prefer a ¾-inch nap roller from Wooster because it holds more paint and creates uniform coverage, reducing the number of work sessions needed.
Why a Laser Level Is a Game-Changer
Aligning your paint lines and ensuring even coats becomes effortless with a laser level. I use the Bosch GPL 5 Laser Level—it projects precise horizontal and vertical lines, saving me hours of eyeballing and smoothing out imperfections. This tool is especially handy when painting high ceilings or stairwells, where accuracy is critical and ladders can be unstable. As technology advances, I predict laser levels will become more affordable and feature integrated smartphone connectivity, allowing for even better precision. For now, they’re an investment that pays off by reducing mistakes and rework.
Maintaining Your Tools for Peak Performance
Proper cleaning and storage are vital. I always rinse brushes and rollers immediately after use, avoiding dried paint that hampers performance. For brushes, I soak them in a brush cleaner like Fisher’s Brush Cleaner, which restores their shape and lifespan. Rollers should be cleaned with warm water and a mild detergent, then hung to dry in a dust-free area. Storing tools in sealed containers prevents dust accumulation and preserves brush bristles. Regularly inspecting and replacing worn equipment ensures your results remain consistent and professional-looking.
Technology and Software to Track Progress
Beyond physical tools, digital solutions streamline project management. I utilize Trello to create checklists, set deadlines, and assign tasks, which keeps my painting projects organized. Additionally, apps like Paint Tester help me visualize color schemes before applying paint, reducing costly mistakes. These tools provide a clear overview of the project’s timeline and quality checkpoints, facilitating smoother execution and long-term satisfaction. As more painters adopt digital tracking, I anticipate AI-driven project estimators to become mainstream, offering precise cost and time estimates based on your specific project scope. For now, integrating basic project management software significantly enhances efficiency and accountability.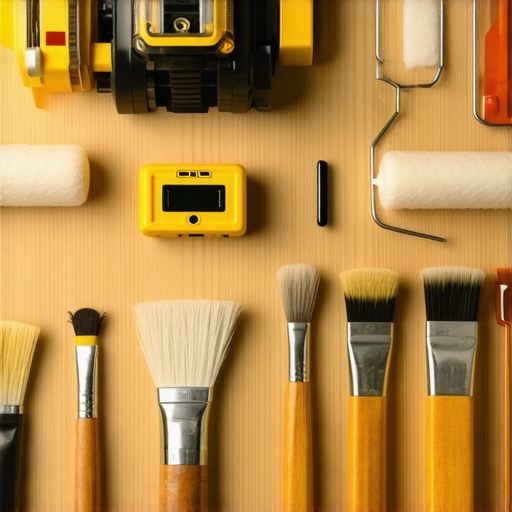
This image showcases essential tools including a laser level, high-quality brushes, and rollers, emphasizing their role in achieving professional results and long-lasting paint jobs. Proper maintenance of these tools ensures they perform at their best and extend their lifespan.
How Do I Maintain My Paintwork Over Time
Ensuring your painted surfaces stay vibrant and intact necessitates regular inspections. Clean walls with a damp cloth annually to remove dust and prevent staining. Address small cracks or peeling spots promptly by sanding, priming, and repainting—delaying repairs can lead to bigger issues down the line. Applying a clear, protective top coat every few years—especially on exterior surfaces—adds an extra layer of durability against weathering and UV damage. Simultaneously, schedule routine maintenance like gutter cleaning and roof inspections to prevent water infiltration that can cause hidden damage and stain re-emergence. Embracing these proactive habits will save you time and money, and keep your home looking fresh for years. For advanced strategies, consider consulting experts at [Elite Painter Pro](https://elitepainterpro.com/why-local-painting-matters-boost-your-homes-value) who recommend annual touch-ups and surface sealants tailored to your environment. Try integrating a seasonal maintenance schedule today—to safeguard your investment and enjoy pristine walls for years to come.
Uncovering Hidden Truths About House Painting
One of the biggest lessons I learned was that surface appearances can be deceiving. No matter how much you scrub or repaint, if you don’t address the underlying moisture and prep properly, those stubborn water stains will come back stronger. This taught me to prioritize thorough inspection and treatment before diving into the aesthetic fix, saving countless headaches down the line.
Another revelation was realizing the importance of using high-quality stain-blocking primer. My initial attempts with cheaper options failed miserably, leading to peels and shadows. Investing in a proper primer amplified my results dramatically, reminding me that quality tools and materials are the backbone of lasting craftsmanship.
Finally, demonstrating patience through multiple thin coats over quick fixes made the difference between a job that lasts and one that needs frequent touch-ups. Rushing often results in patchy, uneven surfaces, so embracing a deliberate pace truly pays off in the long run.
Tools and Resources That Transformed My Approach
My go-to arsenal for tackling water stains includes a shellac-based stain-blocking primer, a Wagner HVLP sprayer for even coverage, and a high-quality microfiber roller for smoothing out coats. These tools elevate the painting process and are backed by trusted professional standards. For color selection and visual planning, I swear by the Paint Tester app, which helps me visualize outcomes before committing—saving time and material costs. To deepen my knowledge, the comprehensive guide at this resource is invaluable, offering expert insights that go beyond DIY myths.
Your Next Move Is Closer Than You Think
Embarking on your house painting project with a focus on long-term results and craftsmanship will make a visible difference. Remember, patience, quality tools, and proper prep are your best allies in achieving a flawless, durable finish. Don’t be discouraged by initial setbacks—every mistake offers a lesson to refine your skills and build confidence. Take action today: start with a detailed plan, gather the right materials, and give your home the care it deserves. Your future self will thank you for choosing quality and perseverance in your house painting journey.