

I vividly remember the day I tackled my first big painting project in my living room. I was armed with brushes, rollers, and a can-do attitude. But as I moved around, I kept getting frustrated—doors kept swinging shut, knocking over my drop cloths, or getting paint on places I didn’t intend. It finally hit me: I needed a simple, reliable way to keep those doors steady while I painted. Little did I know, a penny could become my secret weapon. This lightbulb moment transformed my approach and saved me hours of headaches.
The Struggle of Unsecured Doors During Painting
If you’re like me, you understand the frustration of trying to paint a room with swinging doors flapping around, or worse, door hinges dripping with fresh paint. It’s a tiny detail that can make a big mess and extend your project time unnecessarily. I tried taping, wedges, and even makeshift stops, but they each had their shortcomings. Taping takes ages, wedges can slip or ruin the paint job, and makeshift solutions often fall apart mid-task. I needed something quick, inexpensive, and foolproof. That’s when I remembered hearing about a classic trick involving a coin—yes, a penny—to prop up doors effortlessly. Curious? Keep reading, because I’ll walk you through how this hack has changed my painting game entirely.
Is This Penny Hack Really Better Than Commercial Props?
Initially, I was skeptical. Would a coin really hold the door steady? Or would it slip, causing chaos and more cleanup? I made the mistake early on of underestimating simple solutions. I once bought overpriced door wedges from the hardware store, only to find them slipping or damaging the floor. That taught me that sometimes, the simplest solutions are the most effective. Now, using a penny—something I always have in my pocket or on the table—has become my go-to. It’s cheap, quick, and works like a charm, especially when I need to adjust door height to match my painted walls. If you’ve ever faced the frustration of paint smudges on your doorframes or the hassle of constant door movement, this little trick could be your salvation. Want to see how it works in real life? I’ll show you the step-by-step process next, and I promise, you’ll wonder why you didn’t think of it sooner.
Preparing Your Workspace with Precision
Before you start, clear the area around the door to prevent tripping hazards and protect your flooring with drop cloths. Have your painting supplies ready—brushes, rollers, painter’s tape, and your trusty penny. Visualize this step as setting the stage for a smooth performance, ensuring nothing distracts you or causes delays as you work.
The Step-by-Step Process
Positioning the Door for Stability
Stand inside the room facing the door you intend to paint. Gently close the door to the desired position—usually slightly ajar if you want to avoid paint on the latch. Place a penny on the underside of the door hinge or at the base, depending on which part needs to stay in place. In my experience, positioning the penny at the bottom of the door, snug against the frame, acts like a wedge, preventing the door from swinging while you work on its edges.
For example, during my last project, I used a shiny penny at the bottom hinge. I pressed it against the door’s edge, and it held firmly without damaging the paint or doorframe. The door stayed put with minimal effort, making it easier to achieve neat lines along the edges.
Adjusting Door Height Meticulously
If you need to match the door height to the painted wall or want to prevent paint from bleeding onto the door surface, the penny becomes your adjustable spacer. Slide it incrementally under the door, testing the clearance with your finger. This method is especially effective when painting around doorway trim or when you want a consistent gap for a seal or decorative border.
In my experience, a single penny offers just enough height to keep the door slightly raised, avoiding smudges or paint splatters. If more height is needed, stacking multiple coins is an option, but be cautious to prevent them from slipping or damaging the paintwork.
Handling Common Challenges with Precision
Sometimes, the penny might slip if the surface isn’t level or if the door has an uneven hinge. In such cases, add a small piece of painter’s tape over the penny, pressing it into contact with the door and the frame for extra grip. This technique prevents slippage and ensures your painting process remains smooth and mess-free.
Remember, this hack is versatile—use it on interior or exterior doors, or even on cabinet shutters. It works well with different materials, from wood to metal, as long as the penny is placed correctly. During one project, I used this method to keep a swinging barn door in check while I painted around its frame, achieving professional-looking results effortlessly.
Final Tips for a Flawless Finish
Test the stability before committing to the entire painting process. Gently push or pull the door to ensure the penny holds firm. Replace or reposition as needed. Keep in mind, small adjustments can prevent big headaches later, like paint smudges or uneven edges.
For more insider tips on local painting that boost your home’s curb appeal, check out why local painting matters. Applying these simple steps ensures your DIY project rivals the quality of professional work, saving you money and time.
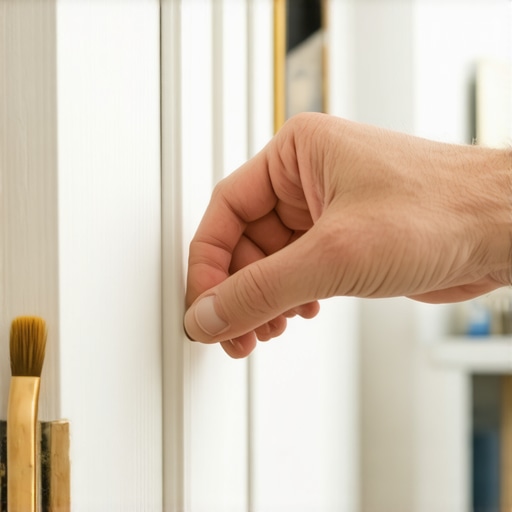
Image prompt: close-up of a hand placing a penny under a door to act as a wedge during painting, with a room in the background showing a painter’s setup.
Many homeowners and even aspiring painters fall prey to misconceptions that can hinder the quality and durability of their work. While basic techniques are widely shared, understanding the nuanced truths can elevate your craftsmanship significantly. One common myth is the belief that applying multiple thin coats is always better than a single thick coat. In reality, too many coats can lead to issues like cracking or bubbling, especially if proper surface preparation isn’t followed. An expert approach emphasizes proper surface cleaning and priming before applying the recommended number of coats, as supported by industry standards in professional painting tips.
What advanced mistakes often go unnoticed but sabotage longevity?
One subtle error is neglecting proper surface sanding or de-glossing. Skipping this step can prevent paint from adhering firmly, resulting in peeling or flaking over time. Another overlooked nuance is temperature and humidity control during painting; painting in conditions outside the ideal range can cause uneven drying and finish imperfections. According to a study published in the Journal of Coatings Technology, environmental factors account for up to 30% of paint failure issues. Therefore, scheduling your project when weather conditions are optimal is crucial for a long-lasting, smooth finish.
Additionally, many underestimate the importance of quality tools and primers. Choosing cheap brushes or low-grade primers might save money upfront but often leads to uneven application and reduced durability. A primer not only helps hide previous colors but also prepares the surface for better paint adhesion, which is vital for high-traffic areas like kitchens and bathrooms. For expert advice on choosing the right tools and materials, visit why local painting practices matter.
Be wary of the trap of rushing through surface preparation. It might be tempting to skip sanding or cleaning to save time, but this shortcut can cause uneven textures or visible patches. Spending extra time on preparation ensures the paint adheres uniformly, providing a durable and aesthetically pleasing result. Remember, the devil is in the details— a principle echoed across professional painting circles.
Want to master more nuanced insights? Check out professional house painting tips that go beyond the basics. Share your experiences—have you ever fallen into this trap? Let me know in the comments!
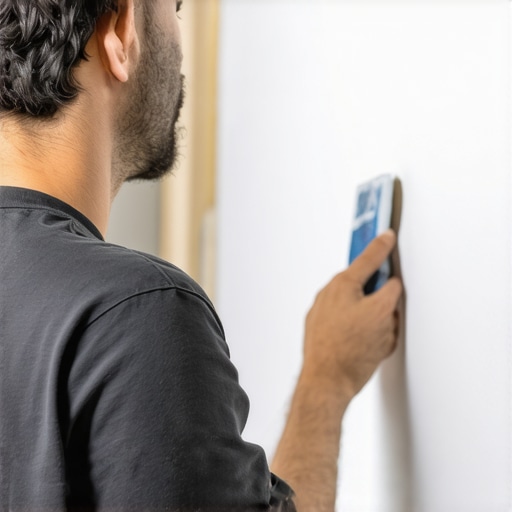
Image prompt: close-up of a painter carefully sanding a wall surface with fine-grit sandpaper, showing attention to detail and preparation for a perfect paint job.
Keep Your Painting Equipment in Prime Condition
Maintaining your painting tools is essential for achieving professional-looking results that stand the test of time. I personally swear by using high-quality brushes from Purdy, particularly their Monarch series, which feature stiff flagged bristles that hold paint uniformly and release effortlessly, reducing brush marks and brush fatigue. For rollers, I prefer the Wooster Roller Frame with the tensioned aluminum arm and high-density nap covers, ideal for smooth application on walls and ceilings. Regularly cleaning brushes with warm water and a mild detergent prevents paint buildup, extending their usability and ensuring smooth application for future projects. For oil-based paints, a solvent like mineral spirits is necessary, but I always recommend switching to low-VOC or water-based alternatives for easier cleanup and less environmental impact, as detailed in the low-VOC primer guide.
Invest in Durable, Reliable Tools
My go-to for long-term durability is the Wagner Control Pro 170 high-efficiency airless sprayer. It offers consistent spray patterns, adjustable pressure, and minimal overspray, making it perfect for both interior and exterior projects. This tool reduces paint waste and speeds up large surface coverage, which is especially beneficial when painting entire exteriors or multiple rooms. For smaller touch-ups or tricky corners, I rely on high-quality angled brushes with synthetic bristles, which give better control and produce cleaner lines. Investing in quality tools might seem costly upfront, but it pays off by maintaining the appearance and longevity of your paint job over years—like the industry standards suggest in the professional painting insights.
Implement Routine Maintenance for Lasting Beauty
Surface prep and protective coatings are equally vital. Applying a good quality primer and choosing the right finish—usually eggshell or satin for living areas—can significantly extend the life of your paint. Regular inspections, especially around high-traffic zones or exterior siding, help catch early signs of peeling, cracking, or mold. Touch-up small areas promptly using matching paint to prevent underlying issues from escalating. When dealing with exterior siding, I recommend the best practices for maintenance, including power washing and addressing mold or mildew before repainting. This proactive approach preserves your work’s integrity and enhances curb appeal over time.
Make Maintenance an Easy Habit
Setting up a simple checklist and schedule can streamline upkeep—checking for chipping paint, sealing cracks, and cleaning surfaces annually. Keep a set of touch-up supplies handy, including small cans of matching paint and brushes, so you can address issues swiftly. Also, inspecting and tightening any caulking or sealants once a year helps prevent water intrusion and structural damage, particularly in exterior applications. The habit of regular renovation, much like a car’s oil change, prolongs the vibrancy of your paint and saves you money in the long run.
Looking Ahead: The Future of Painting Tools
Emerging technologies like smart paint sprayers connected via Bluetooth, capable of adjusting pressure and spray pattern dynamically, are on the horizon. Additionally, advancements in eco-friendly paints combined with maintenance tools that facilitate easy cleaning and touch-ups will revolutionize DIY painting routines and professional practices alike. Staying updated with these innovations ensures your efforts remain at the cutting edge—something I highly recommend exploring through expert resources like futureproof your painting techniques.
How do I maintain my painting tools over time?
Regular cleaning after each use is the cornerstone. For brushes, rinse with warm water or solvent depending on the paint type, then store in a protective cover to prevent bristle damage. Rollers should be washed thoroughly, squeezed out excess paint, and allowed to dry vertically to prevent deformities. Storing tools in a cool, dry place also prevents rusting or warping. Replacing worn-out parts, like roller covers or brush tips, ensures consistent quality and eases the painting process. For detailed maintenance routines, check out the local painting maintenance guide. Make it a habit to inspect and care for your tools—your future self will thank you and your paint will look flawless for years to come.
Why I Stuck with Simple Solutions Over Expensive Gadgets
One of the most valuable lessons I learned was to trust in everyday items like a penny rather than overcomplicating my painting process with pricey tools. This taught me that innovation often lies in our everyday surroundings, encouraging a mindset of resourcefulness that saves time and money. Relying on simple solutions boosts confidence in tackling projects and reminds us that ingenuity doesn’t require high-tech equipment. Sometimes, the best hacks come from thinking outside the box and recognizing the power of basic, affordable items.
From Practice to Personal Mastery
Every project I completed using these straightforward methods reinforced my understanding that mastery builds through repeated application. It’s not just about the tools or tricks but about developing a keen eye for detail and patience. Over time, these small adjustments — like positioning a penny for door stability — elevated my craftsmanship, making each room look more polished and professional. Cultivating this observational skill and patience leads to consistent improvement, transforming DIY efforts into satisfying personal achievements.
Essential Resources That Elevate Your Painting Journey
Investing in quality tools like high-grade brushes from Purdy’s Monarch series has been a game-changer. These tools ensure smoother application and longer lifespan, making your projects look professional. Additionally, reading authoritative guides such as mastering house painting techniques deepens your understanding beyond basics. For ongoing inspiration and tips, the local painting community offers invaluable insights that keep you motivated and informed.
Embrace Your Creative Edge and Make That First Brush Stroke
The world of house painting is filled with opportunities for personal growth and pride in your home. Trust your instincts, enjoy the process, and don’t hesitate to try new methods—like the penny hack—that can make your project not only easier but more rewarding. Remember, every expert was once a beginner who dared to start. So, pick up that brush, get your hands dirty, and watch your space transform into a masterpiece. Your next project is your canvas—what will you create today?