

I remember the moment clearly—standing on my ladder, paint splattering onto my driveway, and realizing my galvanized gutters looked more like a mess than a finish. It hit me then: conventional primers just weren’t cutting it for this metal. That lightbulb moment made me dig deeper, and I discovered that using the right primer can make all the difference in preventing corrosion and ensuring a long-lasting paint job.
Understanding the Metal: Why Standard Primers Fail on Galvanized Gutters
Galvanized metal gutters are coated with a layer of zinc, which is fantastic for corrosion protection, but it can create headaches during painting. Ordinary primers often don’t bond well with zinc surfaces, leading to peeling, chipping, or even rusting through the paint over time. That early mistake taught me an important lesson—skipping the specialized primer is a gamble I can’t afford to take.
I’ve tried to save time by applying regular primer, thinking it would work just fine. Spoiler alert: it didn’t. The paint started bubbling within a few months, and I was back on the ladder sooner than I’d like. That’s when I realized the importance of a primer specifically formulated for galvanized surfaces. According to industry expert sources, such primers contain zinc-compatible binders that ensure superior adhesion and durability, protecting your gutters for years to come. You can find more on this topic by visiting [this comprehensive guide](https://elitepainterpro.com/why-your-exterior-trim-is-rotting-underneath-the-fresh-paint).
Are you tired of constantly repainting your gutters? Have you faced issues with peeling or rust reappearing shortly after your project? If so, you’re not alone, and the good news is—in most cases—the right primer can solve these problems once and for all.
In the upcoming sections, I’ll walk you through the essential steps to select, prepare, and apply the perfect primer for galvanized gutters. Trust me, choosing the right product isn’t just a detail—it’s the secret to a flawless finish that lasts. Let’s get started!
Preparing Your Surface for Primer Application
Start by cleaning the gutters thoroughly with a mixture of water and a degreasing agent like trisodium phosphate (TSP). This removes dirt, grease, and oxidation that can prevent proper adhesion. Use a stiff brush or scrub pad to reach into crevices. Rinse with clean water and let dry completely—rushing this step leads to peeling later.
Once dry, inspect for rust spots or peeling paint. Sand these areas with medium-grit sandpaper to create a smooth, matte surface. This enhances primer bonding and results in a more professional finish. For stubborn rust, apply a rust converter before sanding to neutralize corrosion.
Masking and Protecting Surroundings
Before priming, mask nearby areas with painter’s tape to prevent overspray. Cover the ground and windows with drop cloths or plastic sheeting. Think of this as setting up a protective barrier—like putting a shield around your work zone—so cleanup is minimal and the finish looks sharp.
Choosing the Right Primer
Select a primer formulated specifically for galvanized metal, such as a zinc-rich or rust-inhibitive primer. This type contains binders compatible with zinc coatings, ensuring excellent adhesion. Avoid regular primers—they lack the chemistry needed to stick to zinc surfaces. For my own project, I used a zinc-compatible primer from a trusted brand, which proved to be a game-changer.
Applying the Primer Effectively
Apply the primer using a high-quality brush or roller designed for metal surfaces. I prefer a 3/8-inch nap roller for larger areas and a small brush for corners and inside curves. Think of the primer as a foundation—smooth, even coverage ensures the final topcoat adheres properly and lasts longer.
Begin by cutting in along edges with the brush, then roll with the nap roller, working in manageable sections. Maintain a wet edge to prevent lap marks. If the surface is rough or has imperfections, use a thicker coat or a specialty primer for maximum adhesion.
Sealing the Primer and Preparing for Paint
Allow the primer to dry according to the manufacturer’s instructions, typically 1–2 hours in optimal conditions. If your weather is humid or cold, extend the drying time to avoid trapping moisture beneath the paint. Lightly sand the primed surface with a fine grit (220) to smooth any brush strokes or uneven patches. Clean off dust with a tack cloth, then proceed with painting — this ensures a uniform finish and enhances durability.
Applying primer correctly might seem meticulous, but skipping any of these steps risks peeling, rusting, or uneven coloring down the line. Remember, taking the time now to prepare properly is your best bet for a long-lasting, professional-looking paint job on your galvanized gutters. For additional expert insights into local painting techniques, visit local painting secrets and refine your process further.Many homeowners believe that good results in house painting are simply about choosing the right color or applying the paint evenly, but there’s a deeper layer of nuance that often gets overlooked. One common myth is that applying multiple coats is always better; however, over-coating without proper preparation can lead to issues like cracking or peeling, especially with certain paints and surfaces. Experienced painters understand that surface prep and understanding the specific paint chemistry are crucial, as highlighted in industry expert sources.
A trap many fall into is rushing the drying process — trying to save time by painting over a surface that’s still damp can trap moisture, causing bubbling and long-term damage. Patience and adherence to manufacturer drying times are essential, as skipping this step undermines the durability of your work.
For advanced DIYers or professionals, knowing the difference between paint types and their interactions with various surfaces is vital. For example, choosing a matte finish on high-traffic walls can hide imperfections but may be harder to clean, whereas eggshell finishes offer a good balance of durability and disguise.
Why do some paint jobs last longer than others, even with similar techniques?
The secret lies in surface preparation, primer choice, and environmental conditions during application. A study published in the Journal of Coatings Technology and Research emphasizes that proper surface adhesion significantly prolongs paint life, preventing premature failure. Moreover, understanding the importance of using appropriate primers tailored to the surface material can make or break your project’s longevity.
Another advanced nuance is the application technique itself — for instance, cross-brushing or back-rolling can significantly enhance paint adhesion on textured surfaces, which is often overlooked by amateurs. For more insights into professional strategies, you might explore [top local painting strategies](https://elitepainterpro.com/painting-your-home-top-local-painting-strategies-revealed).
Remember, the goal isn’t just a surface that looks good today but one that withstands the test of time. Have you ever fallen into this trap? Let me know in the comments.Achieving a durable, professional-looking paint job requires more than just choosing the right paint and primer; it hinges on using the best tools and maintaining them properly over time. As a seasoned painter, I rely on a combination of high-quality equipment and strategic maintenance routines to ensure the longevity of my work. In this section, I’ll share my preferred tools and maintenance practices that help me deliver long-term results for local house painting projects.
Invest in Professional-Grade Equipment
My go-to painting tools include a high-performance latex airless sprayer, which provides even coverage on large surfaces and minimizes brush strokes. I particularly favor brands like Graco for their durability and ease of maintenance. The sprayer’s filter system must be cleaned after each use to prevent clogs that could compromise spray quality over time. For detailed work, I use high-quality synthetic brushes with fine bristles—specifically, Purdy’s Samurai series—that hold ample paint and resist wear, ensuring sharp, clean lines without fraying after multiple uses.
Additionally, a 3/8-inch nap roller with quality polyester cover optimizes paint adhesion on textured surfaces like stucco or rough siding. I always choose a roller with a replaceable cover, which I wash thoroughly after each project to extend its lifespan. Investing in the right tools initially saves money over time and guarantees a smoother finish that lasts longer.
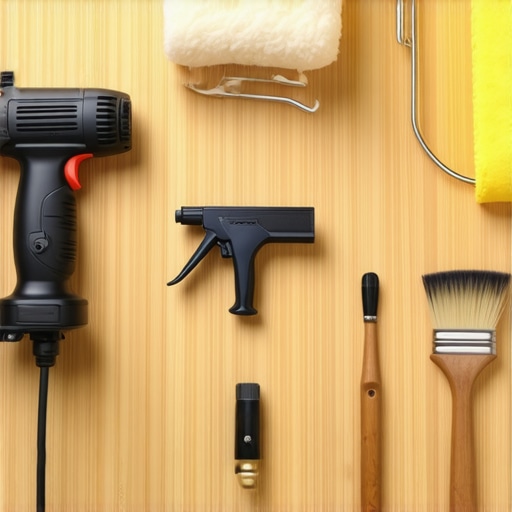
High-Performance Tools Make a Difference: Equipment like industrial-grade sprayers and premium brushes are worth the investment for their durability and the quality of the finish they produce.
Maintain Your Tools Properly
Regular cleaning is crucial to prolong the life of your painting tools. I rinse brushes and rollers immediately after use with warm water and mild detergent, then hang brushes to dry in a well-ventilated area. For sprayers, I follow the manufacturer’s cleaning protocols, which often involve flushing with solvent or specialized cleaning solutions—like the ones recommended by professional painters. Proper maintenance prevents paint buildup inside equipment, ensures consistent application, and reduces the risk of breakdowns during critical projects.
To keep my equipment performing well in the long run, I schedule routine inspections—checking hoses, filters, and seals for wear—and replace parts as needed. This proactive approach minimizes downtime and preserves the quality of my work.
The Future of Painting Tools and Maintenance
Emerging trends like smart spray technology and eco-friendly, easy-clean coatings promise to revolutionize how we maintain tools and achieve lasting results. For instance, digital calibration of spray flow can ensure uniform coverage even after months of use, reducing the need for reapplication. As technology advances, integrating smart maintenance routines—like automated cleaning systems—will become standard practice among professional painters. This evolution will make it more accessible for DIY enthusiasts to achieve professional-grade durability and appearance in their projects.
How do I keep my painting tools in top shape over time?
Implementing a consistent cleaning schedule, using quality products, and inspecting tools regularly are vital. Additionally, storing tools in a dry, sheltered environment prevents rust and degradation. Remember, well-maintained tools don’t just last longer—they improve the quality of every project, ultimately saving you time and money. For more insight into local strategies that extend your tools’ lifespan, check out local painting solutions. Give one of these maintenance tips a try today, and watch your results stand the test of time!
Lessons That Changed How I Approach Exterior Painting
One of the most valuable lessons I’ve learned is the importance of patience—waiting for the proper drying times and surface readiness. Rushing through this step often leads to peeling and bubbling, which wastes time and money in the long run.
Another insight that transformed my work was understanding the surface chemistry. Knowing which primers bond effectively with different materials, especially galvanized metal, can make the difference between a durable finish and constant touch-ups.
Finally, I realized that investing in high-quality tools isn’t just about convenience—it directly impacts the longevity of your paint job. A good sprayer, quality brushes, and proper maintenance ensure your craftsmanship lasts years, saving you from future frustration.
My Go-To Gear and Resources for Professional Results
For me, tools like the Graco airless sprayer and Purdy brushes are game-changers—they deliver smooth, uniform coverage and stand up to repeated use. Trustworthy brands like these have been tested over countless projects, providing consistency and durability.
I also lean on authoritative resources such as local painting tips and professional house painting guides to refine my techniques. Their advice helps me stay current with the best practices and avoid common pitfalls.
Books like “The Paint Maker’s Handbook” have deepened my understanding of paint formulations, allowing me to select materials better suited to specific projects, especially when aiming for longevity and resistance to the elements.
Better Results Are Within Your Reach — Start Today
Remember, achieving a long-lasting exterior paint job isn’t about shortcuts; it’s about combining patience, knowledge, and quality tools. Don’t hesitate to start your project, knowing that your attention to detail now will reward you with a beautiful, durable finish that lasts for years.
Are you ready to take your exterior painting skills to the next level? Share your biggest challenge below, and let’s tackle it together!
,