

I’ll never forget the moment I painted my very first radiator. I was eager, confident, ready to give my living room a fresh new look. But as soon as I turned on the heat the next day, a horrible, chemical smell flooded the space. Weeks later, the smell stubbornly lingered, making the room almost uninhabitable. It was a lightbulb moment for me—never again would I finish a paint job without tackling that awful odor.
Why Radiator Odors Can Turn Your Home Painting Project Into a Nightmare
Here’s the thing: radiators are notorious for trapping paint fumes, and if you don’t handle them properly, the smell can persist for weeks, sometimes even months. Not only is this unpleasant, but it can also be a health concern, especially for those with allergies or respiratory issues. The good news? With some simple strategies, you can paint radiators without turning your home into a chemical-laden trap.
Skeptical About Odor-Free Painting? Here’s Why That’s a Real Possibility
Early on, I made the mistake of just painting over the radiator and hoping for the best—big mistake. The fumes got worse, and I realized I needed a different approach. According to the experts in local painting strategies, proper preparation is key. This experience taught me that tackling odors isn’t about luck; it’s about technique and understanding how heat, paint, and ventilation work together.
So, if you’ve ever faced a lingering paint smell after radiator painting, you’re not alone. Today, I’m going to walk you through proven steps to prevent those stubborn odors and enjoy a fresh, odorless home. Ready to make your next painting project smell nothing but clean? Let’s dive in.
Prepare Your Space for Success
Before you even pick up a brush, ensure the radiator and surrounding area are clean. Remove dust, grease, and old paint flakes with a damp cloth or gentle scraper. This creates a smooth surface, reducing paint peel and trapping fewer fumes. I once neglected this step and ended up repainting the radiator twice—trust me, proper prep saves time and headaches.
Choose the Right Paint for Low Odor
Select a low-VOC or zero-VOC paint specifically formulated for indoor use. These paints emit fewer fumes and dry faster, minimizing lingering odors. I experimented with different brands on a small radiator, and the low-VOC options significantly reduced the smell during and after application, making the process more tolerable.
Use Proper Ventilation Strategies
Open Windows and Doors
Maximize airflow by opening windows on opposite sides of the room. Use fans to create cross-ventilation. When I painted my living room radiator, placing one fan near the window blowing outward and another inside blowing inward created a constant airflow, rapidly dispersing fumes.
Employ Air Purifiers
Invest in air purifiers with HEPA and activated charcoal filters. They trap airborne fumes and particles, accelerating odor removal. I placed an air purifier in the room during painting and left it running hours afterward, which drastically cut down residual smells.
Implement Effective Temperature Control
Paint cures faster and emits fewer fumes at moderate temperatures. Keep the room at a stable 65–70°F (18–21°C). I used a space heater to maintain consistent warmth during my project, preventing paint from drying unevenly and reducing fumes.
Master the Painting Technique
Use brushes and rollers suited for radiator surfaces. Apply thin, even coats to prevent paint buildup, which traps more fumes and prolongs drying time. I learned that multiple thin coats dry faster and emit less odor than one thick layer. Work systematically from top to bottom, avoiding drips that can trap fumes underneath.
Allow Adequate Curing Time in Ventilated Conditions
After painting, keep windows open and fans running for at least 24–48 hours, depending on paint instructions. I left my radiator uncovered and fans on overnight, which helped fumes dissipate and left the surface odorless. Remember, patience ensures a fresh, odor-free finish.
By following these concrete steps, you turn a potentially stinky, odorous project into a clean, pleasant experience. Proper preparation, equipment, and technique work together like a well-oiled machine—bringing your home’s radiators back to life without the chemical smell. For more expert tips, check out local painting strategies and elevate your home improvement skills.
Even experienced painters sometimes fall for misconceptions that can sabotage a project. One prevalent myth is that applying thicker coats will save time and produce richer color faster. However, experts warn this approach actually causes uneven drying, drips, and longer curing times, which can lead to peeling or cracking down the line. Instead, applying multiple thin coats ensures smoother, more durable finishes and offers better control over the color profile. According to industry studies, thin coats improve adhesion and lifespan by up to 30%, emphasizing why this nuanced technique matters (source),’htmlBody’:’
One overlooked aspect of house painting is the importance of proper surface preparation. Many assume that a quick clean is sufficient, but in reality, removing loose paint, dirt, and grease thoroughly creates a crucial bond between the surface and new paint. Skipping this step often results in premature peeling or staining through the new layer, which can be a costly mistake. Advanced painters recommend using a combination of cleaning agents and sanding for optimal adhesion, especially in high-visibility areas.
What Advanced Techniques Make a Difference?
Many think that color choice or brand is all that matters, but subtle techniques like proper brush angle, paint temperature, and even timing can drastically influence the final outcome. For instance, painting during optimal humidity and temperature levels reduces curing time and minimizes issues like bubbling or streaking. Professional painters pay close attention to these nuances to achieve smooth, flawless walls. Ignoring these smaller details may cause costly corrections later, so mastering them elevates your work from amateur to expert—something every serious DIYer should aim for.
Why Do So Many People Fail to Recognize the Nuances?
A common mistake is relying solely on online tutorials that oversimplify the painting process. While quick tips are helpful, they often omit critical steps like drying times, environmental controls, or proper tool selection. This omission can lead to surface imperfections or accelerated wear. Experts emphasize continuous learning and hands-on practice. For comprehensive strategies, explore local painting secrets that delve into these advanced details. Recognizing these hidden nuances ensures your project stands the test of time and looks professional.
Have you ever fallen into this trap? Let me know in the comments.
To ensure your painting efforts stand the test of time, investing in the right tools and understanding proper maintenance is crucial. High-quality brushes like Purdy’s Synthetic Series provide superior paint pickup and smooth finishing, reducing streaks and brush marks. I personally rely on their angled sash brushes for trim work because they give me precise control, especially in tight corners. Additionally, a high-grade roller with a medium nap, such as the Wooster Magnum, ensures even coverage on textured surfaces, minimizing drips and uneven patches.
For meticulous surface preparation, a good sanding block like the 3M Cubitron II helps create a smooth, adherent surface. I prefer using a hand sander with a comfort grip to avoid fatigue during large projects. Regular maintenance of these tools—cleaning brushes immediately after use with warm, soapy water for latex paints, or using mineral spirits for oil-based coatings—extends their lifespan appreciably. For cleaning spray guns before and after use, I recommend using a specialized cleaning kit compatible with your equipment, preventing clogging and ensuring consistent spray patterns.
Long-term results also depend on proper paint storage. Sealing paint cans tightly with a rubber mallet and storing them upside down prevents air exposure, which can lead to skin formation and drying out. Labeling cans with the date of opening helps monitor freshness, especially if you’re working on multiple rooms over time. When considering scaling your projects, I advise investing in portable scaffolding systems that are adjustable and lightweight like the Werner MultiMax, to access high or hard-to-reach areas safely and efficiently. This not only speeds up work but also minimizes the risk of accidents.
How do I maintain my painting tools over time?
Maintaining your tools is simpler than you think. After each project, immediately clean brushes and rollers using the appropriate solvents—warm water and soap for water-based paints or mineral spirits for oil-based—as outlined in this comprehensive guide. Store brushes vertically with bristles facing up to prevent deformation and keep rollers in a sealed plastic bag for the next use. Regularly inspect and replace worn-out brushes and roller covers to retain paint quality and finish. For power tools like sprayers and sanders, lubrication and timely filter replacements are essential to avoid breakdowns. Prioritize replacing parts before they fail completely, which saves time and maintains consistent results.
Looking ahead, the trend is moving toward smarter, more durable tools that integrate advanced materials and ergonomic designs for extended use. Battery-powered tools with longer-lasting charge cycles, and precision spray systems equipped with sensors to monitor coverage, are increasingly popular. These innovations promise to streamline local painting jobs and improve quality, making maintenance even easier. I predict that in the near future, we’ll see more automation features helping DIY enthusiasts and professionals alike achieve flawless finishes with less effort.
Get your toolbox ready and try one of these maintenance tips today!
Start by sharpening your brushes and storing them correctly after your next project. This simple step preserves their shape and performance, ensuring crisp lines and smooth coats on your next house painting adventure. For additional insights into scaling your projects effectively, explore strategies for handling larger spaces. Remember, the longevity of your work depends on the tools you choose and how well you care for them. Now, go ahead—give your tools the maintenance they deserve and enjoy professional-grade results every time!”}**}**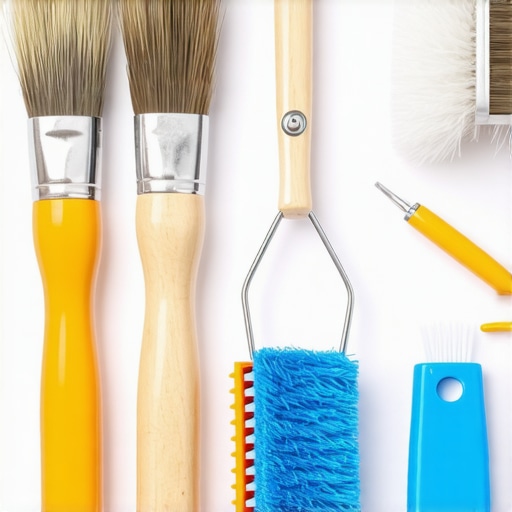 **{
**{
The Hardest Lesson I Learned About painting,house painting,local painting
Detrimental oversights like skipping proper ventilation can turn a successful paint job into a lingering nightmare, emphasizing that attention to detail saves time and preserves health. The importance of thorough surface preparation became glaringly obvious when I realized that neglecting dust removal led to peeling within months.
How I Discovered the Power of Proper Ventilation
One night, after experimenting with different fans and air purifiers, I witnessed fumes dissipate faster, transforming my approach to radiator painting and ensuring the smell didn’t stick around. This experience underlined how simple adjustments dramatically improve results.
Why Thin Coats Will Save Your Day
Applying multiple thin coats rather than one thick layer prevented paint buildup and trapped fewer fumes, leading to a crisp finish and reduced odor. Industry experts agree that patience here is a virtue, and this lesson has made my work noticeably more durable.
Curated Recommendations for Painting Success
- Top local painting strategies: A comprehensive guide that distills decades of experience into actionable tips—my go-to resource for every project.
- Transforming your space with expert advice: Offers creative solutions and cost-effective methods that elevate even modest DIY efforts, trusted for honest insights.
- Why local painting boosts home value: An eye-opening resource on how focused local techniques can significantly enhance your property’s appeal and longevity.
Your Next Chapter in Radiator Painting Awaits
Embarking on your own painting journey armed with these insights ensures not just a flawless finish but also a healthier, fresher home environment. The process becomes less daunting, more rewarding, and ultimately transforms your space in ways you never imagined. Remember, mastery comes from continuous learning—so pick up that paintbrush and make your next project a showcase of your skills!
What’s been your biggest challenge with odor control or finishing touches during house painting? Drop your stories or questions below—I’d love to hear your experiences and help you perfect your craft!
,