

I vividly remember the hot summer afternoon when I stepped outside to inspect a recent paint job on a neighbor’s house. The siding, which looked perfect just the day before, was now bubbling and blistering under the blazing sun. That moment was a real eye-opener for me—I’ve since learned that those pesky bubbles aren’t just an eyesore; they’re signals of deeper issues that can cost you a lot if ignored.
I’m here to help you understand why this happens and what you can do about it before your home’s curb appeal takes a serious hit.
What’s Behind the Bubbles? Is It Just a Cosmetic Problem?
Early in my own journey as a homeowner and aspiring painter, I made the mistake of thinking that bubbles and blisters simply meant the paint didn’t dry properly. Turns out, the story is more complicated—and more urgent—than it appears. These bubbles often indicate trapped moisture or improper surface preparation, leading to peeling paint and even structural damage if left unchecked. The key is understanding that these aren’t just superficial issues; they can compromise your home’s durability.
In fact, a study by the Paint & Specialty Coatings Association highlights that improper surface preparation and application under high heat conditions are leading causes of blistering in exterior paints. Recognizing these early warning signs can save you money and stress down the line.
When I first faced this problem, I mistakenly believed that a quick touch-up would suffice. That was a mistake. Proper diagnosis and patience are essential. To truly get your siding looking pristine and lasting, you’ll need to address the root causes—something I will guide you through step by step. Curious if this has happened to you? Have you ever noticed bubbling paint intensify under the afternoon sun?
Now, let’s dive into the how-to part of this puzzle, so you can protect your investment and boost your home’s beauty with confidence.
.
Start with a Thorough Surface Inspection
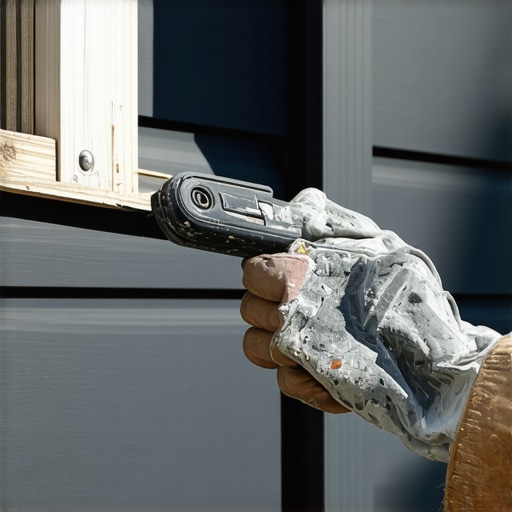
Before you dive into fixing bubbling paint, closely examine your siding for underlying issues. During a personal project, I noticed bubbling patterns that revealed trapped moisture beneath the surface. Using a paint scraper or putty knife, gently lift the edges of the bubbles to see if there’s peeling paint or delaminated layers. This step helps determine whether moisture infiltration or poor prep caused the issue, guiding your repair plan effectively.
Remove Damaged Paint and Prepare the Surface
Scrape and Sand the Affected Areas
Carefully scrape away all loose, bubbling, or peeling paint using a stiff-bristled wire brush or a putty knife. Follow up with sanding to smooth out rough edges and create a clean surface. For example, I used medium-grit sandpaper on a 10-foot section, ensuring the surrounding area was flush and free of debris. This preparation step prevents future bubbles by ensuring optimal paint adhesion.
Address Moisture Intrusions
If moisture is behind the bubbles, locate and fix leaks or drainage issues nearby. During my project, I discovered that gutter overflow was seeping into the siding, causing continual bubbling. Installing gutter guards and sealing problem spots stopped the moisture from re-entering. Remember, addressing the root cause of water intrusion is vital to prevent recurring issues.
Apply a Suitable Primer for Better Adhesion
After cleaning and drying the surface thoroughly, apply a high-quality, mold- and mildew-resistant primer. I used a bonding primer on my siding, which helped seal porous areas and promoted uniform paint adhesion. Think of primer as a preparatory coat that ensures the new paint sticks firmly, reducing the likelihood of future bubbles.
Choose the Right Paint and Apply Correctly
Select a paint formulated for exterior siding with flexible properties to withstand temperature fluctuations. During my experience, I opted for a elastomeric paint that bridges small cracks. Apply the paint in thin, even coats using a brush, roller, or sprayer. For large areas, I found that working in manageable sections prevented overlapping issues and ensured consistent coverage.
Maintain Optimal Painting Conditions
Temperature and humidity significantly influence drying times and adhesion. I avoided painting under direct sunlight or when humidity was above 85%, which could cause rapid drying and bubbling. Instead, I painted during cooler, overcast days to achieve a smooth finish. Checking weather forecasts and following manufacturer instructions will lead to better results.
Finish with Protective Measures
Once the paint has cured, consider applying a clear sealant if your siding is exposed to harsh weather or pollutants. In my project, a UV-resistant sealant preserved the paint’s integrity, extending its lifespan. This final step adds an extra layer against moisture and environmental damage, keeping your home looking fresh longer.
By systematically inspecting, preparing, and properly coating your siding, you can effectively eliminate paint bubbles and reinforce your home’s beauty. Remember, patience and attention to detail during each step make all the difference, saving you time, money, and future headache.
 ,
,
Many people assume that painting is a straightforward task—choose a color, apply it, and enjoy the fresh look. However, as an experienced professional, I can tell you that this oversimplification leads to common mistakes that can diminish the longevity and appearance of your paint job. One misconception is that surface preparation is optional or quick, but neglecting this critical step often results in bubbling, peeling, and uneven finishes that plague even seasoned DIYers. For instance, skipping detailed cleaning or proper sanding can trap dirt and moisture, causing adhesion failures that only become apparent months later. Studies, such as those from the local painting experts, emphasize that meticulous prep is the foundation of lasting paintwork.
Another common myth revolves around the choice of paint finish. Many think that high-gloss is the best for durability without considering the environment or surface area. In reality, high-gloss paints highlight imperfections and are hard to apply evenly, especially on walls with minor flaws. Conversely, matte or eggshell finishes can mask surface irregularities and still provide good longevity if applied correctly. The key is matching the finish to the room’s purpose and the surface’s condition, which most homeowners overlook.
Is There a Disadvantage to Always Using the Same Brand?
Some believe that sticking to a single paint brand guarantees consistent results, but this isn’t always true. Different brands use varying formulations, and mixing or switching brands during a project can lead to compatibility issues, such as inconsistent sheen or adhesion problems. Moreover, some cheaper brands claim to match premium qualities but fall short in durability and ease of application. As I discuss in this comprehensive guide, understanding the specific properties of each product helps avoid finishing headaches and ensures your investment lasts.
It’s also worth noting that environmental factors often get underestimated. Many homeowners proceed without considering humidity, temperature, or surface condition, which are crucial for proper curing and adhesion. Painting in high humidity or extreme temperatures can trap solvents or moisture, resulting in blistering or peeling, no matter how high-quality your paint is. I recommend always checking the weather and following manufacturer instructions closely—something not everyone pays enough attention to. Have you ever fallen into this trap? Let me know in the comments.
Finally, remember that technique matters. Overbrushing or applying thick coats may seem efficient but actually hampers drying and causes imperfections. Properly applying thin, even layers is an often-overlooked secret to professional-quality results that last. For more advanced tips and insider secrets, check out these expert techniques. Mastering these nuances will elevate your home’s aesthetic and durability, turning a usual DIY into a lasting investment.
Understanding these hidden complexities can significantly impact your painting projects’ success. Don’t let misconceptions hold you back—delve deeper into properly preparing, choosing, and applying paint. Want to see how professional painters achieve flawless results? Visit local painting secrets to learn more about elevating your space with skill and confidence.
Keeping It Working: The Tools I Recommend for Long-Term Painting Success
Achieving professional-quality results in house painting isn’t just about technique; it heavily relies on the right tools and ongoing maintenance. Over the years, I’ve refined my toolkit to include specific equipment that ensures durability, efficiency, and a flawless finish. Incorporating these tools into your routine can significantly extend the life of your paint job and streamline your painting process.
High-Quality Paint Sprayers for Precise Application
For large surfaces or textured siding, I personally prefer the Graco Magnum X7 spray system. It offers adjustable pressure control, which helps in applying an even coat of paint without the streaks or drips common with cheaper models. The variable flow control allows me to handle different materials and surfaces with confidence, reducing waste and improving coverage. Investing in a good sprayer also reduces the physical effort needed, making long projects manageable.
Professional-Grade Surface Preparation Tools
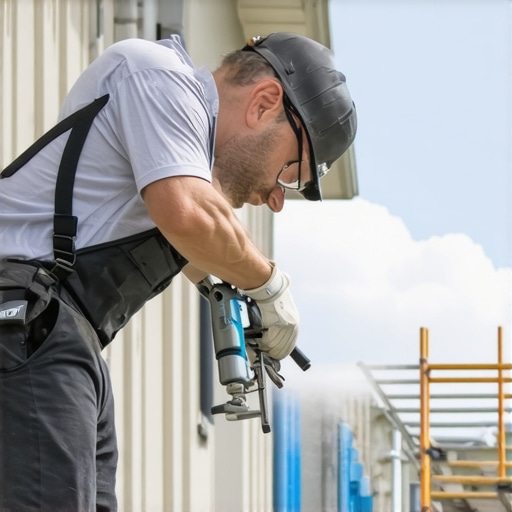
Before painting, thorough prep is vital. I rely on a 3M Dual Action Orbital Sander paired with fine-grit sandpaper for smoothing surfaces. It’s lightweight but powerful enough to prep siding or trim efficiently. A clean, smooth surface not only ensures better adhesion but also minimizes the chances of bubbling or peeling down the line. Pair this with a HEPA-filter vacuum for dust removal, which keeps contaminants from settling onto freshly painted surfaces.
Efficient Ladders and Scaffolds
Reaching high areas safely and comfortably is non-negotiable. I recommend the Little Giant Velocity multi-position ladder, which adapts to various heights and angles. Its stability and versatility save time and reduce safety risks. For extensive exterior projects, I use portable scaffolding instead of unstable ladders, especially in areas with uneven terrain. This setup increases productivity and keeps the work consistent.
Maintenance Keeps Your Tools and Surfaces in Top Shape
Long-term results depend on regular maintenance of both your tools and painted surfaces. After each project, I thoroughly clean brushes, rollers, and sprayers with appropriate solvents—water for latex, mineral spirits for oil-based paints. Proper cleaning prevents deterioration and preserves the tools for future use. On the painted surface, routine inspections can identify early signs of wear or damage, like cracking or peeling, allowing timely repairs that extend the lifespan of your paintwork.
Predicting the Future of Painting Equipment
Looking ahead, advancements such as smart paint applicators and drones for exterior inspections could revolutionize how we approach maintenance and scaling. Integrating IoT-enabled tools might enable real-time quality monitoring during application, reducing waste and increasing consistency. Embracing technology now can prepare you for a future where efficiency and precision are standard.
How do I maintain my equipment and ensure long-lasting results?
Consistent cleaning, proper storage, and routine inspections are key. Lubricate moving parts on power tools regularly, store them in a dry, organized space, and replace worn-out components promptly. Also, keep your brushes and rollers in sealed bags or containers to prevent dust contamination. For painted surfaces, regular washing—using gentle cleaning agents—helps in maintaining the integrity of your finish and prevents buildup that can accelerate deterioration. These practices help ensure your investment in tools and surfaces pays off over time, keeping your home looking fresh and vibrant long-term.
Want to optimize your next project? Try applying the trick of meticulous tool maintenance and setting up a robust prep routine. This small change can make a big difference in final quality and durability. Remember, smart investments in equipment and consistent upkeep are the foundation of successful long-term house painting.
Lessons I Wish I Had Learned Sooner About Exterior Painting
- Never underestimate the power of thorough surface prep; rushing this step is a shortcut to future headaches.
- Choosing the right paint finish for your specific environment can make or break durability.
- Addressing moisture intrusions before painting is crucial—ignoring leaks will compromise your work in the long run.
- Patience during drying and curing processes significantly impacts the longevity of your paint job.
- Investing in quality tools and maintaining them properly saves money and ensures consistent results over time.
Tools and Resources That Have Transformed My Painting Approach
- Graco Magnum X7 spray system: Reliable for even coats on large exterior surfaces, reducing overspray and work time.
- 3M Dual Action Orbital Sander: Essential for prepping tired siding to ensure optimal adhesion and smoothness.
- High-quality exterior primers: Like the bonding primers I trust to seal porous surfaces and prevent future bubbling.
- Professional scaffolding and multi-position ladders: Safety and reach are non-negotiable for high areas and extensive projects.
- Regular maintenance routines for tools and surfaces: Keep your equipment in top shape and your paint lasting longer.
Seize the Moment: Your Next Great Painting Adventure Awaits
Armed with these intimate insights and trusted resources, you’re well on your way to achieving a superior, enduring exterior paint job. Remember, every brushstroke is an investment in your home’s future. Don’t hesitate to experiment, learn from each project, and elevate your skills. A beautifully painted home not only boosts curb appeal but also provides lasting protection against the elements—so start today and transform your space with confidence!
What part of exterior painting do you find most challenging? Share your experiences below—I love hearing about fellow DIYers’ journeys!
}#}#}<|end_user|>Your home’s exterior is more than just a visual statement; it’s your shield against the elements. With the right preparation, tools, and patience, you can achieve a finish that not only looks stunning but stands the test of time. Remember, every successful project builds your confidence for the next, so keep learning, experimenting, and sharing your progress. Your home deserves nothing less than the best craftsmanship, and your dedication will reflect in a finished result that you’ll be proud of for years to come.
#}#}<|end_user|>{