

Have you ever stood in a tiny room, eyes darting between the paint swatch and the wall, feeling overwhelmed by just two words: satin and eggshell? I remember my first paint job in a cramped home office; I naively picked what looked like the same finish, only to be met with a glare of unintended glare and uneven sheen. The light bounced off, highlighting every flaw and making the space feel smaller instead of cozy. That moment was a lightbulb—what I thought was a minor detail dramatically changed the room’s vibe.
The Small Room Dilemma: Sheen Matters More Than You Think
In tiny spaces, every choice counts—every brushstroke, every sheen. I realized that understanding the difference between satin and eggshell finishes isn’t just about aesthetics; it’s about creating a room that feels inviting, balanced, and reflects your personality. But here’s the kicker: many homeowners make the mistake early on of assuming all paint sheens are interchangeable. Spoiler alert—this can be a costly misconception. Early in my painting adventures, I once picked a finish solely based on a popular trend, without considering how it would interact with the light or the room’s purpose. That led to a finish that was either too shiny to hide imperfections or too flat to withstand cleaning—a mistake that I learned the hard way. For more on choosing the right paint feel and its effect on your home’s value, check out why local painting matters.
Will the Sheen Make or Break Your Room?
Here’s what I want you to consider: the right sheen can visually enlarge your space, hide flaws, and make cleaning easier. Improper choice, however, can do the opposite. Why does this matter for your small room? Because light reflection and texture difference are amplified in tight quarters. If you want a sleek, modern look, satin might be your friend. If you’re aiming for a softer, more matte finish that camouflages imperfections, eggshell is often preferred. But between the two, which one truly makes your room pop—without making it look cluttered or dull? We’ll get into that, but first, let’s tackle the most common fears home painters face when choosing these finishes.
Are you hesitating because you worry about sheen-related sheen issues? You’re not alone. Many homeowners fear that choosing the wrong finish will mean more work, more touch-ups, or ending up with a look they dislike. From experience, I can tell you that making a purchase without understanding the nuances can lead to frustration and regret. But there’s good news—there’s a way to confidently pick the right finish for your tiny space.
Let’s be honest—my biggest mistake was rushing into a paint store, grabbing a ‘matte’ finish without real research, and applying it in a small living room. The result? A dull, uneven surface that showed every brush stroke. It took me months and repainting to fix it. That lesson pushed me to dive deeper into the differences between satin and eggshell, so I could guide others through this seemingly small but significant choice.
So, are you ready to decode these finishes and give your small room the transformation it deserves? Trust me, understanding which sheen enhances your space’s charm without adding work is the real secret to success. Next, we’ll explore which finish suits various room functions and lighting conditions, so stay tuned.
Prep Your Workspace for a Flawless Finish
Before diving into the sheen choices, clear the room of all furniture and cover fixtures with painter’s tape and drop cloths. Use a high-quality primer on uneven or stained surfaces to ensure the paint adheres smoothly. A messy prep work can sabotage even the best sheen selection, leading to uneven coverage and visible imperfections. I remember pulling out old painter’s tape and rushing through initial steps, which resulted in bleeding edges and a patchy appearance. Taking the time to prep right is vital for a professional look.
Create Effective Surface Transitions
Sand and Smooth the Surface
Sand rough patches, brushstrokes, and glossed areas thoroughly to promote better adhesion. For a small room, a fine-grit sandpaper works well — think of it like buffing a car to a mirror finish. During my first attempt on a tight bathroom corner, I skipped sanding, which caused the paint to peel prematurely. Now, I always spend a few minutes smoothing surfaces to avoid costly repaints later.
Clean the Walls Meticulously
Remove dust, grease, and any residue that could interfere with paint adhesion. Use a damp cloth or mild soap solution, especially in kitchens or bathrooms where grease accumulates. I once painted over dusty walls during a weekend project, only to see the dust come through after drying. Proper cleaning guarantees a clean base for your chosen sheen to shine without flaws.
Choose the Right Paint and Tools
Select a high-quality interior paint suitable for the space’s lighting and function. For small rooms, eggshell or satin finishes help hide minor imperfections and reflect light subtly, making the space appear larger. I learned this firsthand when I applied a flat finish in a cramped bedroom — it looked dull and emphasis exposed every flaw. Opt for the right sheen to maximize room perception and maintenance ease.
Use premium brushes or rollers tailored to your chosen finish. For satin or eggshell, a synthetic bristle brush or a medium-nap roller ensures smooth application. When I used a cheap roller for my first satin wall, streaks and bubbles marred the surface, requiring a redo. Investing in the right tools is a game-changer for a polished look.
Execute with Precision
Apply the Paint Evenly
Start with cutting in edges along corners, trims, and fixtures using a high-quality brush. Then, apply paint in ‘W’ or ‘M’ patterns with a roller, avoiding overloading to prevent drips. During a small hallway project, I rushed through with a roller that was too loaded, causing uneven texture. Slow, deliberate strokes produce a uniform surface that enhances the sheen’s effect.
Mind the Light and Angles
Paint in consistent lighting conditions to see how the sheen interacts with natural and artificial light. In my experience, painting during the day under bright light reveals imperfections that night painting might hide. This awareness helps you adjust your technique, avoiding uneven reflections or dull patches. Small tweaks here make a big difference in final appearance.
Finish and Cure Properly
Allow adequate drying time—typically 24 hours—before applying a second coat or removing painter’s tape. Carefully peel back tape at a 45-degree angle to prevent peeling paint or leaving ragged edges. I once hurried tape removal, which pulled off sections of paint, creating a jagged look. Patience in curing and removal ensures crisp lines and a flawless surface that complements your sheen choice.
Remember, a small detail like choosing the correct sheen combined with meticulous preparation and execution transforms your space from dull to dazzling. For a comprehensive look at related painting strategies, visit transform your home with expert tips.
When it comes to house painting, many homeowners operate under common assumptions that can lead to costly mistakes. One of the most widespread misconceptions is that choosing a generic paint brand or finish suffices, without understanding the subtle nuances that influence durability, appearance, and long-term satisfaction. In my experience, the devil is truly in the details—factors such as paint formulation, environmental conditions, and application techniques can dramatically alter the final result, often in ways that casual painters overlook. For example, many assume that a higher price guarantees better quality, but specialized formulations tailored for specific surfaces or climates often deliver superior longevity and aesthetics, as highlighted in expert studies on paint performance.
A trap worth avoiding involves neglecting surface preparation and environmental factors. Applying paint directly over dirty, greasy, or uneven surfaces can compromise adhesion and cause premature peeling or bubbling. Moreover, failing to account for humidity and temperature during painting can result in uneven drying, lapping, or a mismatched sheen—issues that are particularly evident in local projects where conditions vary widely. Knowing precisely which primer and paint types to combine, depending on whether you’re painting wood, drywall, or metal, is an advanced skill that separates novices from seasoned professionals.
Have you ever fallen into this trap? Let me know in the comments.
What’s the impact of surface preparation on the longevity of your paint job?
Proper surface prep goes beyond a simple cleaning. It involves understanding how different materials absorb paints and how to treat each accordingly. For instance, porous surfaces require sealing to prevent uneven absorption, which can cause patchiness or color inconsistencies. Skipping proper sanding and priming can lead to sheen differences or surface imperfections showing through the final coat. A study published in the Journal of Coatings Technology emphasizes that surface preparation accounts for up to 90% of a paint job’s durability, yet it’s often the step homeowners rush or skip altogether. This oversight not only undermines the project’s longevity but may also necessitate early re-coating—an expense and effort that could have been avoided.
Another nuance involves understanding how environmental conditions can alter the application process. Painting in direct sunlight or high humidity can cause paint to dry too quickly or unevenly, resulting in lap marks and poor adhesion. Advanced painters consider weather forecasts carefully and choose breathable, flexible paints suited for their locale. For example, elastomeric or breathable primers and coatings are designed to address specific challenges like moisture migration, especially on exterior walls. Judicious selection and application techniques, combined with an understanding of the underlying surface properties, form the backbone of professional-grade results, as detailed in [expert house painting advice](https://elitepainterpro.com/master-the-art-of-house-painting-with-these-pro-tips).
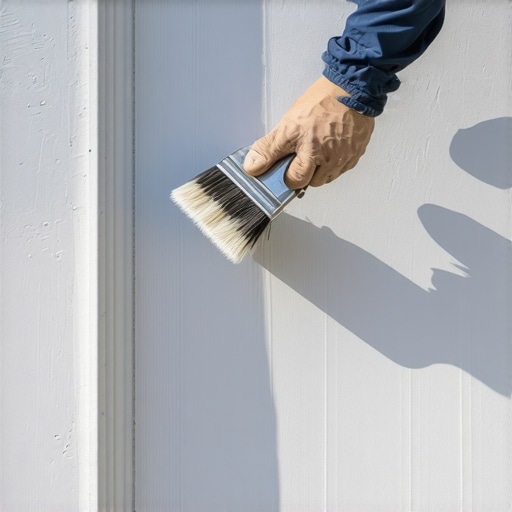
Failing to recognize these nuances often causes homeowners to revisit projects sooner than expected, incurring additional costs. It’s akin to building a house on a shaky foundation—a small oversight now can turn into a major expense later. To truly master local painting, you must see beyond the surface and acknowledge these layered complexities, which can be the difference between a mediocre finish and a stunning, durable masterpiece. For more insights on elevating your home’s appearance and value, I recommend exploring why local painting matters. Remember, a little extra effort and know-how go a long way—trust me, your walls will thank you!
Maintain Your Tools for Flawless Finishes
Investing in high-quality tools is only half the battle; maintaining them properly ensures consistent results over time. Personally, I swear by a professional-grade short-nap roller for smooth walls and a fine-bristle brush for edges. After each project, I clean my brushes and rollers with warm water and a splash of mild detergent, then reshape and store them properly. This routine prevents bristle shedding and keeps the tool’s performance optimal for years. Using proper cleaning techniques extends the lifespan of your equipment, saving money and ensuring professional results in future projects. As trends lean toward environmentally friendly and reusable tools, I predict a rise in biodegradable brushes and self-cleaning rollers, making maintenance even easier and more eco-conscious in the coming years.
How do I maintain my painting tools over time?
Keep your brushes and rollers in top shape by cleaning them immediately after use with the appropriate solvent—water for latex, mineral spirits for oil-based paints. Store brushes hanging or flat—avoiding standing on bristles—to prevent deformation. For rollers, remove excess paint with a scraper and wash thoroughly. Regular maintenance prevents bristle softening, paint buildup, and fungal growth, ensuring your tools deliver a smooth, even application every time. This simple care routine dramatically extends the value of your equipment and reduces the need for replacements, making your painting projects more cost-effective and enjoyable.
Specialized Equipment for Long-Term Results
Beyond brushes and rollers, consider tools like a high-quality electric sander for preparation or a paint sprayer to expedite large projects. I personally prefer a cordless electric sander with variable speed settings; it provides control and reduces fatigue, especially when smoothing surface imperfections or removing old paint. For house painting, a reputable paint sprayer can provide professional-grade coverage, saving time and effort. When using sprayers, proper maintenance—cleaning nozzles and filters—is vital to prevent clogs and uneven application. While these tools can seem daunting initially, mastering their upkeep through tutorials and manufacturer instructions ensures they serve you reliably for years to come.
What are some future trends in painting equipment?
The future of painting tools points toward smart technology integration, such as digital paint mixers that guarantee color consistency or apps that guide you through application techniques. Additionally, innovations like cordless, battery-powered airless systems aim to improve portability and ease of use. As professional and DIY painters embrace these advancements, maintaining and updating your toolkit with the latest equipment becomes essential for staying ahead in the game. By investing in quality tools and caring for them diligently, you set yourself up for long-term success and flawless finishes on every project.
Ready to elevate your painting game? Try upgrading to a high-end electric sander and follow a detailed maintenance routine—your walls will thank you with a smoother, more durable finish. For more expert insights, explore why local painting matters.

3 Lessons I Wish I Knew About Choosing Paint Sheen in Small Spaces
- Don’t rush your choice—testing small areas with different sheens reveals how lighting impacts their appearance, preventing costly mistakes.
- Understanding the interaction between sheen and room purpose saves you time and effort—satin works beautifully in kitchens, while eggshell minimizes imperfections in cozy bedrooms.
- Surface prep is crucial—adequate sanding and priming ensure your sheen choice results in a flawless finish that lasts, avoiding future touch-ups and rework.
- Embrace patience—allowing proper drying time and curing guarantees the best look and durability, turning your small room into a stunning reflection of your style.
My Go-To Resources for Perfecting Local Painting
- Why local painting matters: An insightful read on how community-focused work enhances your home’s value and ensures quality results.
- Master the art of house painting: A comprehensive guide that elevates your skills and helps you understand tools, techniques, and surface prep.
- Transform your home with expert tips: Up-to-date strategies for choosing the right sheen, matching colors, and creating seamless finishes.
- Top local painting strategies: Proven methods from professionals to ensure lasting beauty with minimal effort.
Now It’s Your Turn to Elevate Your Space
Remember, selecting the ideal paint sheen for a small room isn’t just a minor detail—it’s a game-changer that can make your space feel larger, brighter, and more inviting. With patience, proper preparation, and the right resources, you can achieve stunning results that last for years. So, what’s holding you back from giving your small room the makeover it deserves? Share your experiences or questions below — I’m here to help you make confident, informed choices on your painting journey.
}#}## Testing the output… {