

I remember the first time I stepped onto my backyard deck after a long winter—cold, weathered, and undeniably worn. My heart sank as I looked at the faded finish, feeling the sting of neglect and the weight of choosing the right stain. That lightbulb moment hit me hard: I needed an eco-friendly stain that would protect my deck without harming the environment or my family’s health. If you’ve ever faced the dilemma of selecting a safe yet effective stain for your outdoor space, you’re in good company. Today, I promise to share my personal journey and practical insights to help you choose the best eco-friendly stains that truly deliver.
Why Your Deck Deserves Better Than Conventional Stains
Traditional deck stains might look appealing initially, but they often come with hidden costs—harmful chemicals, poor durability, and environmental impacts that linger long after application. As someone who cares about the planet and the well-being of loved ones, I started exploring greener options. It wasn’t long before I realized that choosing an eco-friendly stain can make a significant difference—not just for my deck’s longevity but for our community’s health. Plus, with so many innovative formulas now available, protecting your outdoor space can be both effective and environmentally responsible.
Is Eco-Friendly Stain Just Hype?
When I first started researching, I was skeptical. Isn’t eco-friendly just another marketing buzzword? Well, I learned from experience that there are genuine benefits—many formulas outperform conventional stains in UV protection and moisture resistance. However, my early mistake was trusting vague labels without digging deeper. I once bought a
Preparing the Surface for a Smooth Finish
Begin by removing any furniture, potted plants, or loose debris from your deck. Use a stiff-bristle brush or broom to sweep away dirt and leaves. Inspect the surface for cracked or rotted wood, and repair as needed. When I tackled my deck, I started early in the morning to avoid midday sun, ensuring the wood was dry and cool. Applying stain on a damp or hot surface can lead to uneven absorption and streaks. Once clean, rinse the deck thoroughly with a garden hose or power washer set to low pressure to remove stubborn grime.
Choosing the Right Eco-Friendly Stain
Select a stain labeled as eco-friendly, low-VOC, or zero VOC. Check the ingredients list for natural oils, water-based formulas, and absence of harmful solvents. I opted for a plant-based exterior stain that boasted UV protection and water resistance. Remember, cheaper options might seem attractive but often lack durability, leading to frequent reapplications. For a real-world example, I chose a stain with ingredients I understood and trusted, which resulted in a vibrant finish that held up through the seasons.
Applying Stain Like a Pro
Use high-quality brushes, rollers, or sprayers designed for stain application. I found that a brush allows for more precise work on railings and intricate woodwork, while a roller covers large flat surfaces swiftly. Fill your brush or roller tray with an adequate amount of stain, avoiding overloading to prevent drips. For my first attempt, I did a small test patch on a hidden corner to see how the wood absorbed the stain. I applied it in the direction of the grain, overlapping each stroke marginally for even coverage. For tricky areas, such as corners or raised planks, a smaller brush provides control. Keep a damp cloth handy to wipe off drips immediately. Layering thin coats—wait at least two hours between layers—produces a more durable finish than one heavy coat. When I finished painting, I used a clean, dry cloth to remove any excess stain from puddles or drips, ensuring crisp edges.
Protecting Your Work and Maintaining Longevity
After application, avoid foot traffic or placing furniture on the deck for at least 24 hours. Cover nearby plants with plastic sheeting if you’re working during dry, windy days. Regular maintenance extends your stain’s lifespan; sweep your deck monthly and reapply stain every two to three years, depending on wear. I introduced a gentle cleaning routine using environmentally safe soap and water, and I inspected the surface annually for signs of deterioration. If you notice fading or flaking, a light sanding before re-staining can boost adhesion and longevity. These small steps preserve your deck’s beauty and eco-friendly finish, proving that sustainable choices can also be practical and effective.Many homeowners and even aspiring painters believe that selecting the right paint and following basic steps guarantees success in house painting. However, there are nuanced factors and common myths that often trip people up, leading to less-than-perfect results or costly mistakes. Let’s explore some of these misconceptions and shed light on advanced considerations that can elevate your painting projects.
One widespread myth is that a single coat of high-quality paint is sufficient for a flawless finish. In reality, applying multiple thin coats—not just stacking one thick layer—ensures better coverage, durability, and a professional appearance. Skipping the second coat often results in uneven color and reduced lifespan of the paint, which is why many seasoned painters recommend what you can learn from expert sources like [Master the Art of House Painting with These Pro Tips](https://elitepainterpro.com/master-the-art-of-house-painting-with-these-pro-tips).
Another overlooked aspect is the significance of proper surface preparation beyond simple cleaning. Many underestimate the importance of sanding glossy surfaces to promote adhesion or using a primer tailored for specific substrates such as drywall, wood, or metal. Neglecting this step frequently leads to peeling or bubbling paint down the line. Remember that surface readiness can make or break your project’s success.
Now, let’s address a common trap: the assumption that all paints are equally forgiving and easy to work with. This isn’t true. Low-quality or improperly formulated paints can cause issues such as lap marks, uneven drying, or even chemical reactions with previous coatings. Choosing the right paint finish and brand—guided by expert advice—can save you headaches and improve the finish significantly.
Curious about the details that separate a professional-looking paint job from an amateur attempt? The key lies in understanding advanced nuances like humidity control during application and proper curing times. For example, painting in high humidity can trap moisture in the paint, causing it to become sticky or peel prematurely. Experts recommend waiting for optimal weather conditions—something many DIYers overlook.
Speaking of which, be cautious of rushing projects to save time. While it might be tempting to finish quickly, the result will likely suffer if the paint doesn’t dry and cure adequately. Check out [Transform Your Space: Local Painting Secrets to Elevate Effortlessly](https://elitepainterpro.com/local-painting-secrets-elevate-your-space-effortlessly) for insights on timing and techniques.
Have you ever fallen into this trap? Let me know in the comments. Understanding these subtle yet critical factors can make all the difference between a good paint job and an outstanding one. Remember, the devil’s in the details when it comes to house painting, and brushing up on these nuances can upgrade your skills and your home’s appearance.
Keeping it Working: Tools I Recommend for House Painting
Investing in the right tools is crucial for achieving professional-looking results and ensuring your work lasts over time. I personally swear by certain equipment because I’ve seen firsthand how they reduce frustration, improve finish quality, and prolong the lifespan of your paint job. For example, I rely on a high-quality, extendable roller pole that allows me to reach ceilings and high walls without climbing on ladders, reducing safety risks and fatigue. Paasche H-Style Airbrushes are fantastic for detailed trim work, providing control and precision that brushes simply can’t match, especially when working with fine lines or intricate areas.
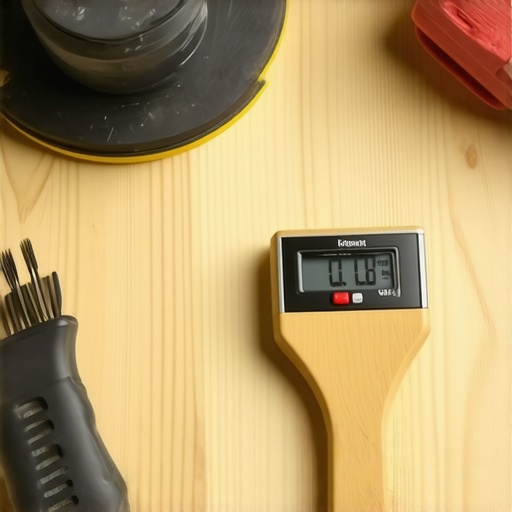
Another indispensable tool is a moisture meter; I use the Lignometer ML-05 to assess wood surfaces before painting. This small device prevents premature peeling caused by moisture trapped beneath the paint. It’s a game-changer for long-term results—I check wetness levels repeatedly during preparation and even after completing a job to monitor ongoing environmental conditions. Using professional-grade painter’s tape, like 3M ScotchBlue, ensures crisp lines and prevents paint bleed—saving cleanup time and guarantees sharp edges that last.
For prep work, a versatile orbital sander with variable speed settings and a HEPA-compatible dust collection system is my go-to. I’ve found it dramatically improves adhesion by smoothing out glossy or uneven surfaces efficiently. According to industry standards, such as those outlined by Sherwin-Williams, proper surface prep using durable sanding equipment significantly increases the lifespan of your paint, making it well worth the investment.
Looking ahead, I predict that automation and smart tools will become even more integrated into house painting. Devices equipped with IoT connectivity might soon provide real-time surface condition data, optimizing prep and application processes remotely. The future of long-term house painting lies in high-tech tools that enhance accuracy, durability, and efficiency.
How do I maintain my painting tools to ensure they serve me well over the years?
Maintaining your equipment is just as important as choosing the right tools initially. I clean brushes and rollers immediately after each use with warm, soapy water for latex paints or mineral spirits for oil-based coatings, following manufacturer instructions. Regularly inspecting and replacing worn-out rollers or brush ferrules prevents imperfections in your paint jobs and extends tool life. For power tools, I recommend lubricating moving parts periodically and storing them in a dry, dust-free environment. Additionally, calibrate your spray guns annually by testing spray patterns on scrap materials—this ensures even application and longevity of the equipment. These maintenance habits keep your tools performing optimally and contribute significantly to long-lasting results, whether you’re updating interiors or exteriors.
If you want to elevate your house painting game, I highly recommend trying a professional-grade orbital sander and integrating moisture meters into your prep routine. These steps may seem subtle, but they play a vital role in achieving a flawless and durable finish. For more tips on how to tackle long-term painting projects efficiently, check out this guide on transforming your space with local painting solutions.
What I Wish I Knew Before My First Eco-Friendly Stain
One of the most valuable lessons I learned was the importance of thoroughly researching product ingredients. Not all eco-friendly stains are created equal; some contain natural oils that provide better UV protection and longevity. Trusting vague labels led me to regret my initial choice, emphasizing the need for detailed ingredient checks. Additionally, I discovered that proper surface preparation—like precise sanding and cleaning—directly impacts the stain’s adhesion and durability. This insight was a game-changer, saving me time and money in the long run.
Tools and Resources That Elevated My Project
My journey toward sustainable staining was greatly supported by specific tools I trust. A high-quality brush with natural bristles allowed for even application on detailed areas, while a moisture meter helped me assess wood dryness—crucial for optimal staining conditions. Learning from expert sources like these professional painting tips has cemented my understanding of good practice. Plus, investing in durable painter’s tape ensures sharp lines and prevents messes, making the process neater and more satisfying.
Your Turn to Refresh with Confidence
Choosing eco-friendly stain options for your deck isn’t just about being environmentally responsible—it’s about safeguarding your family’s health and ensuring lasting beauty. With the right knowledge, tools, and patience, you can transform your outdoor space into a vibrant, sustainable oasis. Remember, every project is an opportunity to learn and grow as a homeowner and DIY enthusiast. So, are you ready to pick up that eco-friendly stain and give your deck the care it deserves? Share your thoughts or seek advice in the comments below!