

Late one evening, I found myself staring at my kitchen walls, totally frustrated. I’d just spent the weekend scraping off peeling paint and thinking I was ready for a fresh coat. But as I rolled on the primer, I noticed something strange — the paint was smudging, almost slipping right off. That’s when it hit me: my walls were way too greasy to paint over, and I hadn’t checked this crucial step before starting. The whole project felt like a waste of time, and I learned my lesson the hard way.
Why Grease on Walls Can Destroy Your Painting Efforts
Many homeowners overlook the fact that kitchen walls often accumulate grease, steam, and grime over time. These deposits don’t just make your walls look dull—they also create a barrier that prevents paint from adhering properly. If you skip cleaning thoroughly, you risk peeling paint, uneven textures, or even having to strip everything and repaint after only a few months. Trust me, I’ve been there, and it’s not worth rushing into a painting project without assessing your walls first.
Do I Really Need to Clean the Walls The Right Way?
Absolutely. Using the wrong cleaning products or neglecting this step can leave residues that compromise your finish. Early on, I thought a quick wipe with a wet cloth would suffice—big mistake. It wasn’t until I did some research that I realized grease requires a degreasing solution for the best results. For example, a mixture of warm water and trisodium phosphate (TSP) works wonders. Proper cleaning ensures the paint bonds strongly, lasting much longer and giving you a professional look that truly transforms your space.
If you’re wondering whether your kitchen walls are suitable for paint, don’t wait for peeling or streaks to appear. Address it now by inspecting and cleaning wisely. Want to get a head start on your next painting project? Check out this guide on expert house painting tips for more insights. Next, I’ll show you how to test your walls properly and avoid common mistakes that can sabotage your efforts. After all, a fresh coat of paint should bring joy—nothing ruins that faster than greasy walls. Ready to safeguard your project from these pitfalls?
Gather the Right Cleaning Supplies and Tools
Start by assembling essential items: a sturdy ladder, gentle cleaning cloths, a bucket, warm water, and a degreasing solution like trisodium phosphate (TSP). Wear gloves and eye protection to stay safe during the process. I remember once I used a sponge and a simple soap solution; the grease remained stubborn, and I had to redo the cleaning multiple times, leading to frustration and wasted time.
Remove Furniture and Cover Surroundings
Clear your workspace as much as possible. Use drop cloths or plastic sheeting to cover furniture, flooring, and nearby fixtures. Think of it like preparing a stage before a performance — you want everything out of the way to ensure a clean backdrop for your painting.
Scrape Off Loose Paint and Debris
Use a putty knife or a scraper to remove peeling or chipped paint. This prevents uneven surfaces and ensures better adhesion for the new coat. If you don’t remove loose paint, it can bubble and peel over time, ruining your efforts. In my last project, I neglected this step, and a few months later, chunks of paint started flaking off — a sight I wish I had prevented.
Thoroughly Clean the Walls
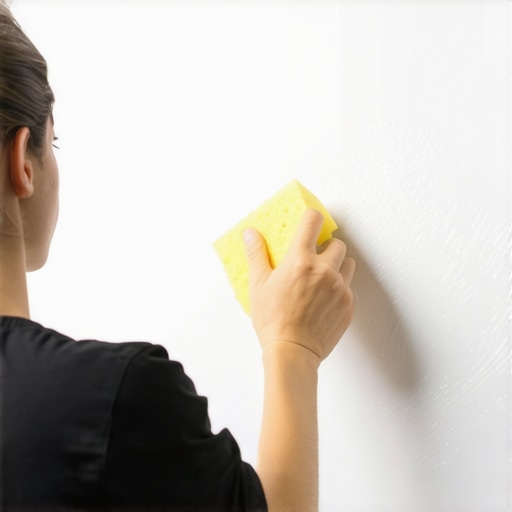
Mix warm water with TSP according to the package instructions. Dip a sponge or scrub brush into the solution and wipe the walls thoroughly, paying extra attention to greasy areas near stoves and sinks. Rinse with clean water afterward to remove any residue. This step is like giving your walls a deep scrub to remove all the grime and grease that could sabotage your paint’s grip.
Practical Tip: Test a Small Section First
Before cleaning the entire wall, test your solution on a small, inconspicuous area to ensure it doesn’t damage or discolor the paint. This is especially critical for older or delicate surfaces. In my experience, a small test prevented larger mishaps down the line, saving me a headaches and extra work.
Dry the Walls Completely
Allow walls to air dry thoroughly or use a dry cloth to speed up the process. Moisture can interfere with paint adhesion, leading to bubbles or peeling. I once hurried this step and ended up with streaks and uneven patches, which I had to sand and repaint later.
Final Touches and Inspection
After the walls are dry, inspect for any remaining grease, dust, or damages. Fill minor cracks or holes with appropriate filler, then sand smooth. Doing this prep work ensures a professional-looking finish and prolongs the life of your paint job.
By following these concrete steps, you’ll set a solid foundation for a quality paint job. Remember, thorough preparation transforms a mundane task into a rewarding project, giving your walls the best chance to look flawless for years to come.
 Many homeowners and even some professional painters get caught up in the basics of house painting but overlook the subtle complexities that determine a truly successful project. Contrary to popular belief, selecting the right paint color or the prettiest finish isn’t enough; understanding the nuances of preparation, surface compatibility, and advanced techniques can make all the difference. For example, a common myth is that any interior wall paint will do, but experts emphasize that surface type and environmental conditions heavily influence durability and appearance.
One of the most overlooked aspects is the impact of wall substrate porosity. Different materials—plaster, drywall, or old paint layers—absorb paint differently, leading to uneven finishes or peeling over time. Homeowners often skip spot-testing or fail to recognize that certain surfaces may require different primers or special preparation steps, which can cause costly mistakes down the line. A real oops involves applying high-gloss paint over matte finishes without proper sanding, resulting in visible streaks and patchiness, especially under varied lighting conditions. This mistake is easily avoided if you understand the importance of surface preparation and use appropriate techniques—something I learned through my own trial and error.
Why Is It Critical to Recognize Surface Variations Before Painting?
Recognizing surface differences is essential because it affects adhesion, color consistency, and longevity. For example, applying latex paint over oil-based paints without proper cleaning and primer can lead to peeling or bubbling. Studies, such as those summarized by the Painting and Decorating Contractors of America, highlight that surface preparation is where most failures originate and that neglecting it reduces a project’s lifespan significantly. Therefore, a key advanced tip is to conduct a porosity test—dampening a small area and observing absorption—to determine the right primer or surface treatment needed.
Don’t underestimate the power of surface compatibility; it’s the hidden factor that can make or break your professional look. For more tips on advanced local painting strategies, consider checking out this comprehensive guide. Have you ever fallen into this trap? Let me know in the comments.
Protecting your investment also means understanding environmental factors like humidity and temperature, which influence drying times and paint curing. For example, painting in a high-humidity environment can lead to longer drying times, trapping moisture and causing mold or mildew. Knowing how to adjust your approach—like using fan drying or choosing weather-appropriate paints—prevents these issues. I learned this the hard way after rushing a project during a rainy spell and ending up with a sticky, uneven finish. Today, I always check the weather forecast and select compatible paints to ensure a quality job that lasts.
In conclusion, mastering local painting involves more than surface prep and color selection. It requires a nuanced understanding of materials, environmental influences, and advanced techniques. If you’re keen on elevating your home’s appearance and durability, dive into resources like this ultimate guide to house painting. Remember, the difference between a good paint job and a professional one lies in attention to these subtle details. Want to learn more about boosting your home’s curb appeal? Explore this article on boosting your home’s value with expert painting strategies.
Achieving a professional and durable paint job isn’t just about choosing the right color; it’s equally about having the right tools and maintaining them properly over time. In my experience, investing in high-quality equipment elevates the quality of your work and saves you time and money in the long run. One indispensable tool I rely on is a high-precision paint sprayer for large surfaces. Unlike rollers, a sprayer delivers a smooth, even coat quickly, especially on textured or complex surfaces. I personally favor the Graco Magnum X5 for its portability and consistent flow, making it my go-to for residential projects. Proper cleaning after each use is crucial—it prevents clogging and extends the lifespan of your sprayer. Using warm water and a suitable cleaning solution, I clean my sprayer thoroughly, following the manufacturer’s instructions, which you can review in the official cleaning guide.
How do I maintain my painting tools over time?
Tools are an investment, and their longevity depends on regular maintenance. For brushes, I clean them immediately after each painting session using warm, soapy water for latex paints or mineral spirits for oil-based paints. I also wrap brushes in plastic wrap or store them in airtight containers to keep the bristles from drying out if I plan to use them again soon. For rollers, I rinse thoroughly and remove excess paint to prevent hardening or mold growth. Storing tools in a dry, covered space protects them from dust and moisture, ensuring they’re ready for your next project. Additionally, inspecting equipment before starting helps identify potential issues early—like worn-out nozzles or damaged bristles that can compromise your finish. Well-maintained tools not only improve your results but also make long-term projects more manageable.
Choosing the Right Equipment for Scaling Up
If you’re considering larger projects or scaling your home painting efforts, professional-grade tools become essential. Upgrading to larger capacity sprayers, such as airless models with higher PSI, enables faster coverage without sacrificing quality. When I moved onto exterior walls, I opted for the Wagner Control Pro 350 M, which handles thick paints and provides superior spray patterns. Scaling also involves planning for efficient cleanup and storage, so investing in durable, easy-to-clean accessories pays off. As the demand for long-lasting results increases, so does the importance of proven tools and techniques.
Where will painting technology go next?
Looking forward, innovations like automated spraying systems and smart paint mixers are poised to revolutionize the industry. These advancements promise greater precision and consistency, reducing human error and waste. As a DIY enthusiast or professional, staying updated with these trends and investing in future-proof tools will give you a competitive edge and ensure your work stands the test of time.
Maintain Your Equipment to Save Money and Improve Results
To keep your tools working smoothly, establish a routine of thorough cleaning and regular inspections. Properly maintained tools lead to cleaner edges, smoother finishes, and longer equipment lifespan. For detailed guidance on maintaining your painting arsenal, I recommend checking out expert advice from this resource. Don’t underestimate the power of good maintenance—try implementing a routine cleaning schedule today, so your tools always perform at their best and your projects yield professional results. Want to learn more about elevating your local painting efforts? Visit the local painting secrets page now.
What I Wish I Knew Before Starting My First Painting Job
One of the biggest lessons I learned is that seemingly small details, like surface porosity or environmental conditions, can make or break your painting results. I once painted over a wall without testing its absorption rate, only to find the paint peeling months later. Now, I always conduct a porosity test—dampening a small area to see how quickly it absorbs. This simple step saved me from costly mistakes and helped me select the right primer, ensuring durability and a flawless finish.
Why Cutting Corners On Wall Prep Is a Recipe for Disaster
I used to believe that a quick wipe with a damp cloth was enough to prep walls. That was until I experienced peeling paint after just a few weeks. I realized that grease, dust, and old paint residues require proper cleaning with a degreasing solution like TSP. Skipping this step may seem harmless initially but leads to bubbling and peeling down the line. Proper surface prep is your best investment for long-lasting paint jobs.
My Favorite Tools That Elevate My Painting Results
Investing in quality tools has transformed my approach. I swear by a professional-grade sprayer like the Graco Magnum X5 for even coats, especially on textured walls. Regular maintenance of brushes and rollers—cleaned immediately after use and stored in airtight containers—keeps my equipment in top shape, producing smoother finishes. For larger projects, I switch to airless sprayers to save time without sacrificing quality. These tools, combined with proper technique, make all the difference.
How Small Details Can Make Your Walls Look Pro
Sealing minor cracks and filling holes before painting can seem tedious but pays off with a polished result. Sanding smooth after applying filler ensures a seamless surface. During my projects, I learned that attention to these finishing touches prevents uneven patches and prolongs the life of your paint. Remember, perfection often lies in the details—taking that extra time elevates your work from average to professional-grade.
Your Turn to Make Walls Last and Shine
Armed with these insider secrets, you’re ready to tackle your next local painting project with confidence. Proper preparation, quality tools, and attention to detail will not only save you time and money but also give your walls a professional look that lasts years. Don’t let hidden mistakes sabotage your efforts—master the art of prep and finish like a pro. Ready to transform your space? Share your biggest wall painting challenges below, and let’s work through them together!”}#{