

It was a typical Saturday morning when I finally decided to give my bathroom a much-needed facelift. I scrubbed, primed, and painted the ceiling with high hopes of a crisp, clean look. But just a few weeks later, I looked up—and there it was again: mold creeping stubbornly across the surface. Frustration hit me hard. I’d thought that a fresh coat of paint would keep mold at bay, but it seemed I’d fallen for a common misconception. If you’ve faced this baffling problem, you’re not alone. Many homeowners believe that painting over mold or damp areas simply hides the issue, when in reality, it often makes matters worse.
Why Does Mold Return After Painting? The Hidden Reasons
Are you genuinely protected, or just covering up the problem?
Many of us assume that repainting a bathroom ceiling is enough to solve mold issues. The truth is, mold thrives in humid environments—especially where moisture accumulates and isn’t adequately addressed. Early on, I made the mistake of thinking that applying a mold-resistant primer or specialized paint would do the trick. But without tackling the root causes—like poor ventilation or hidden leaks—that mold will keep coming back. According to experts, improper surface preparation and ignoring underlying moisture issues are the main culprits behind recurring mold problems. For a comprehensive approach, it’s crucial to identify and fix these underlying problems before painting over them. You can find more tips on effective moisture control in our article on [local painting secrets](https://elitepainterpro.com/local-painting-secrets-elevate-your-space-effortlessly).
If you’re tired of redoing the same painting every few years, keep reading. I’ll share the exact steps I took to finally get mold under control—and how you can do the same. Because let’s be honest: a moldy ceiling not only ruins your bathroom’s look but also poses health risks. It’s time to get to the root of the issue and make your space truly fresh and safe.
Thorough Surface Preparation Is Key to Long-Lasting Results
Once you’ve identified the source of moisture, start by removing any loose or flaky paint using a putty knife or scraper. Wear a dust mask to prevent inhaling mold spores. Next, wash the area with a solution of bleach and water—one part bleach to three parts water—to kill residual mold. Rinse thoroughly with clean water and let it dry completely. I recall spending an afternoon meticulously scrubbing my bathroom ceiling; the difference in paint adhesion was remarkable afterward.
Address Moisture and Ventilation Instantly
Before repainting, fix leaks, and improve airflow. Install exhaust fans or dehumidifiers to reduce humidity levels below 50%. Keep windows open during and after painting for several days. When I upgraded my bathroom ventilation, I noticed a significant decrease in mold recurrence, saving me from future repainting headaches.
Choose the Right Paint for Damp Areas
Opt for high-quality, mold-resistant paints designed specifically for bathrooms and kitchens. These paints contain antimicrobial agents that inhibit mold growth. Apply a primer suitable for humid environments—this creates a sealed surface, preventing moisture penetration that causes mold. I learned from local painting secrets that using proper primer and paint combination is critical for durable results.
Apply Multiple Coats Properly
Paint with at least two coats, allowing adequate drying time between coats. Use a roller for flat surfaces to achieve an even finish and minimize drips. For angles and corners, use a brush to ensure full coverage. I remember my first attempt, rushing through the coats, which led to patchy coverage. Taking my time with each layer made all the difference in durability.
Implement Ongoing Moisture Control Measures
After painting, continue monitoring humidity and fix leaks promptly. Use mold-proof paint on seams and corners, and regularly clean surfaces with mold inhibitors. During my renovation, I applied mold-resistant paint to the grout lines of my shower; it’s been five years, and no mold has returned.
For more detailed techniques, check out mastering expert painting tips that can help you achieve a professional finish and prevent mold from persisting.
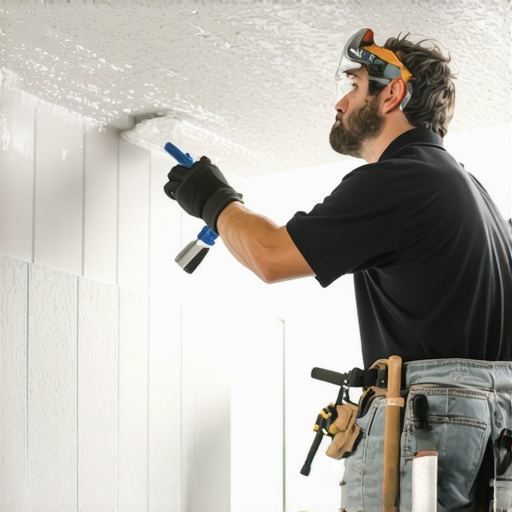 Many homeowners assume that choosing the brightest or darkest paint color will be enough to achieve a stunning look, but the truth is, color perception varies dramatically under different lighting conditions. This misconception can lead to dissatisfaction with your final paint job. Experts recommend testing paint samples in various rooms and times of day to understand how how light impacts color. For example, a shade that looks perfect in your store lighting might appear entirely different at sunset. To avoid costly repainting, it’s essential to consider and test lighting effects beforehand, as highlighted in our guide on [transforming spaces with local painting solutions](https://elitepainterpro.com/transforming-spaces-local-painting-solutions-for-every-budget).Achieving durable, professional-quality house painting hinges on the right tools and consistent maintenance practices. One essential piece of equipment I rely on is a high-quality spray painter like the Wagner Control Pro 130, which allows for even application over large surfaces and minimizes brush strokes. Using a sprayer not only accelerates the process but ensures a more uniform coating—key for long-term protection especially on textured or previously painted surfaces. Additionally, I recommend investing in a digital moisture meter such as the Protimeter Aquant; this device helps me precisely gauge moisture content in walls or wood, preventing early paint failure caused by hidden dampness.
In terms of software, I utilize project management tools like Trello to organize my painting schedule and checklist, ensuring each step—from surface prep to final touch-ups—is meticulously documented. This discipline pays off in consistency and quality, allowing for predictable long-term results. According to industry experts, routine surface inspections with these tools can significantly extend the lifespan of your paint job.
Looking towards the future, trends in paint technology are evolving rapidly. Eco-friendly, low-VOC paints combined with smart application devices are gaining popularity, promising even better durability and indoor air quality. Embracing these innovations now can set your projects ahead of the curve.
How do I keep my house paint in top shape over time?
Proper maintenance is straightforward but vital. Regularly cleaning walls with a mild detergent and inspecting for early signs of damage or moisture ingress can prevent costly fixes later. Applying a high-quality sealant or touch-up paint in areas prone to wear—like door frames and trim—can also maintain the integrity of your finish. For larger projects or tricky areas, I highly recommend using a professional-grade primer like Zinsser Bulls Eye 1-2-3, which provides excellent adhesion and moisture resistance, ensuring your paint stays fresh longer. For more detailed guidance on maintaining your paintwork, visit [local painting secrets](https://elitepainterpro.com/local-painting-secrets-elevate-your-space-effortlessly).
By combining the right tools—such as sprayers and moisture meters—with disciplined maintenance routines, you’re setting your house up for a long-lasting, beautiful finish. Don’t skimp on quality equipment; investing in these dedicated tools not only saves time but also reduces the need for frequent repainting, ultimately saving you money and effort. Try incorporating a digital moisture meter into your next project and notice the difference it makes in preventing moisture-related issues before they start.
The Hardest Lesson I Learned About house painting,painting,local painting
Patience and thorough preparation are essential—rushing to cover mold without fixing underlying issues often results in recurring problems. I once believed that a fresh coat of mold-resistant paint was enough, but I soon realized that addressing ventilation and moisture sources makes all the difference. Remember, surface cleaning alone won’t keep mold at bay if humidity continues to rise.
3 Myths About house painting,painting,local painting That Held Me Back
One common misconception is that all paints are equally effective in damp areas. In reality, choosing the right mold-resistant, high-quality paint designed for bathrooms is crucial. Another myth is that you can skip surface prep; in my experience, meticulous cleaning and correct primer application are the foundation for lasting results. Lastly, some believe mold is a cosmetic issue—it’s also a health concern that demands proper attention.
What Experts Won’t Tell You About house painting,painting,local painting
Professionals often emphasize the importance of moisture control equipment like dehumidifiers over just paint selection. I learned that even the best paint will fail if moisture isn’t managed. Experts also recommend ongoing maintenance, inspecting for leaks, and monitoring humidity levels—simple steps that significantly prolong your paint job’s lifespan. For comprehensive guidance, check out local painting secrets.
My Essential Toolkit for house painting,painting,local painting
Investing in a reliable digital moisture meter like the Protimeter Aquant changed my approach to painting. It helps detect hidden dampness before I start, preventing future issues. A high-quality spray painter like the Wagner Control Pro 130 ensures even coating, especially on textured surfaces. These tools have empowered me to achieve professional-looking results, saving time and effort.
Books That Changed How I View house painting,painting,local painting
Reading master the art of house painting with these pro tips broadened my understanding of finishing techniques and the importance of proper surface prep. Additionally, books on moisture management and eco-friendly paints inspired me to choose sustainable options that last longer and are healthier for my family. Continuous learning is a cornerstone of successful house painting.
Your Turn to Try
If you’ve faced similar struggles with recurring mold or paint failures, I encourage you to reflect on your approach and consider the lessons learned. Investing in the right tools, addressing moisture issues proactively, and choosing high-quality paints can transform your experience and results. Your home deserves the best care, and with patience and knowledge, you can achieve truly lasting beauty.