

Ever stood back after finishing a fresh coat of paint only to notice a shiny streak or thick drip that just won’t go away? I remember the first time I painted my living room wall, thinking I had everything perfectly smooth—then, surprise! A stubborn paint run stared back at me the next day. It was frustrating. That glossy, uneven patch kept drawing my eye, ruining all my hard work.
But here’s the thing: those paint runs aren’t the end of the world, even when the paint has dried. With a little patience and the right approach, you can fix dried paint runs without redoing the entire project. And trust me, I’ve been there—learning by trial and error before discovering some workable solutions.
Today, I’m going to share practical tips from my own experience on how to remedy those ugly drips and streaks after your paint has set. Whether you’re tackling a new wall or touching up a job gone awry, these techniques will help you achieve a smooth, professional-looking finish. No more staring at imperfections that make your space feel less than finished.
Imagine transforming that thick, dried drip into an invisible repair—or better yet, avoiding the need to repaint altogether. Small adjustments can have a huge impact, saving you both money and time. Plus, I’ll cover common pitfalls, such as rushing the process or using the wrong tools, which can exacerbate the problem.
If you’ve ever faced a stubborn paint run after it’s dried, you’re not alone. Many homeowners and DIY enthusiasts find themselves stuck on how to fix it quickly. Well, let’s dive into the steps that will help you save your paint job—without tearing down your walls or calling in a pro.
Why Fixing Paint Runs After Dried Is Still Worth It
Paint runs and drips may seem like small issues, but they can seriously undermine your results and confidence in your handiwork. The good news? There are effective ways to fix them, and doing so properly maintains the integrity of your finished look. Plus, knowing how to handle these imperfections boosts your skills and makes future projects less daunting.
A mistake I often made early on was trying to sand down dried paint prematurely, which only caused more smudges or uneven patches. I learned that patience is key—allowing the paint to cure fully and selecting the right tools makes all the difference. For a more comprehensive understanding of proper painting techniques, I recommend checking out this insightful resource on mastering the art of house painting with tips from pros.
Scrape Off Excess Paint Carefully
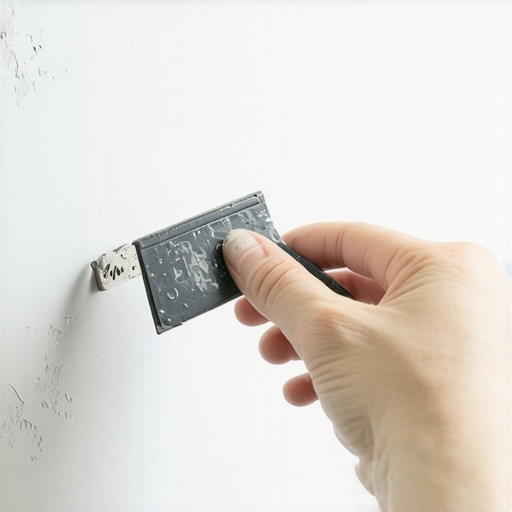
Start by gently removing the thickest parts of the dried paint run with a razor blade or paint scraper. I once tried scraping without a gentle touch, which gouged the wall — so proceed slowly and with patience. This step prevents subsequent sanding from becoming overly tedious.
Sand Smooth With Fine Grit
After removing the bulk, use fine-grit sandpaper (around 220 grit) to smooth the edges of the repair area. I recommend using a sanding block for better control. When I first tried this method, I noticed that sanding too aggressively created uneven patches, so focus on feathering the edges seamlessly into the surrounding surface.
Apply a Thin Layer of Primer
Use a high-quality primer on the sanded area to seal the surface and improve paint adhesion. A mistake I made was skipping this step, which led to uneven color. Primer creates a uniform base, making the final touch-up blend seamlessly.
Repaint the Area Precisely
Select a small brush or roller that matches the existing finish. Lightly apply thin coats, letting each dry thoroughly before the next. I found that multiple thin coats produce a smoother finish than a single heavy application, especially if you’re working on a wall with a matte or flat finish. For detailed tips on matching finishes, check out this guide on paint finishes.
Blend the Repair for a Seamless Result
Once the paint fully dries, lightly feather the edges with a fine sanding sponge, then gently reapply paint if necessary. When I repaired a stubborn drip on my living room wall, this blending technique made the patch almost invisible. Using a small brush to feather out the paint helps achieve that professional, smooth look.
Additional Tips for Success
Always test your paint color on a hidden section first to ensure perfect matching. If the color appears slightly off, adjust with a small dab of a slightly darker or lighter shade. Also, work in natural light if possible, as it reveals imperfections more clearly and helps you monitor drying accurately. For more advanced tricks, don’t miss pro painting tips here.
 Many DIY painters operate under misconceptions that can lead to subpar results or costly mistakes. One prevalent myth is that higher-quality paint automatically guarantees a flawless finish; however, without proper surface preparation and technique, even premium paints can produce uneven coats or uneven gloss. Another misconception is that thicker coats save time—spreading paint too heavily often causes drips, longer drying times, and poor adhesion, increasing the risk of peeling later. Focusing solely on color matching instead of understanding underlying paints and primers can also cause mismatched finishes or uneven color, especially when transitioning between different sheen levels or types of paint. An advanced mistake I’ve seen in practice is neglecting environmental factors like temperature and humidity, which significantly influence drying and curing, as confirmed by recent studies on paint chemistry published in the Journal of Coatings Technology. For those seeking a truly professional look, mastering the nuances—such as feathering edges, proper brush techniques, and surface prep—makes all the difference. Remember to avoid rushing through preparation steps or applying paint under unsuitable weather conditions; these small errors can compound into a visible, lasting flaw. Curious about how to refine your approach? Explore our comprehensive guide to [painting your home top local painting strategies revealed](https://elitepainterpro.com/painting-your-home-top-local-painting-strategies-revealed) for expert insights. Always question common beliefs and consider the science behind your methods. Have you ever fallen into this trap? Let me know in the comments.Maintaining high-quality results in house painting requires the right tools and a strategic approach. My personal experience has shown that investing in specialized equipment can save you time and ensure a professional finish. For example, a high-quality paint edger with adjustable rollers helps achieve crisp, clean lines along corners and trim—something I discovered during a particularly detailed project in my living room. Using a small, angled brush also makes touch-ups more precise, especially in tight spaces where rollers can’t reach.
Another essential tool I rely on is a variable speed electric sander; it allows me to smooth out imperfections on previously painted surfaces or prep new drywall efficiently. I’ve learned that choosing the right grit—typically 220 for fine sanding—prevents damage to the wall while providing an ideal surface for paint adhesion. For larger projects, a paint sprayer with adjustable pressure control delivers an even coat faster than traditional brushes or rollers, provided you practice proper technique to avoid overspray.
Software-wise, I utilize color-matching apps to ensure my touch-ups blend seamlessly with existing paint. These digital tools analyze the current wall color and suggest the closest matches, which helps prevent noticeable discrepancies. As technology advances, I predict that integrating augmented reality (AR) into color selection and planning will become commonplace, making it even easier to visualize results before starting.
How do I maintain my tools for long-term use? Proper maintenance extends the lifespan of your painting tools and guarantees consistent performance. Cleaning brushes and rollers immediately after each use with warm water and mild soap prevents dried paint from hardening and damaging the fibers. For oil-based paints, use mineral spirits or paint thinner, but always follow safety guidelines and ventilate the area.
Storing tools properly is equally important; hang brushes or keep them in airtight containers to prevent drying out. Regularly inspecting your equipment for signs of wear, such as frayed brushes or clogged sprayers, allows for timely replacements that avoid uneven application or splatter.
Looking ahead, innovative tools like cordless, battery-powered sprayers with smart controls are making some traditional methods obsolete. These advancements make large-scale exterior painting faster and more accessible to DIY enthusiasts. To explore these emerging options, visit our dedicated page on [local painting solutions](https://elitepainterpro.com/local-painting-secrets-elevate-your-space-effortlessly) and consider upgrading your toolkit.
One tip I highly recommend trying is using a digital color-matching app before starting touch-ups or repainting an entire wall. This ensures your repairs blend perfectly, saving you from redoing work later. Ready to elevate your DIY game? Experiment with one of these tools or techniques in your next project and see the difference it makes.
The Hardest Lesson I Learned About house painting,local painting,painting
One of my biggest surprises was realizing that rushing the surface prep leads to imperfections that aren’t easily fixable later. Patience in sanding and cleaning up before painting truly pays off, a lesson I wish I grasped sooner.
3 Myths About house painting,local painting,painting That Held Me Back
I used to believe that multiple coats are always necessary, but I learned that proper technique and high-quality tools can reduce the number of coats needed, saving time and paint.
What Experts Won’t Tell You About house painting,local painting,painting
Many professionals keep the secret that environmental factors like humidity and temperature can make or break your project. Waiting for ideal conditions ensures better adhesion and durability.
My Essential Toolkit for house painting,local painting,painting
From a high-grade paint sprayer to precise edge tape, my tools have a direct impact on quality. Investing in these tools, like a reliable electric sander and digital color matcher, raised my game drastically.
Books That Changed How I View house painting,local painting,painting
One book I highly recommend is “The Complete Guide to House Painting”—it deepened my understanding of finishes, sheens, and prep, turning me from amateur to confident homeowner.
Where to Go from Here
If you’re eager to elevate your painting skills, check out these local painting strategies for inspiration and expert tips that will help you achieve stunning results for your next project.
Bright Future: Take Action Now
Embracing these lessons and resources can transform your home, making it more beautiful and valuable. Don’t wait for the perfect moment—start applying what you’ve learned today and see the difference it makes in your space.