

I remember the first time I tried to strip old paint from my beloved vintage bathroom tiles. I was eager to freshen things up, wielding my scraper with gusto. But suddenly, a strange, bitter chemical smell hit me—something off, something alarming. That was my lightbulb moment: I had no idea whether the stubborn paint I was about to remove contained lead. It struck me then how crucial it is to identify lead paint before any scraping or renovation starts, not just for the health of my family but also for peace of mind.
The Hidden Danger Underneath Your Old Paint Jobs
If you’re like I was, you probably assume that the paint in your older home is just outdated, maybe needing a fresh coat for aesthetic reasons. But that assumption can be a dangerous game — especially if lead-based paint is lurking beneath the surface. According to the EPA, homes built before 1978 are most likely to contain lead paint, and peeling or chipping paint increases the risk of lead dust becoming a health hazard. That’s why, before you pick up that scraper, it’s essential to determine whether your walls are hiding potential danger.
Is Lead Paint Actually Worth the Hype?
Early on, I made the mistake of dismissing the importance of proper testing, thinking it was just an unnecessary hassle. Little did I know, disturbing lead paint without precautions can lead to severe health issues — especially for children, pregnant women, and pets. Studies show that even small amounts of lead exposure can cause cognitive impairments and behavioral problems, as highlighted by the CDC. So, I ask you: Have you checked if your home’s paint contains lead? If in doubt, a quick test can save you from future health scares and costly remediation.
Start with a Clean Canvas
Before you break out the brushes, ensure your surfaces are spotless. Remove dust, dirt, and any grease with a damp cloth or mild detergent solution. Think of it like preparing a piece of wood before staining—nothing will adhere properly if there’s grime or loose particles. When I painted my living room last year, I spent extra time cleaning the walls, and the smooth finish afterward was well worth the effort.
Sand and Repair for a Smooth Finish
Next, sand rough patches or peeling areas with fine-grit sandpaper. Fill holes or cracks with spackle, then sand the repairs flush with the wall. This step is akin to leveling a bumpy road before laying new asphalt—skipping it results in a bumpy surface that ruins your paint job. Once, I used an orbital sander to expedite the process, and it created a perfectly even surface ready for primer.
Prime for Longevity and Color Accuracy
Applying primer is like laying a foundation for a house—essential for durability and true color. Use a stain-blocking primer if there are water stains or dark patches. For most walls, a latex primer will suffice. During my project, I chose a high-quality primer recommended by local painting experts, which made the final color pop and prevented bleed-through.
Choose the Right Tools and Paint
Use quality brushes and rollers suited for your type of paint and surface. For smooth finish walls, a 3/8-inch nap roller works well; for textured surfaces, opt for a thicker nap. Also, select a paint with the desired sheen—matte, eggshell, satin, semi-gloss, or gloss—based on the room’s function and lighting. When I painted my bathroom, I picked a satin finish to withstand moisture and cleaning.
Master the Painting Technique
Apply paint in W-shaped strokes, filling in gaps without lifting the brush. Keep a wet edge to avoid lap marks. Use a brush to cut-in at edges and corners before rolling the main surfaces. I once mistakenly painted a large wall without cutting in first, which led to uneven edges. Learning to ‘cut in’ properly saved me hours of touch-up work.
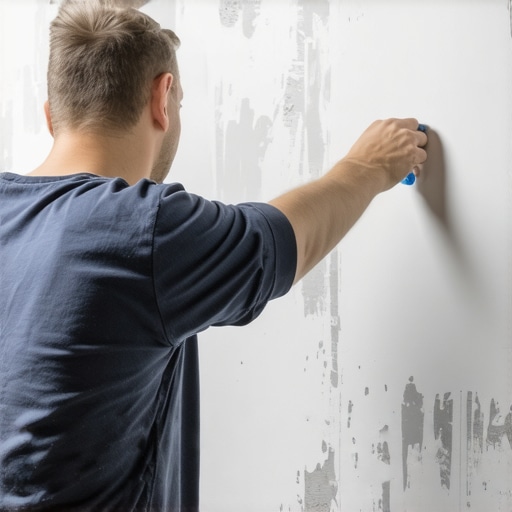
This image illustrates the correct technique for cutting-in at walls’ edges and corners, helping you achieve professional results.
Work Systematically and Maintain the Area
Paint one wall at a time, from top to bottom, and let each coat dry thoroughly before applying the next. Use painter’s tape to protect trim and adjacent surfaces, removing it at the right time to prevent peeling paint. During my project, I secured masking tape carefully and removed it as soon as the paint was dry, leaving crisp lines without damage. Proper planning and clean-up keep your workspace neat and your paint job flawless.
Final Touches and Clean-Up
Once painting is complete, inspect for drips or uneven spots and touch up as needed. Clean brushes and rollers immediately after use—warm water for latex paints or solvent for oil-based paints—to prolong their lifespan. Properly sealing and storing leftover paint in a cool, dry place prevents skinning over and saves future touch-ups. I learned this the hard way after trying to use dried paint, only to find it unusable—saving money and effort by cleaning tools promptly is key.
While many DIY enthusiasts believe that choosing the right color or applying an extra coat guarantees a perfect finish, expert painters know there’s more beneath the surface. One common misconception is that surface preparation is just a preliminary step—that once you’ve painted, the job is done. In reality, neglecting nuanced details during the preparation and application process can lead to issues like peeling, uneven texture, or color fading over time. As I discovered through years of experience, mastering these subtle aspects elevates your painting from amateur to professional-quality work.
For instance, the importance of primer is vastly underestimated. Many believe that using a tinted or high-quality paint alone is enough. However, skipping or choosing an inappropriate primer can cause bleed-through, staining, or uneven finish, especially when transitioning between different colors or finishes. A well-applied primer creates a uniform surface, enhancing adhesion and longevity. Local painting experts emphasize this => primer’s role in achieving superb results.
Is Your Technique Causing Paint Failures?
Advanced painters understand that even technique influences durability. For example, applying paint in thick layers or over a surface that hasn’t been adequately cleaned can trap air bubbles or dust. These imperfections might not be visible immediately but will surface as peeling or bubbling later. Also, the type of brush or roller nap used impacts texture and coverage; using low-quality tools may seem like a saving but ultimately compromise the finish. To truly master your craft, pay attention to such details and avoid common pitfalls—your walls will thank you.
Wanna take your skills further? Improving your understanding of advanced painting techniques can be transformative. Remember, mistakes like applying paint in the wrong weather conditions or ignoring surface moisture can backfire significantly. For example, painting on a humid day traps moisture beneath the paint, leading to blistering and bubbling, a problem I encountered firsthand. It’s crucial to check humidity levels and temperature before starting a project. Reading the full guide to house painting best practices can help prevent these costly errors.
Maintaining a high-quality paint finish over time requires the right tools and consistent care. I personally swear by using a high-grade electric orbital sander with variable speed controls, like the Fein MultiMaster, because it offers precise, gentle sanding that prevents damage to delicate surfaces and ensures smooth recoats. Pairing this with a durable, tack cloth helps remove stubborn dust particles, ensuring optimal adhesion for future layers. For edge work, I rely on a corner-reach paint edger—it’s a game-changer for quick, clean lines in tight spaces, minimizing hand fatigue and effort. These tools, combined with quality paints like Benjamin Moore Aura or Sherwin-Williams Duration, help me achieve a flawless, long-lasting finish that withstands the test of time.
Looking ahead, I predict smart tools and advanced coatings will become even more integrated into the painting process, allowing for quicker applications and increased durability. For example, laser-guided spray systems and moisture-measuring devices could revolutionize how we prep and paint, reducing mistakes and boosting efficiency. Staying updated with the latest innovations will be crucial for professionals and DIYers alike.
How do I keep my paint job looking fresh over years?
Regular maintenance is key. Inspect your walls periodically for chips or fading, and touch up small areas immediately with matching paint. Using a high-quality sealant or protective topcoat can also extend the life of your paint. Moreover, cleaning your walls gently with a soft sponge and mild detergent prevents buildup of dirt and grime, which can dull the finish and accelerate wear. Adopting these habits ensures your investment in house painting remains vibrant for years to come. For more professional strategies, check out local painting tips to boost your home’s aesthetic and value.
Don’t forget, proper tools are just part of the equation. Consistent upkeep, timely repairs, and using the right protective finishes will keep your home looking its best longer. For expert advice on long-term results, explore future-proof your house paint strategies.
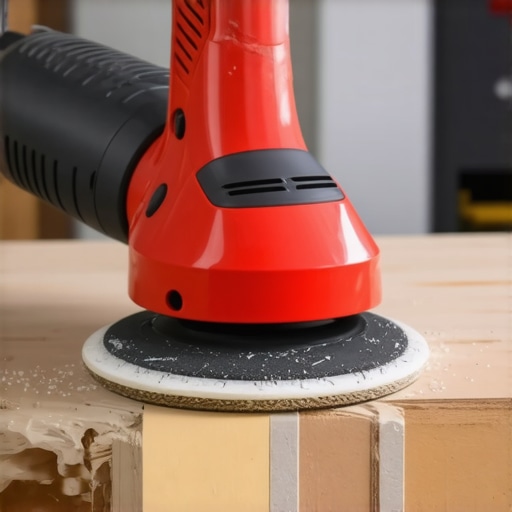
This image showcases a professional-grade orbital sander in use, highlighting how precise tools contribute to perfect, durable finishes.
Lessons Painting Can’t Teach You in Books
One of the most profound insights I’ve gained from years of DIY painting is that preparation and attention to detail often make the biggest difference—not just in how your walls look, but in how long they last. I once rushed through a project, skipping priming, only to find the paint peeling within months. That experience taught me that patience and proper steps can save you time and money down the line.
Another lightbulb moment was realizing that tools matter just as much as techniques. Using high-quality brushes and rollers, even for small projects, created a finish that looked professional and durable. Skimping on tools might save a few dollars initially, but the final result suffers, and you’ll end up redoing the work sooner than you’d like.
Finally, understanding the environment before painting—like humidity and temperature—can prevent common mistakes like bubbling or uneven drying. I recall attempting to paint on a humid day, only to have my efforts ruined by moisture beneath the surface. Now, I always check weather conditions before starting a new coat, ensuring a flawless finish that stands the test of time.
Tools and Resources that Transformed My Approach
For anyone serious about mastering home painting, a few trusted tools and sources have been game-changers for me. First, I rely on a quality electric orbital sander—like the Fein MultiMaster—which makes surface preparation quick, safe, and effective. Pairing this with a tack cloth ensures dust is thoroughly eliminated, providing a perfect base for paint.
When it comes to reading material, local painting strategies and guides have filled in many gaps in my knowledge, especially about choosing the right primer and paint finishes for different surfaces. These guides help me adapt best practices to my home’s unique needs, boosting the durability and appearance of my work.
I’ve also found that online communities and tutorials on house painting tips provide fresh insights and motivation. Sharing successes and mistakes with fellow DIYers keeps me inspired and constantly learning, turning house painting from a chore into a satisfying craft.
Your Turn to Bring Color and Confidence
Remember, every home has its story, and your painting efforts are a part of that narrative. Whether you’re tackling a small room or a full exterior overhaul, embracing proper preparation, investing in quality tools, and leveraging expert guides will elevate your results beyond the DIY average. Don’t hesitate to experiment and learn—each project builds your skills and confidence.
What’s the biggest lesson you’ve learned so far about house painting? Share your stories below—I’d love to hear about your experiences and tips for fellow enthusiasts eager to improve their craft.