

It was a Sunday afternoon when I finally decided to tackle my living room’s old oak door. I kept staring at its deep, swirly grain pattern, which seemed to mock my efforts. No matter how many coats of paint I applied, the surface looked uneven, streaky, and frankly, disappointing. I had this lightbulb moment—what I thought would be a simple weekend project turned into a frustrating puzzle of failed techniques and uneven finishes. If you’ve faced this struggle, you’re not alone. Many homeowners and DIY enthusiasts grapple with achieving that perfect, smooth finish on heavily grained oak surfaces.
Why Getting a Smooth Finish on Heavy-Grain Oak Can Be Tricky
The unique challenge with heavily grained oak lies in its open pores and prominent texture. Without proper preparation and techniques, paint or stain can sink into the grain or create uneven layers, ruining the overall look. Early on, I made a classic mistake—skipping the right primer—thinking that just a couple of coats would do the trick. Spoiler alert: it didn’t. The paint bled into the grain, highlighting every flaw and leaving me with a finish that looked more rustic than sleek. That experience taught me a vital lesson: understanding the nature of oak and choosing the right process makes all the difference.
For those of you wondering whether a perfect finish is worth the extra effort, I promise it is. It can transform a room and boost your home’s overall appeal. Don’t let that grain intimidate you; with a few strategic steps, you can achieve a professional-looking, smooth surface that lasts. Curious how? Let’s get into the practical, proven methods that turned my project around and can do the same for you. If you’re interested in elevating your space effortlessly, check out our [local painting secrets](https://elitepainterpro.com/local-painting-secrets-elevate-your-space-effortlessly) to make every project a success.
Is It Really Possible to Get a Flawless Finish on Heavy Grain Oak?
Early mistakes taught me that skipping proper preparation was a quick route to disappointment. For example, I used cheap primer and applied paint directly onto the raw wood. The result? Bleeding and uneven texture. That’s when I realized that paying attention to primer quality and application makes all the difference. To truly achieve that smooth, even look, you need to respect the grain—filling, sealing, and patiently building up layers. Trust me, the satisfaction of seeing a sleek, uniform surface after struggling with the same problem for years is worth every minute of extra effort. For more tips on transforming spaces with expert painting strategies, visit our guide on [top local painting strategies](https://elitepainterpro.com/painting-your-home-top-local-painting-strategies-revealed). Now, let’s dive into the step-by-step process that turned my project — and can do the same for you.
Sand and Prepare for the Best Results
Begin by sanding the oak surface with a medium-grit sandpaper (around 120 grit), mimicking a gentle scuffing process like erasing a marker. This helps open the grain slightly, allowing primer and paint to adhere firmly. I recall spending an afternoon on a door, going slow over every groove, ensuring no area was missed. After sanding, sweep off dust with a vacuum or tack cloth. Skipping this leads to a gritty finish, much like trying to paint over a dusty countertop—a recipe for unevenness.
Apply a Grain-Filling Primer for Smoothness
Select the Right Primer
Opt for a high-quality, stain-blocking primer formulated for hardwoods. A popular choice is a shellac-based primer, which effectively seals the open pores of oak. Think of it as laying a smooth base coat—like laying down a fresh sheet of paper before drawing. When I used shellac primer on my project, the grain disappeared under the first coat, making subsequent layers much smoother.
Techniques for Application
Use a brush or roller suited for primers. For textured oak surfaces, a foam roller can help press the primer into grooves. Work in thin, even coats, avoiding drips and pooling. Remember, patience here saves you from compounded issues later. I learned this when a thicker coat led to runs, and I had to sand it back—wasting time and risking uneven coverage. Allow the primer to dry thoroughly, following the manufacturer’s instructions, usually around 2-4 hours.
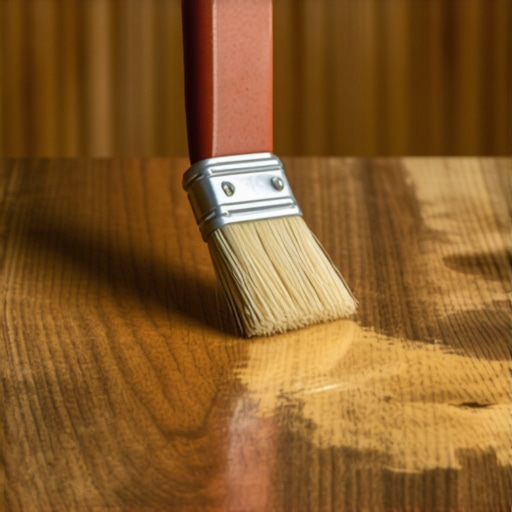
Seal the Grain with a Quality Sanding Sealer
After priming, lightly sand the surface with fine-grit sandpaper (220 grit). This step smooths out any brush strokes and furrows, preparing for the topcoat. It’s like buffing a car to bring out that mirror shine. Employ a light touch to avoid sanding away the primer. I used a block sander for better control, resulting in a glass-smooth finish that made detailed grains less noticeable—almost like the surface was transformed from rustic to refined.
Build Up Layers with the Right Paint Technique
Choose a semi-gloss or satin finish paint suitable for woodwork. Use a high-quality brush or a microfiber roller for even application. Apply in thin coats, working with the grain patterns without forcing the paint into the grooves. I applied three light coats in my project, allowing proper drying between each. This gradual layering prevents paint sagging or uneven textures, much like layering thin coats of makeup to avoid clumping.
Finish with a Clear Protective Coat
Once satisfied with coverage, seal the surface using a clear polyurethane or polycrylic suitable for wood. Lightly sand after the final coat to eliminate any imperfections. This provides durability and enhances the smoothness. Remember, a good finish not only looks better but also lasts longer, especially on surfaces exposed to wear. Think of it as giving your oak a suit of armor—protecting it from future battles like knocks and scratches.
When it comes to local house painting, many homeowners believe they just need to pick the right color and apply a couple of coats for a flawless finish. However, as an experienced painter, I can tell you that there’s a complex layer of nuances that most amateurs and even some professionals tend to miss. These subtleties can make the difference between a paint job that looks good from a distance and one that stands the test of time with a stunning, durable finish.
One common misconception is that choosing high-quality paint automatically guarantees a perfect result. While quality paint is important, the real secret lies in preparation and understanding the paint’s chemistry. For example, many overlook temperature and humidity conditions during application. Painting in high humidity or extreme temperatures can cause the paint to dry unevenly, leading to visible brush marks or bubbling — issues that ruin the overall appearance and longevity of your work.
Another often-ignored detail is the importance of proper surface cleaning and priming. Skipping this step might save time initially, but it can cause adhesion problems and premature peeling. Moreover, the commonly held belief that primer is optional is outdated; in fact, primer stimulates better adhesion, provides a uniform base, and can even block stains from showing through your paint layer.
Are Homeowners Setting Themselves Up For Failure With Oversimplified Expectations?
Many assume that applying multiple coats is enough to fix underlying issues like uneven surfaces or absorption differences. The truth is, without meticulous sanding, filling cracks, and ensuring surface uniformity beforehand, your final finish will appear patchy and rough. Research by the Painting and Decorating Contractors of America (PDCA) emphasizes that proper surface preparation can improve paint lifespan by up to 50%.
Moreover, there’s a hidden trap in the choice of tools—brushes versus rollers versus sprayers. Each has its own nuances and最佳实践. For instance, using a roller for detailed edges can result in uneven coverage; in such cases, brushes or sprayers might be more appropriate depending on the project specifics. Failing to understand these nuances often leads to frustration and subpar results. For an in-depth guide on mastering these skills, check out our article on mastering the art of house painting.
In addition, technique matters. Applying paint too thickly, neglecting to back-brush, or overloading your roller can create drips, roller marks, and uneven textures. These mistakes often seem minor but can compromise the entire look. Advanced painters recommend investing time in learning proper application techniques—like consistent, overlapping strokes and maintaining correct pressure—to ensure smooth, professional results. If you’re interested in elevating your skills, our latest painting ideas can provide inspiration and practical tips.
Finally, don’t underestimate the importance of finishing touches. Sealing, clear-coating, and carefully inspecting your work can prevent minor flaws from turning into glaring defects. It’s the difference between a good paint job and a truly professional one. Remember, refinements often make the most significant visual impact and ensure your handiwork lasts longer.
Have you ever fallen into this trap? Let me know in the comments, and share your experiences or questions about the nuances of local house painting. The devil is truly in the details, and mastering these can transform your space from average to exceptional.Maintaining your house’s paint job is crucial for long-term beauty and durability. Investing in the right tools can make ongoing care easier and more effective. For example, a high-quality paint sprayer like the Wagner Flexio 590 allows for quick touch-ups and re-coats, especially on textured surfaces. I personally prefer this model because it provides even coverage without overspray, saving time and reducing mess. Additionally, a telescoping extension pole enables you to reach high spots without the need for ladders, which minimizes risk and effort. I use the telescoping pole from Wooster, as its lightweight aluminum design offers durability and ease of handling over prolonged periods.
Regular cleaning tools are equally important. A microfiber dusting cloth combined with a gentle cleaning solution helps keep painted surfaces looking fresh without damaging the finish. I recommend routinely wiping down exterior siding and trim to prevent dirt buildup, which can lead to premature paint aging. When it comes to cleaning brushes and rollers used for touch-ups, soak them in a solvent appropriate for your paint type—water for latex paints or mineral spirits for oil-based finishes—and store them in sealed containers to prolong their usability.
Predicting future trends, I believe smart painting tools will integrate more digital features, such as app-controlled sprayers and sensors that monitor paint thickness and drying progress, making maintenance even more precise.
How do I maintain my paint over time?
Establishing a regular inspection routine can catch issues early before they become costly repairs. For exterior surfaces, check annually for signs of peeling, cracking, or UV damage. Addressing minor problems promptly by cleaning and touch-up prevents the need for complete repainting. For interior walls, dusting and wiping spills immediately preserve the paint’s integrity. Having a maintenance toolkit ready—comprising a good scraper, filler, paintbrushes, and the right primer—means you can handle small repairs without professional help. To discover more advanced tips on extending the life of your paint, visit our [local painting secrets](https://elitepainterpro.com/local-painting-secrets-elevate-your-space-effortlessly).
By selecting the appropriate tools and establishing a diligent maintenance routine, you ensure your investment in quality paint continues to deliver stunning results for years to come. Incorporate these strategies into your regular home care, and you’ll find that your house remains vibrant and protected with less effort over time. Want to take your touch-up game to the next level? Try using a microfiber roller for seamless blending during repairs; it really pays off in achieving a flawless finish that blends perfectly with the existing paint. Need more guidance? Reach out through [our contact page](https://elitepainterpro.com/contact-us) and let us help you keep your home’s paintwork in top shape.
Lessons Only Years of Painting Have Taught Me
- One of the most surprising realizations was that patience truly is a virtue—rushing through priming or skipping steps almost always results in uneven finishes. Taking the extra time to sand, fill, and seal pays off in the end, giving you a much more professional look.
- I learned that understanding the specific characteristics of oak—its openness, texture, and grain patterns—allows you to tailor your approach. Ignorance of these features leads to frustration and disappointing results, but awareness transforms the process into a rewarding craft.
- Another lightbulb moment was discovering that high-quality tools and materials make a significant difference. Cheap brushes or primers might seem economical initially, but they often create more work down the line with streaks, bubbles, or uneven absorption. Investing wisely saves time and effort.
- Finally, I realized that the finish is only as good as the preparation. Surface cleaning, proper sanding, and primer application are non-negotiable steps—skipping them is like building on shaky ground, compromising durability and visual appeal.
Tools and Resources That Elevated My Work
- The expert house painting tips for 2025 provided invaluable strategies on surface preparation and finishing techniques that I now swear by. They helped me understand the nuances beyond just choosing the right paint.
- I trust the ultimate guide to house painting for comprehensive insights into prepping and applying paint on textured surfaces. It’s a resource I revisit before each project to refresh my approach.
- The top local painting strategies on [elitepainterpro.com](https://elitepainterpro.com/) are great for understanding how climate, surfaces, and material choices interact—something crucial when dealing with heavy grain oak.
- For tools, I recommend the high-quality local painting tools selection. A good brush, foam roller, and premium primer are game-changers, making application smoother and more consistent, ultimately saving time and frustration.
Your Next Step Toward Perfect Finishes Starts Today
Achieving a flawless heavy-grain oak finish isn’t just about technique—it’s about embracing the process and valuing preparation. When you respect the natural beauty and challenges of oak, your results will reflect that effort with a durable, stunning surface. Remember, every project is an opportunity to learn and improve—don’t be discouraged by initial setbacks. Whether you’re tackling furniture or door frames, the right approach makes all the difference. For more practical tips, consider exploring expert house painting advice for 2025. Go ahead—start your next project with confidence, knowing that mastery comes one brushstroke at a time!